
I half jokingly told the team that I wanted to write an Emily Bowser-style post. Now, that’s a BIG statement given how incredibly entertaining and helpful her posts are. They take you on a long, winding journey. You will laugh, you may cry, but without a doubt, you will have a wonderful time. So maybe consider this a kind of Bunge adaptation of sorts? I mainly stated this to them because my lord has this living room design been a journey that started longer ago than I’d like to admit. Did my brother get married and have a baby who just turned one in less time than it took to finish my whole living room? I can neither confirm nor deny (I did technically reveal half of it here:)). But what I can confirm is that there is a lot to cover, that I’m so proud of the final result, and of course, I feel so unbelievably lucky that this is my home. As a fun warning, there probably should have been an intro post, given how long this one turned out to be. But if I’m following in Emily Bowser’s footsteps, the longer the post, the better. So grab your favorite beverage, get seated in a cozy spot, and come with me on my living room design tale. This is why we read blogs, right? For the juicy details? I realllly hope so, ha. Thank you for your patience. I know this reveal took SO LONG, and I hope you think it was at least a little worth it:)
And no offense taken if you are like, “Jess, love ya, I’m scrolling to the pretty photos first.”
Let’s Start At The Beginning
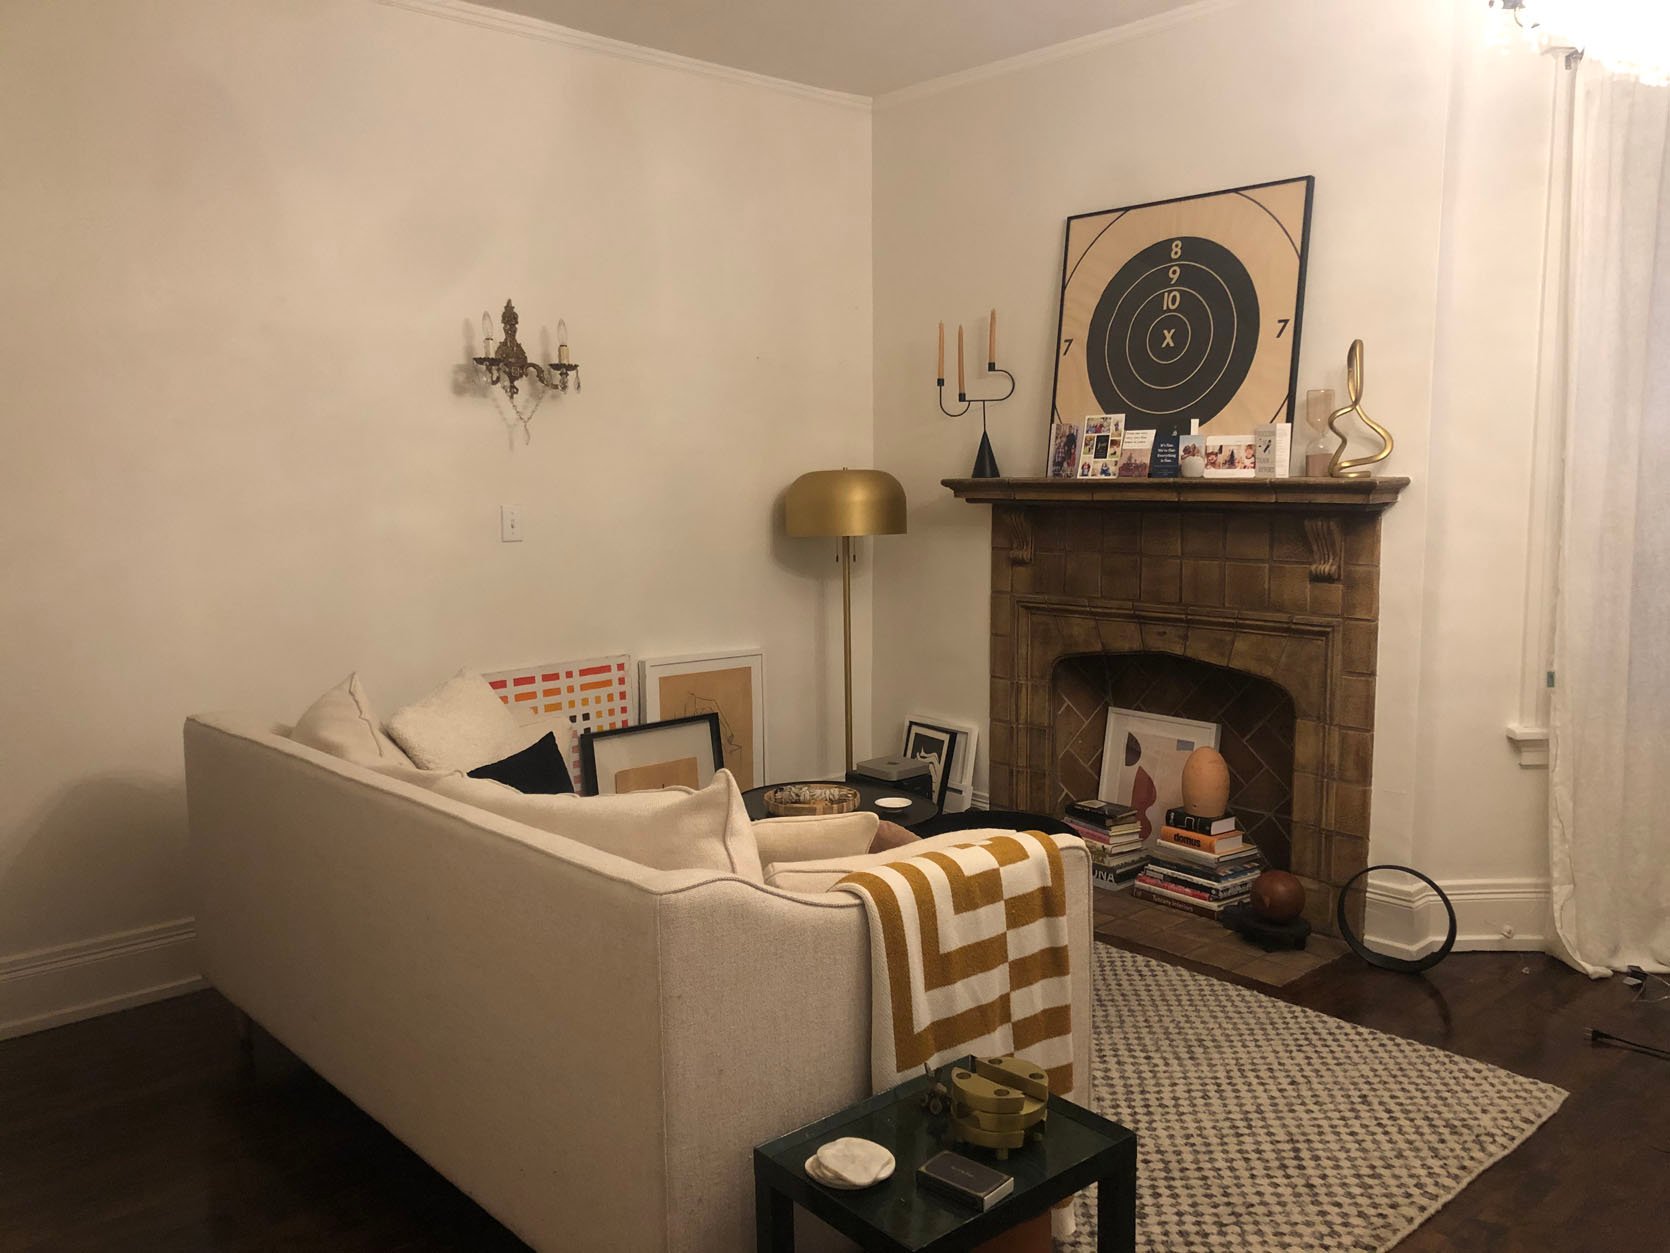
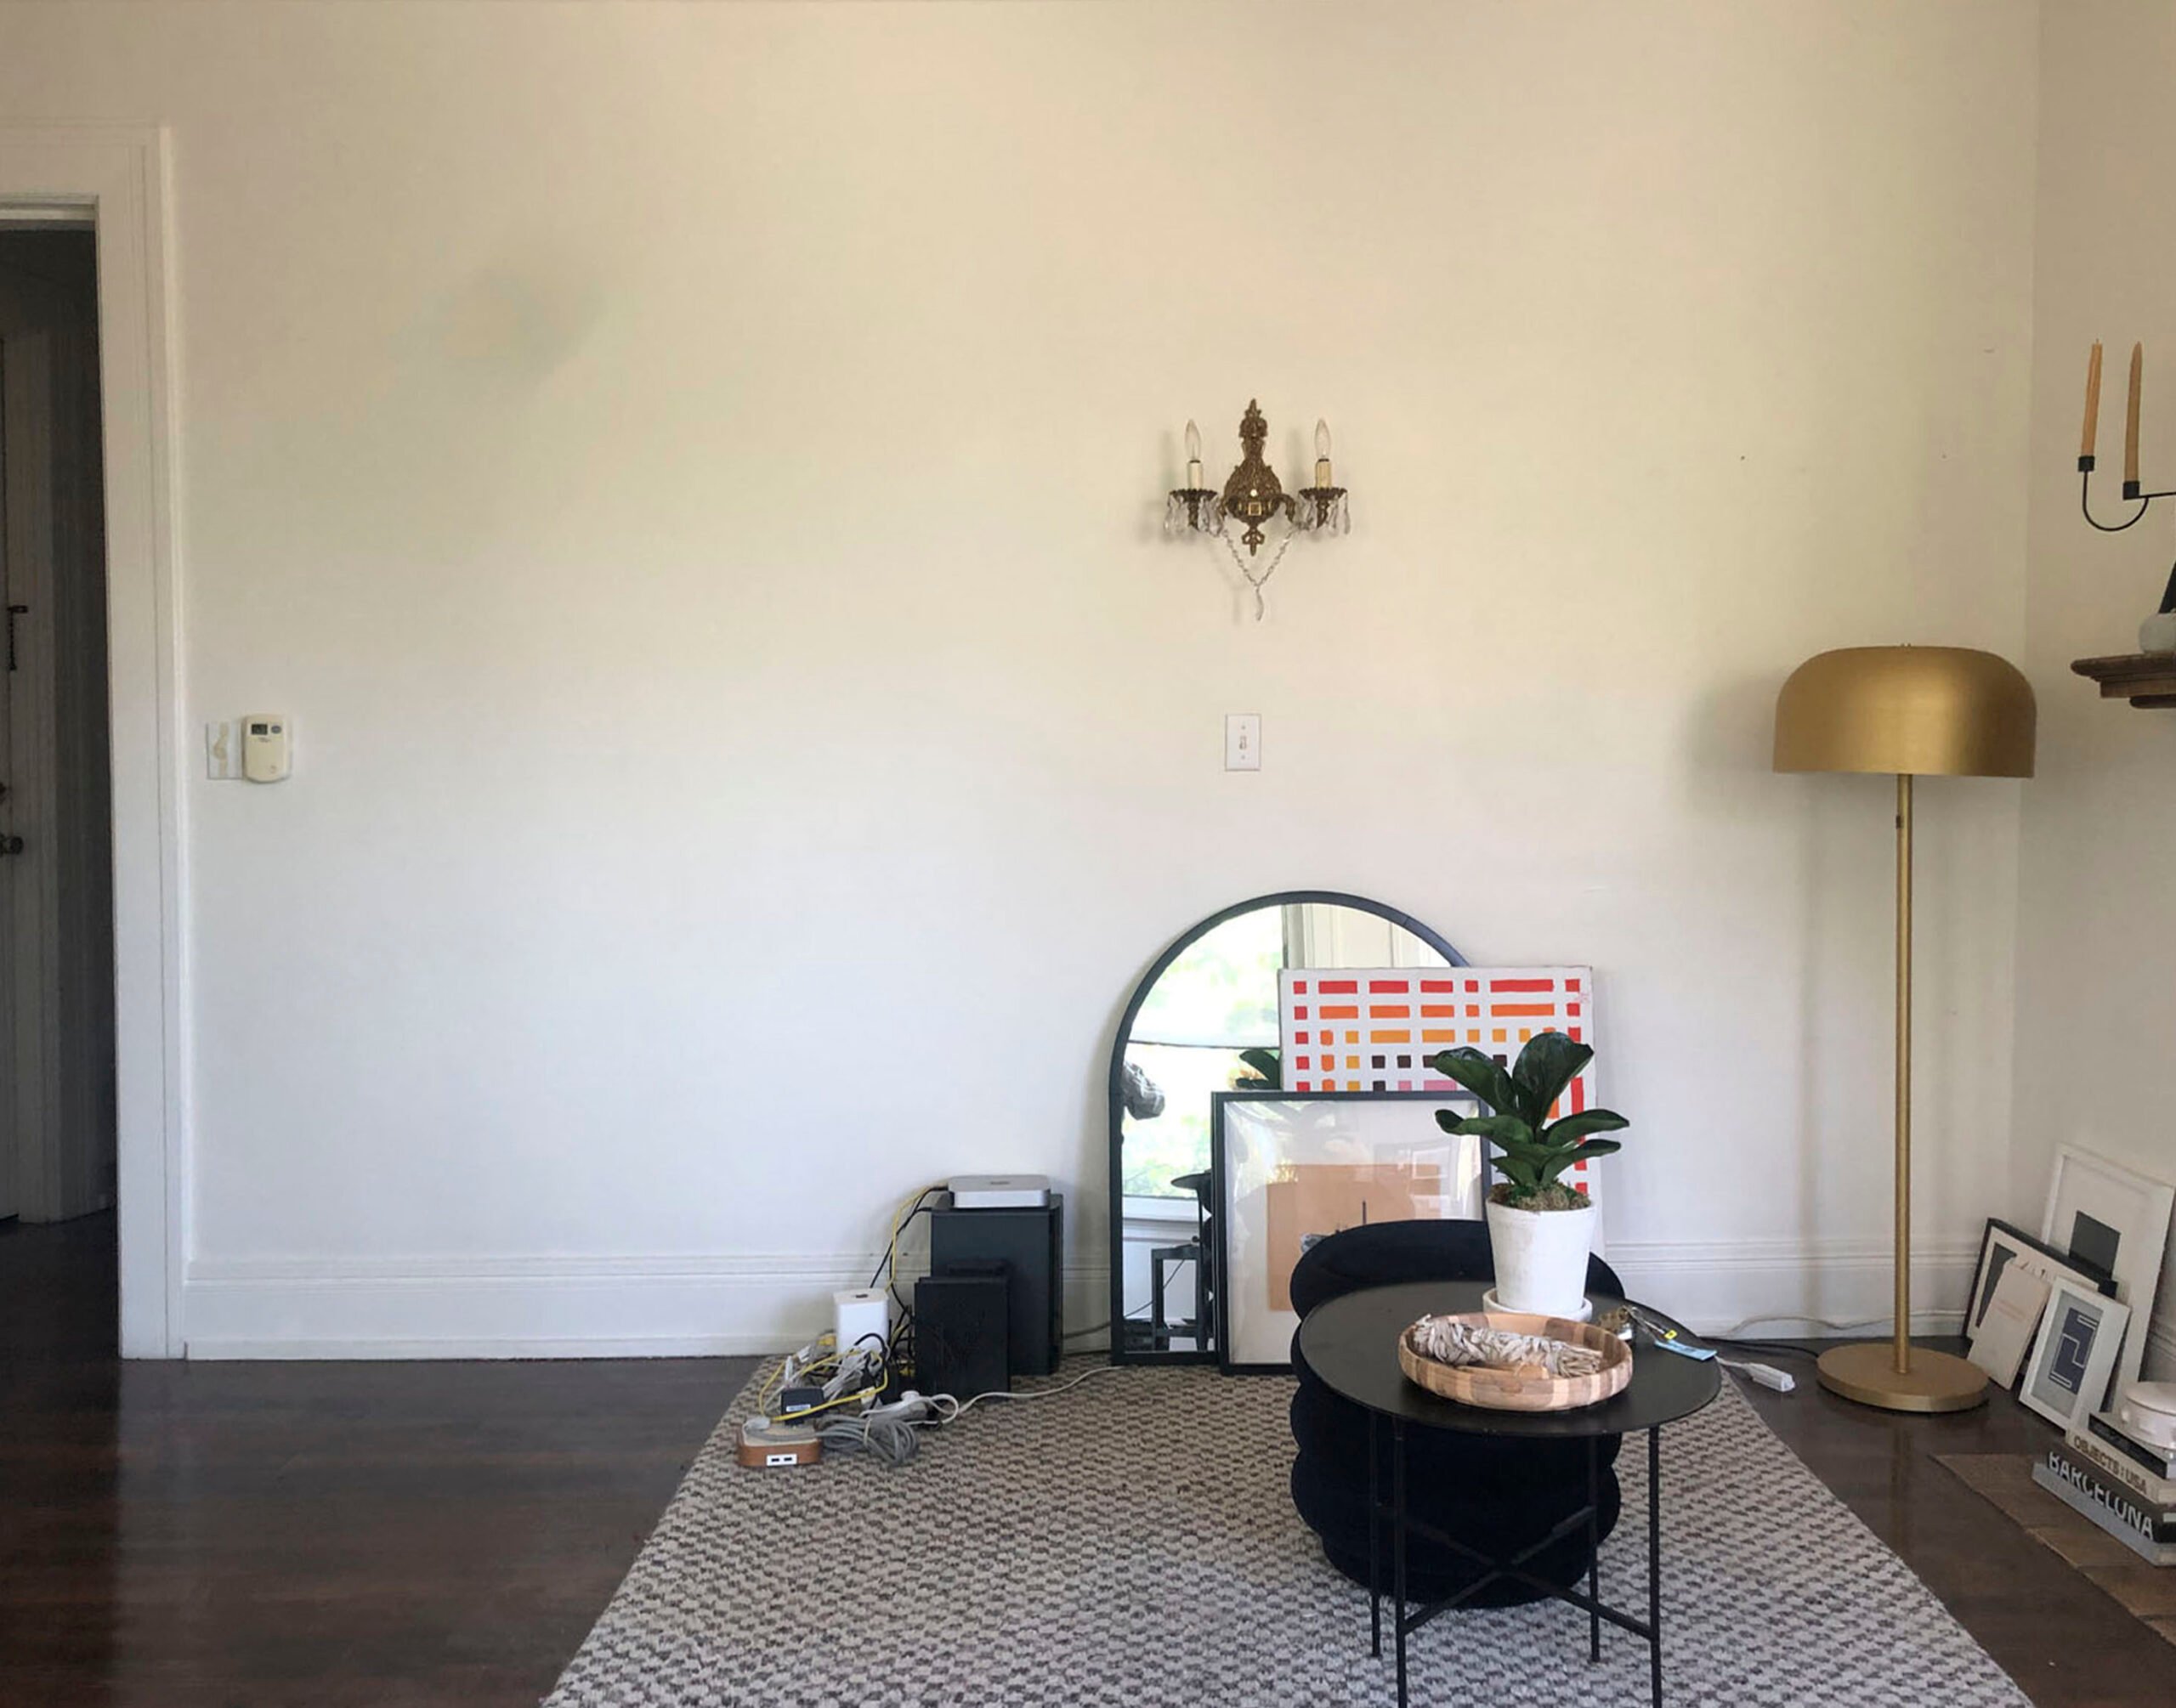
This is more or less where I started when I first moved in. Everything here is from my last apartment, which I used a good amount of in the final design. I tried the furniture layout a few different ways, which I talk about here in this post, but ultimately this one worked the best and made me feel like I had a “living room area” and an “office area” despite them being in the same room.
The Gray Brown Fireplace Drama
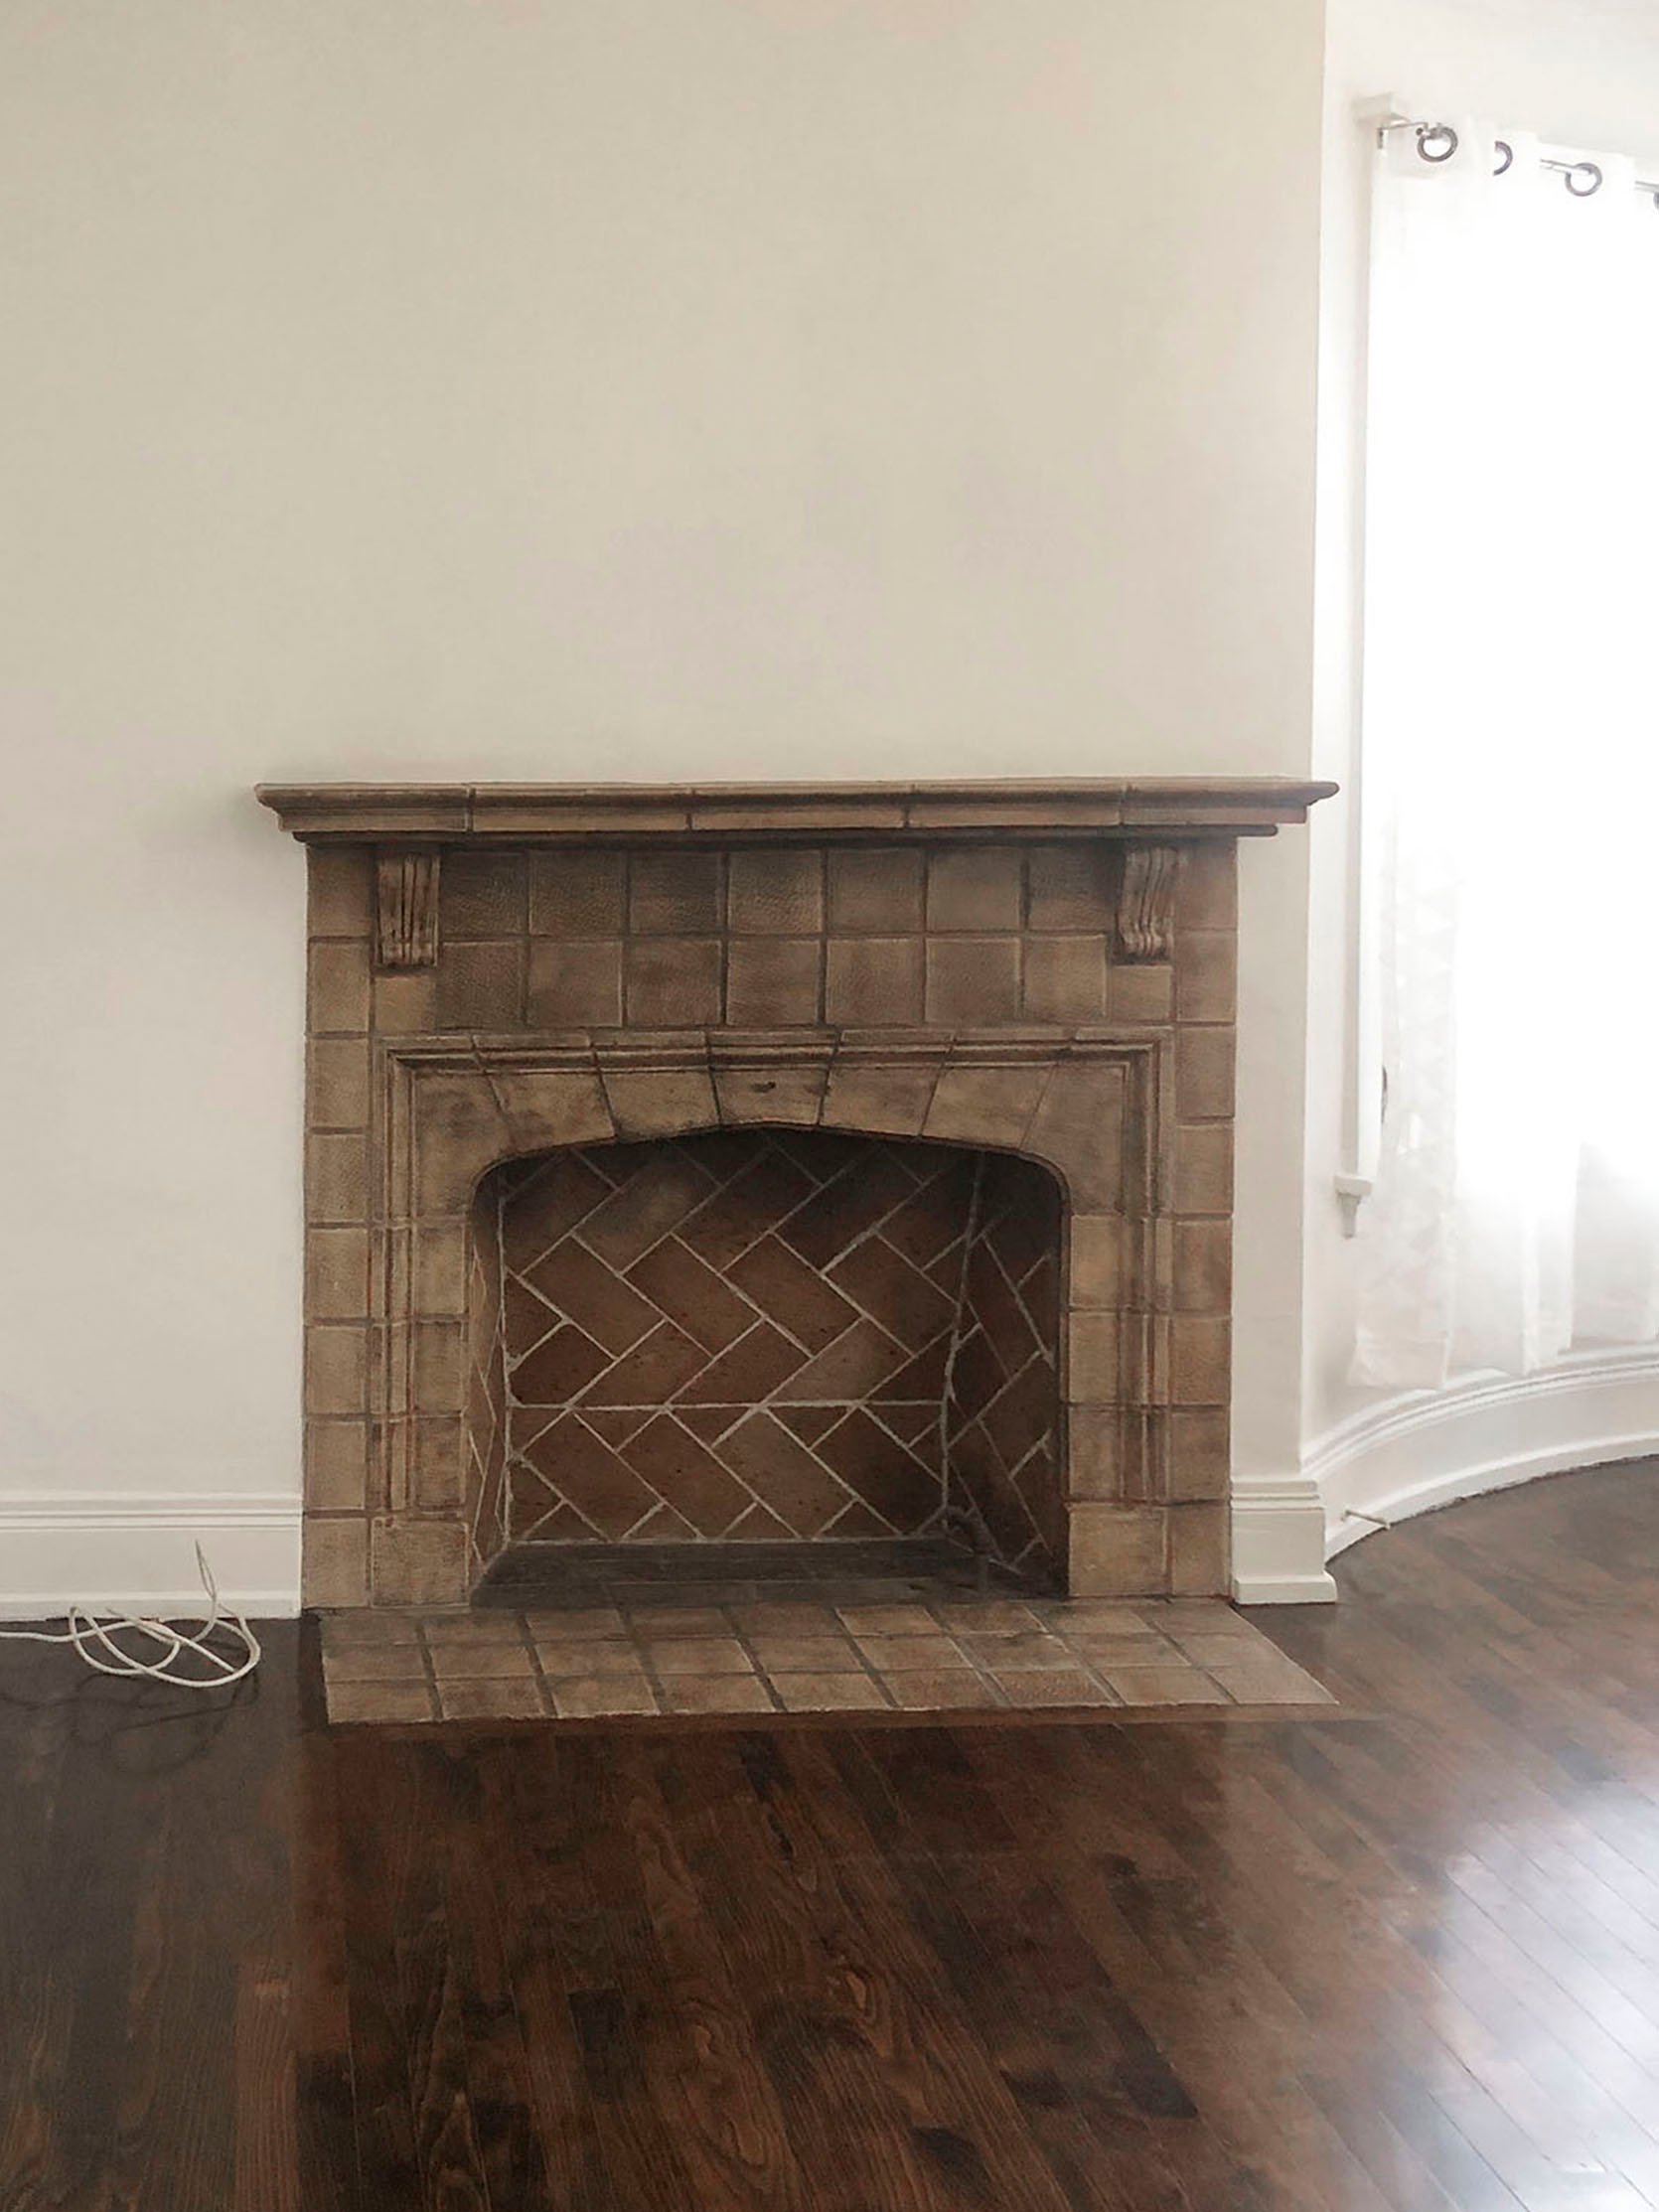
My first major issue, or so I thought, was the fireplace. When I toured the apartment before I moved in, I was beyond excited about this fireplace, working or not (it doesn’t work, FYI). But then I moved in, plopped that light cream colored sofa down, and design mental chaos took over my brain. “This looks bad. I have to make a DIY cover!” I said to myself and anyone who would listen. All of a sudden, the gray undertone of the tiles haunted my dreams, the red(?) spots on the grout mocked me every time I looked their way. Naturally, I called my dad and asked if he could help build something. And because he’s the best, he said, “Draw it up and I’ll see what I can do.”

Then, on one of his trips down (he lives in Northern California), he brought these front pieces to see how he needed to proceed. Well, after a few minutes, I got the “Jess, it’s not going to happen.” I immediately blamed his lack of imagination. It was at that moment (and after about 20 minutes of telling him he was wrong) that I conceded to putting a pin in that idea for a least a little while…and luckily I did. Also, that hairstyle lasted a liiiittle longer than it probably should have. I think he really just loved showing off that he could still grow long, luscious locks.
My Sofa
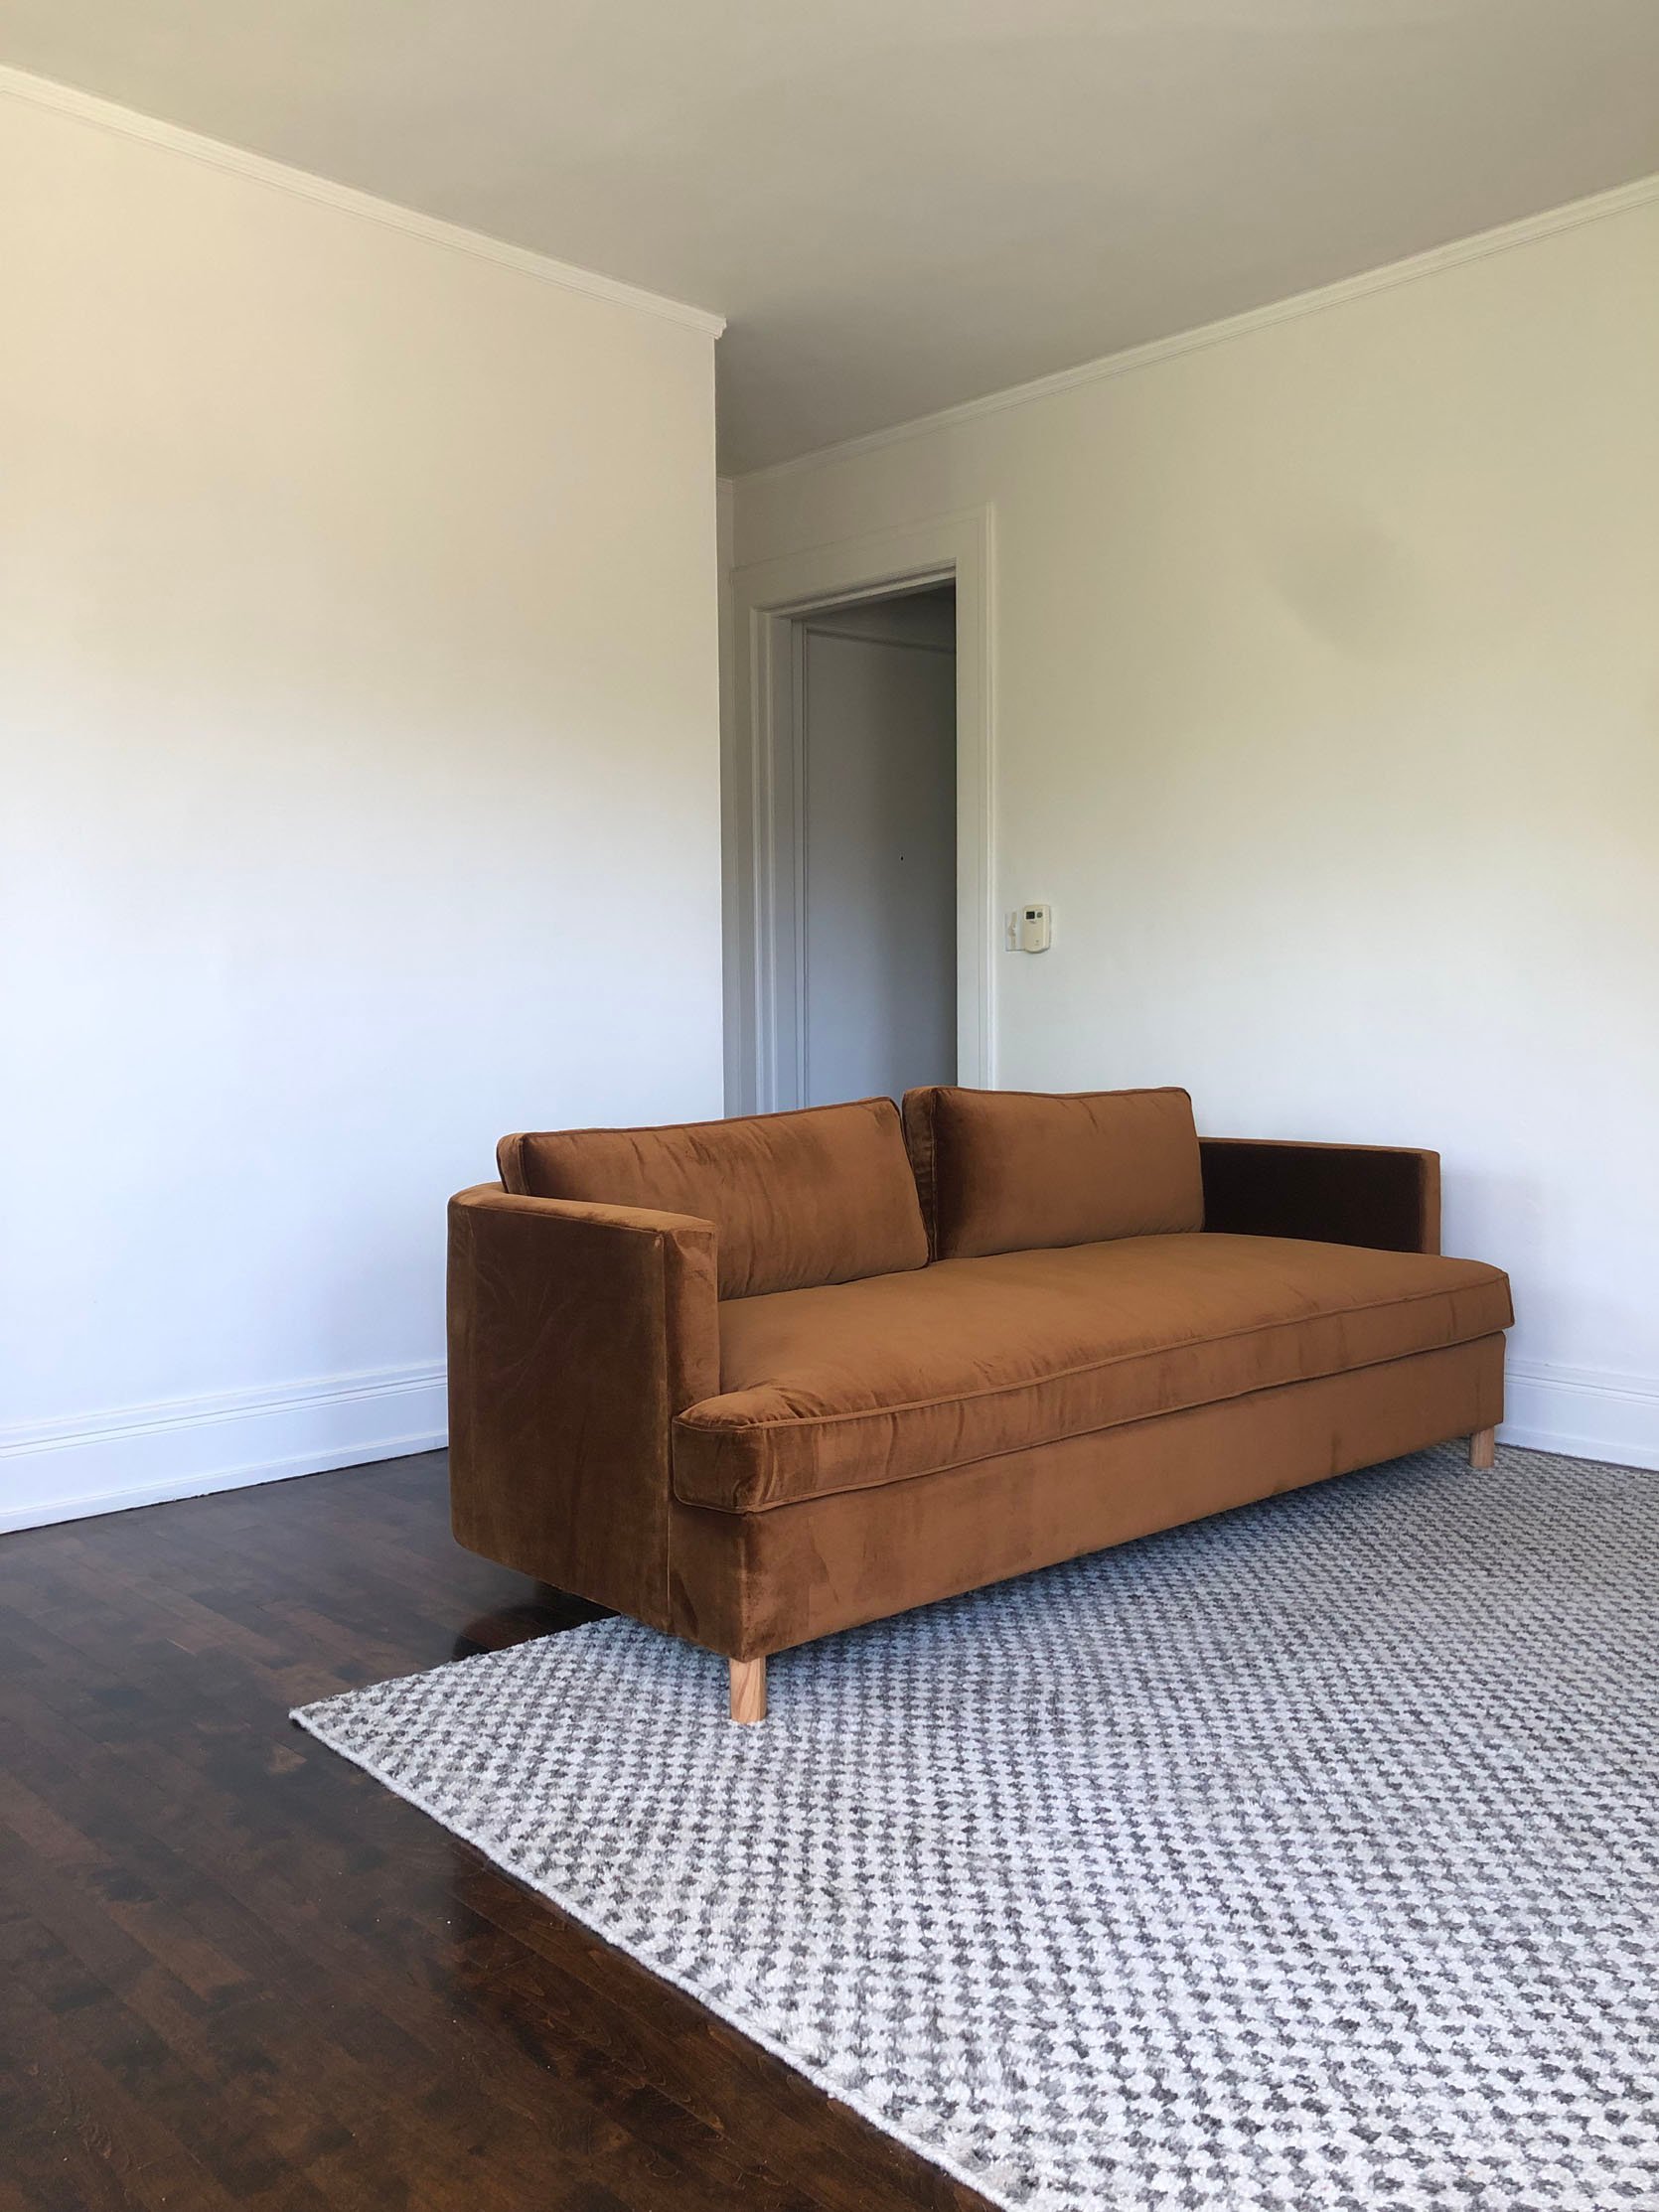
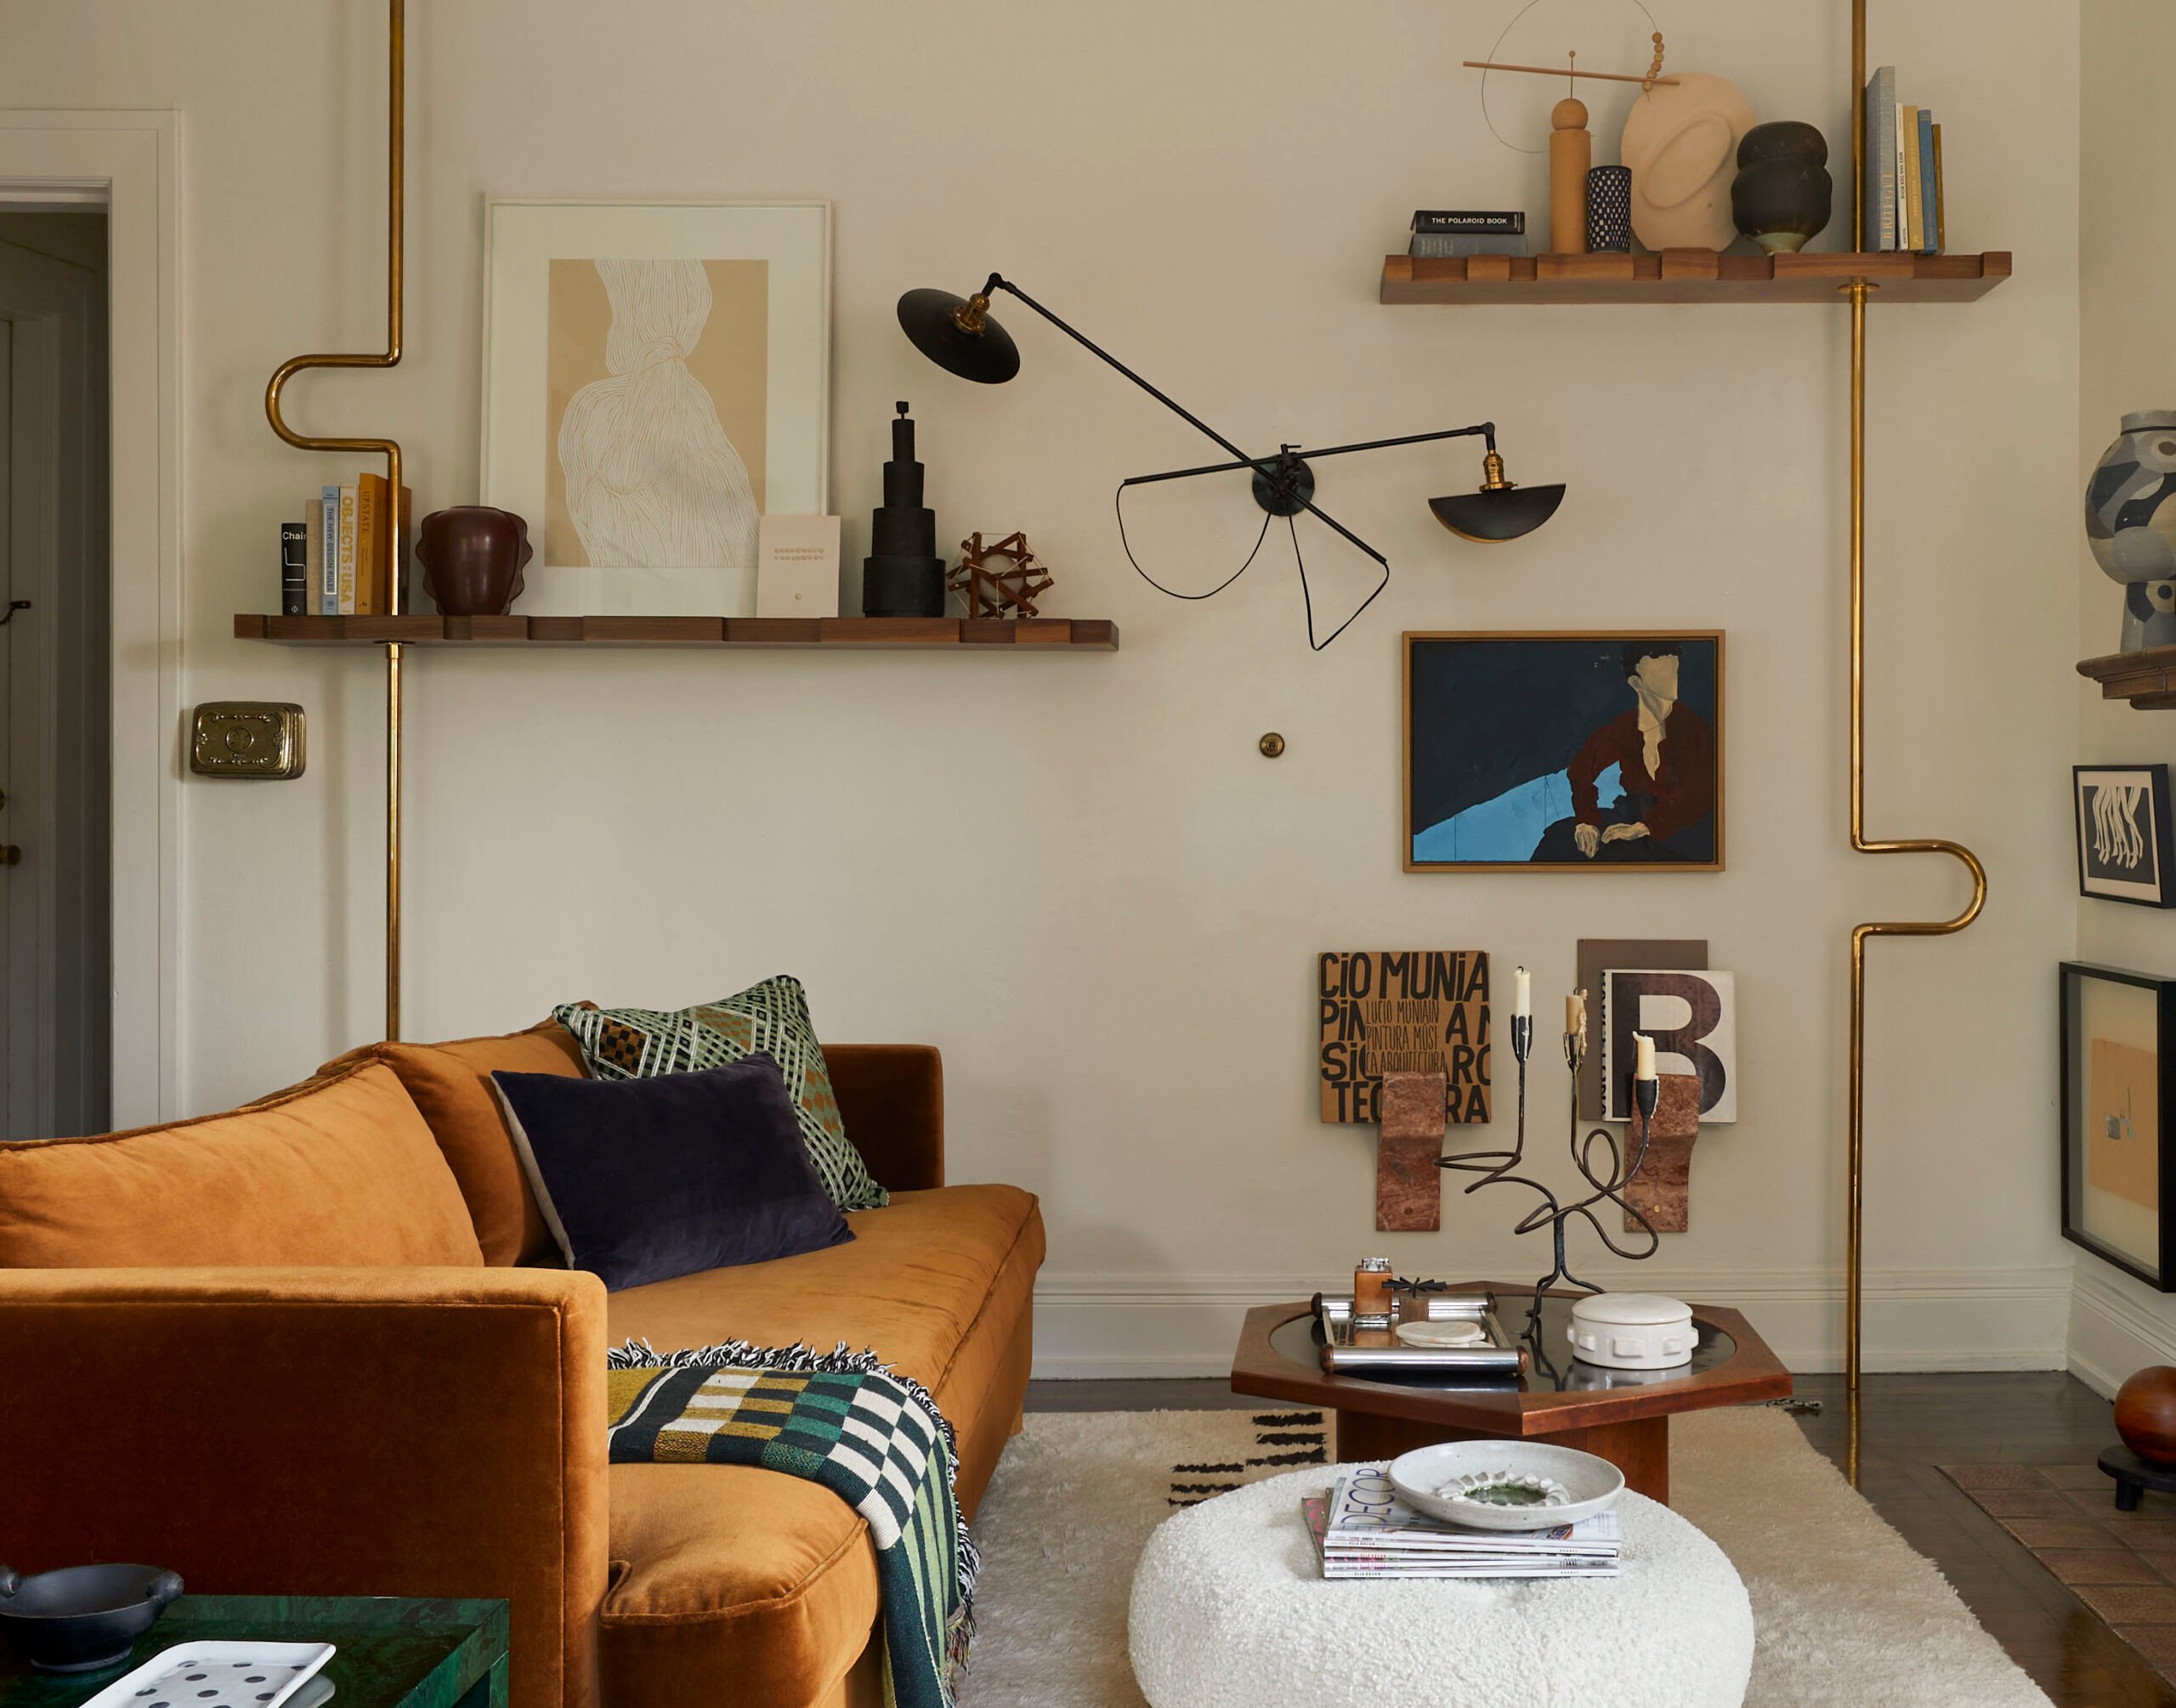
Then came the new sofa. For those of you who might not know the entire EHD alum team, this sofa is part of a collaboration with Lulu and Georgia with one of Emily’s first employees, Ginny Macdonald. She’s an incredible designer, so it was no surprise that her collection was and is so special. I only got to work with Ginny for about a year before Em made the decision to close the client side of the business, and she then started her own firm. Needless to say, she’s as fun and kind as she is talented, so getting to have a sofa of hers was a dream. So aside from it having an extra special meaning, being beautiful, and very comfortable, that delicious cognac velvet totally balanced the room visually with the brown fireplace. I don’t think I had quite experienced that kind of immediate transformation before. All of a sudden, I didn’t feel the need to “figure something out” with the fireplace.
So Many Rugs
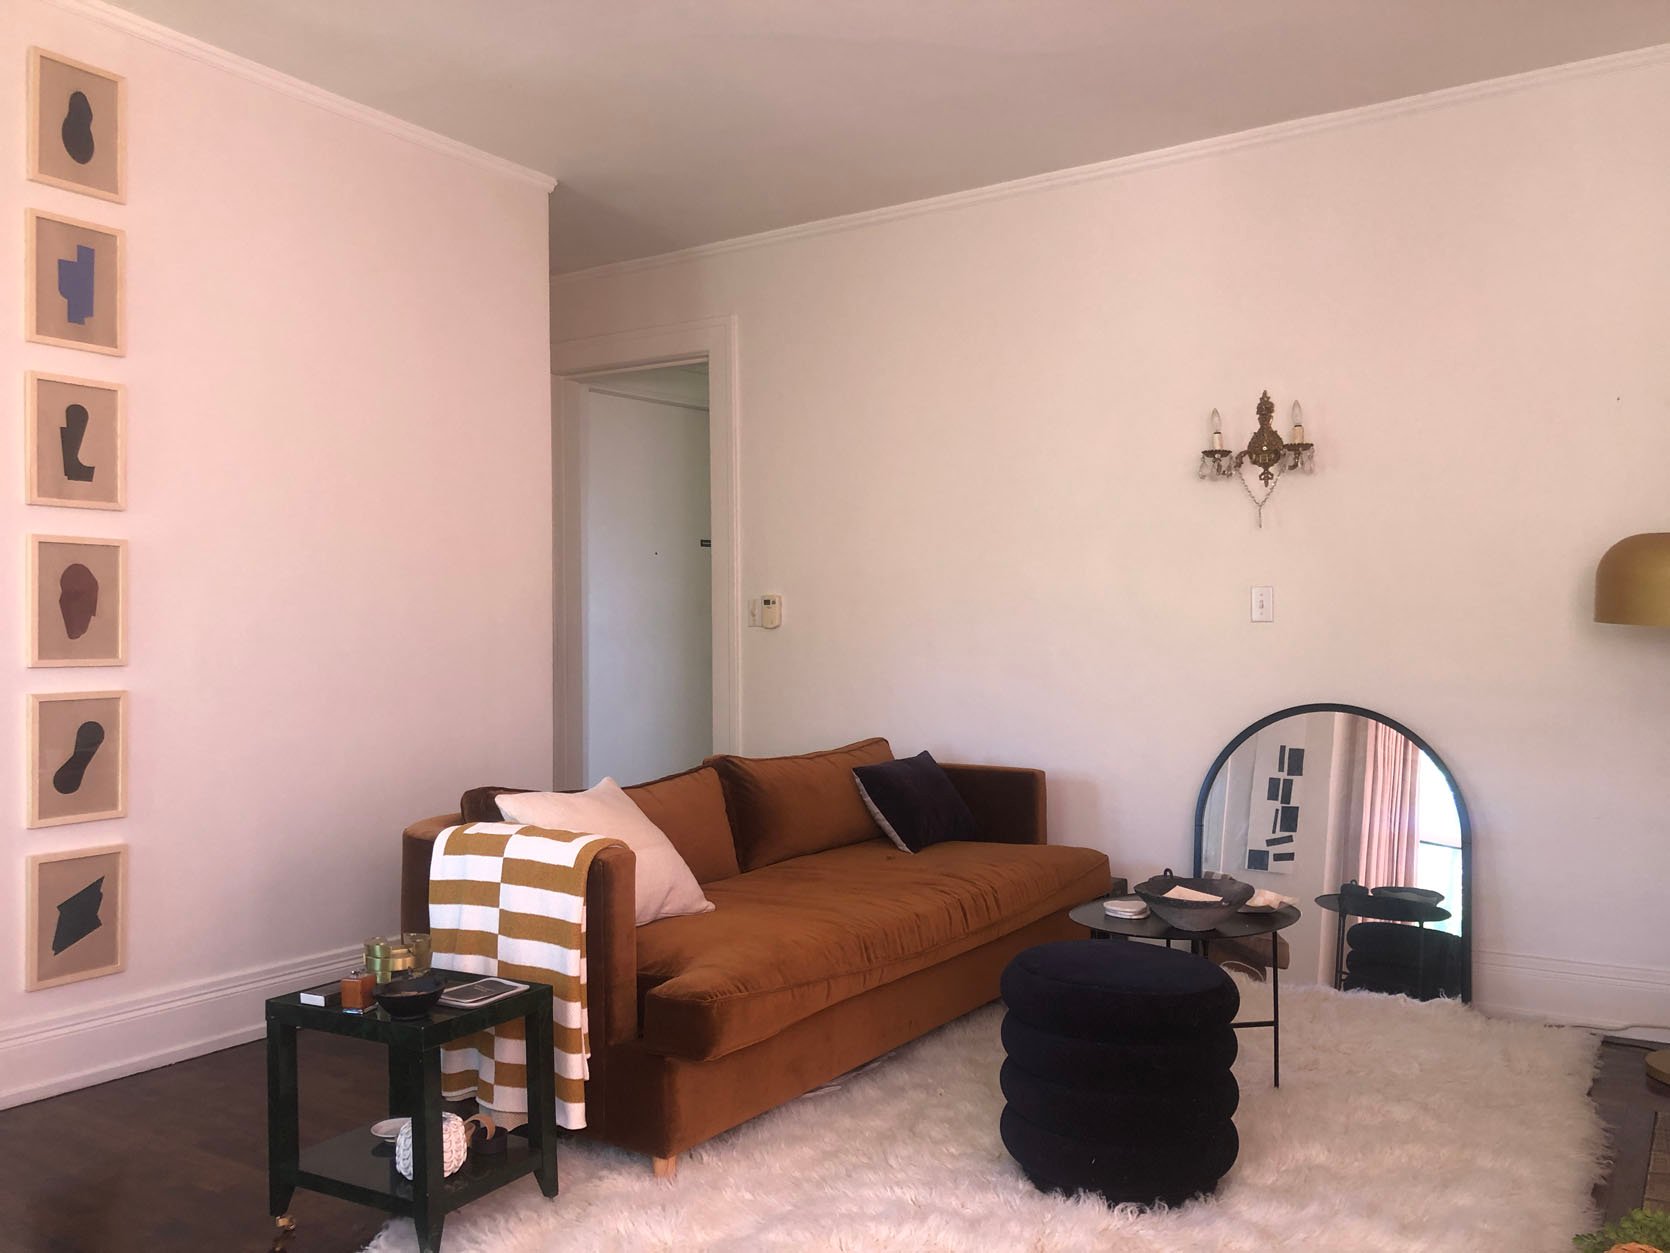
Another “saga” was the rug. I LOVE my grey checkered Annie Selke one and still have it (obviously!), but in this 100+ year old home, it didn’t evoke the feeling I wanted it to. It was a little too “refined.” I wanted a style contrast with a more organic, cozy, textured vibe, which is how I ended up ordering this rug above based on seeing a similar one in a room I loved on Instagram. It’s a Greek Long Hair Flokati rug that was a great price (under $400 at the time for a 6×9) and was really pretty, but also not right. I tried it in my bedroom too, but no dice. It now lives with the checkered rug in my storage unit (because I carelessly didn’t return it in time), waiting for its day in the sun.
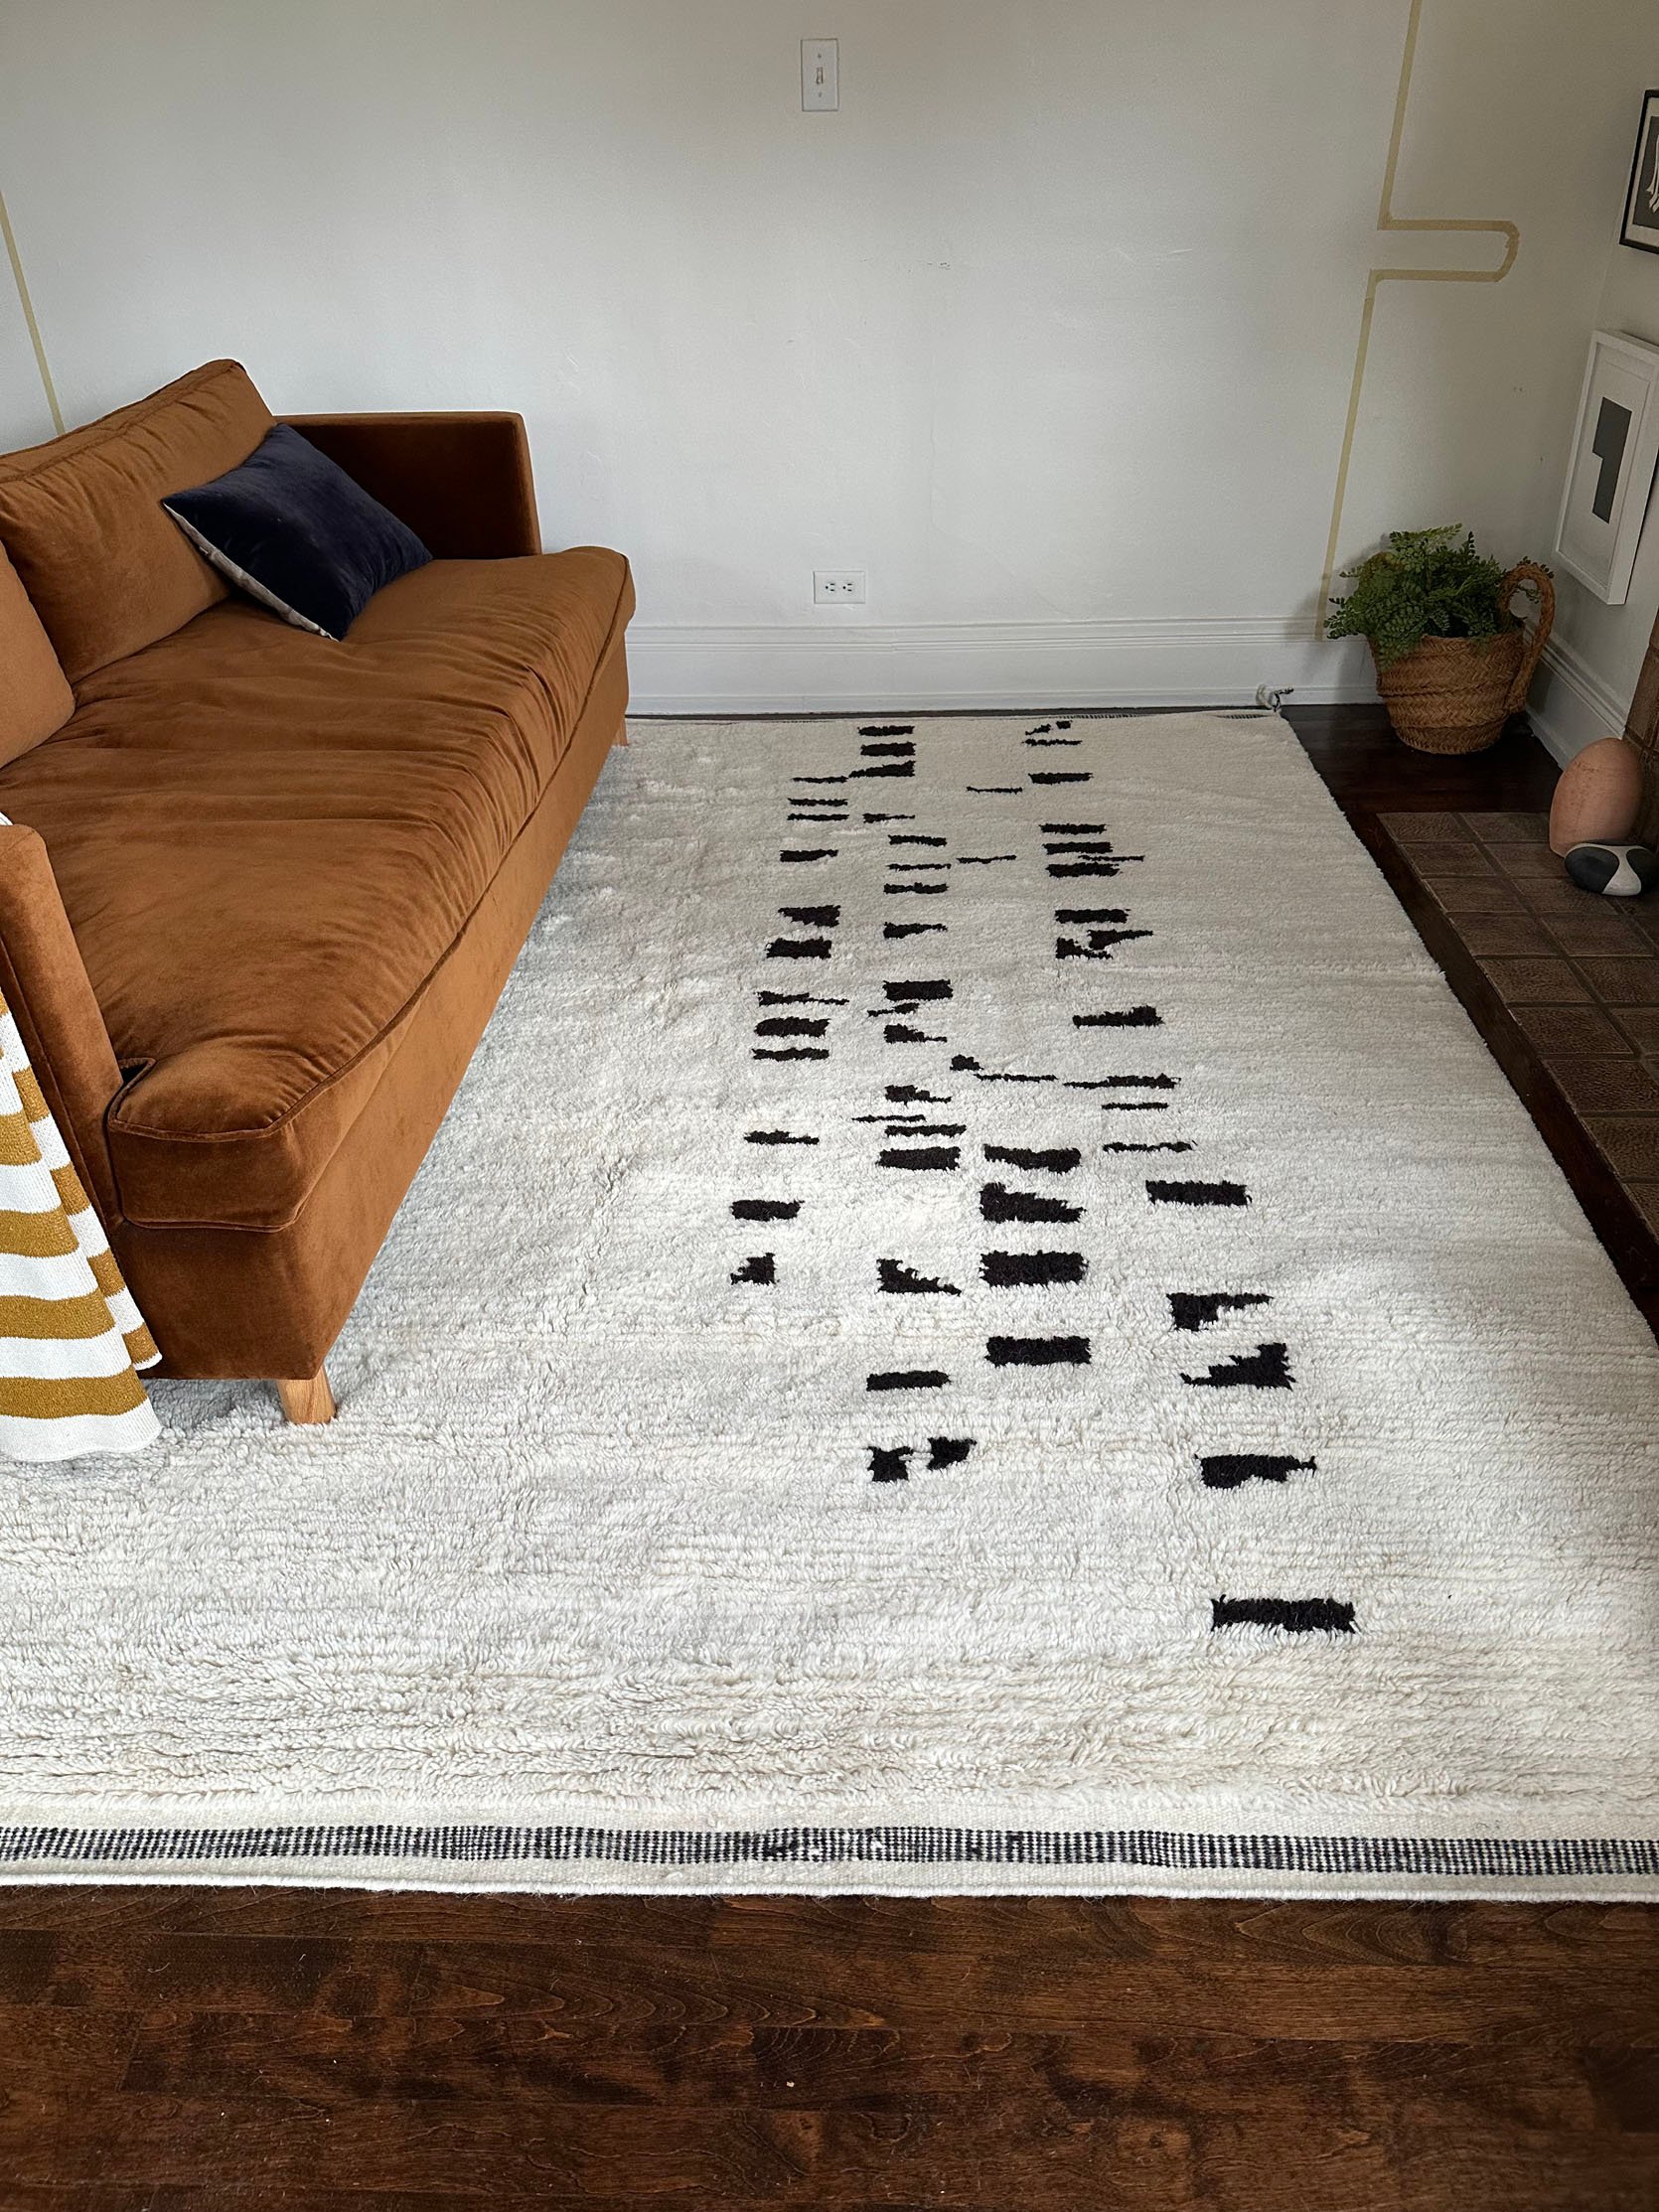
But then I stumbled upon this amazing rug from Revival Rugs, which was generously gifted to me, and I was and am still blown away. The quality is so good, it’s SO soft, looks expensive, and at the time, I believe it was under $600. I know that everyone has a different budget and one person’s “affordable” is another’s “not affordable,” but let me tell you that, for the quality you get, these rugs could be much more expensive. My cousin has them all over her house (like in here), and they are all just as great as this one.
Then came the idea for the main wall…
My Dream Shelves
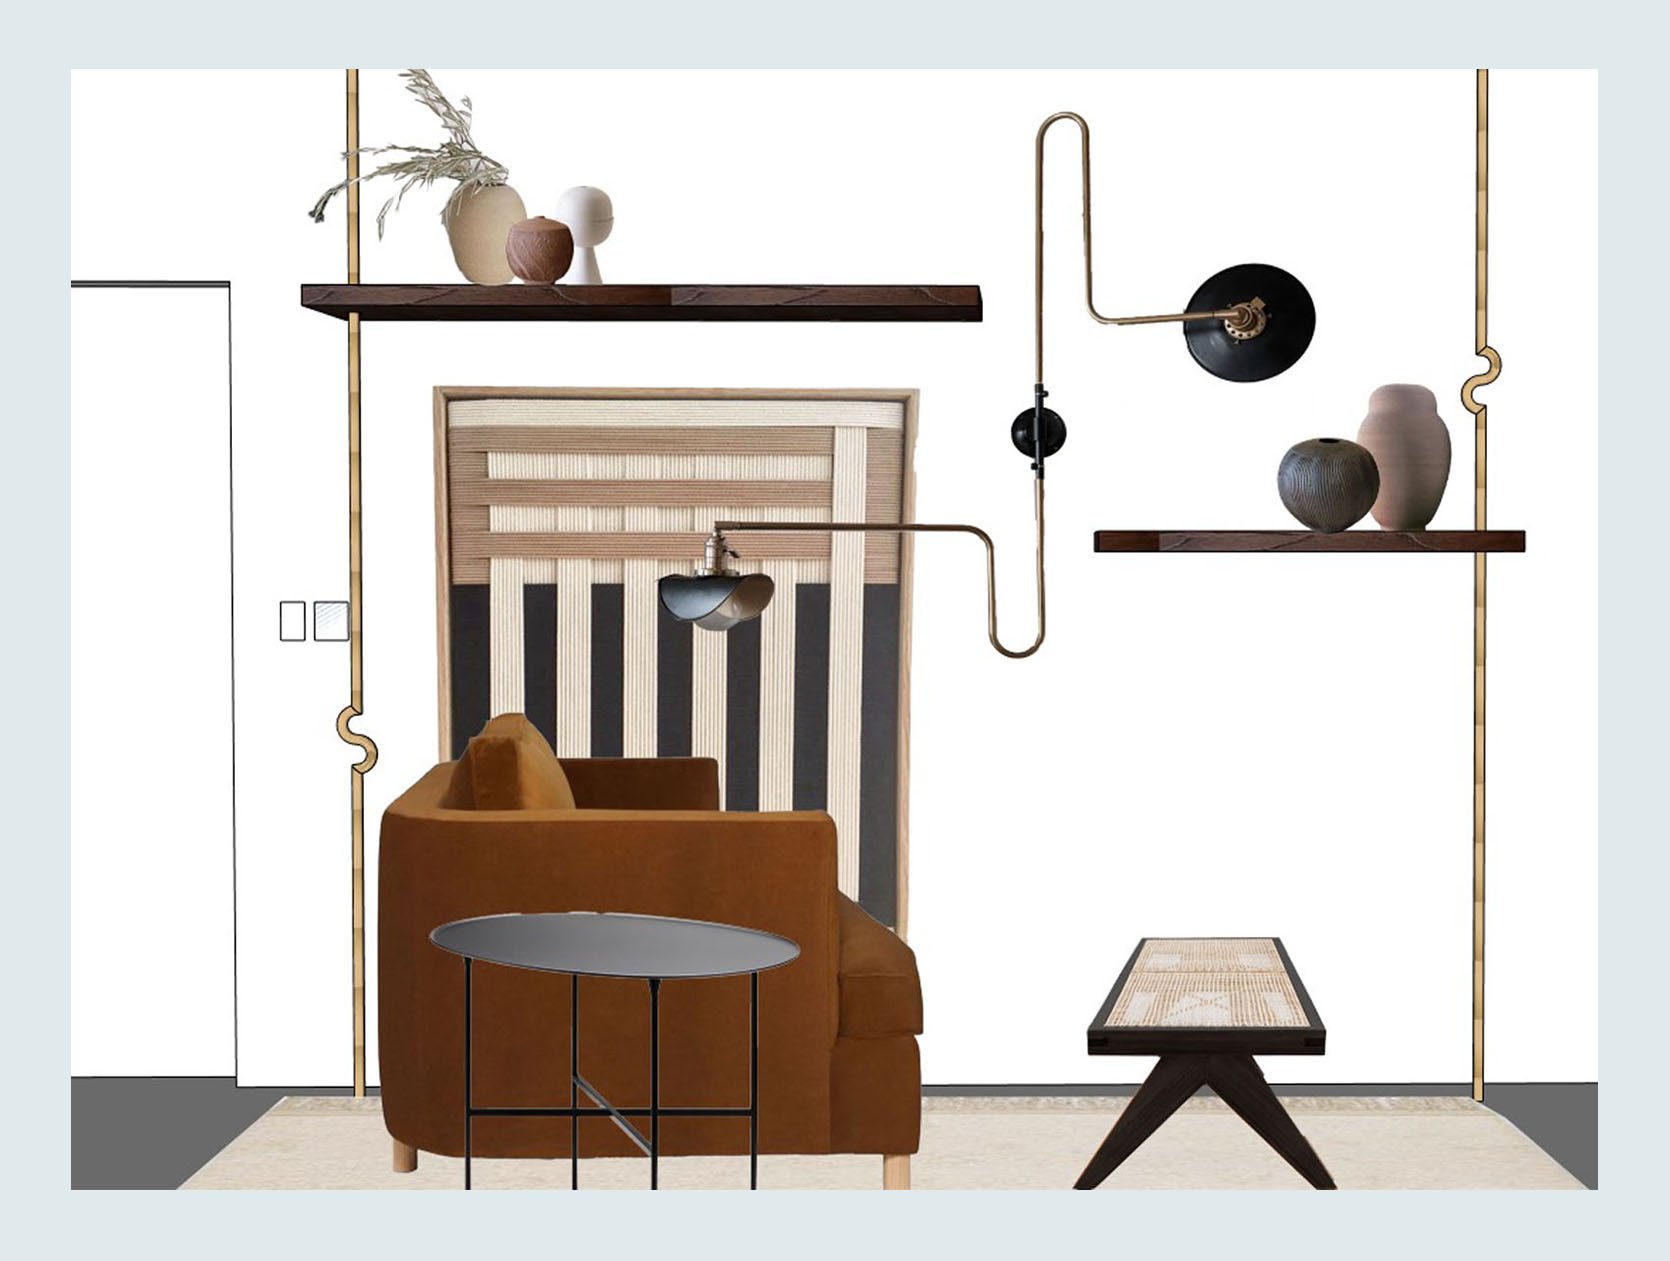
Of course, I thought of maybe doing a gallery wall, but since that was the main feature of my last living room, I wanted to do something different. My next thought was shelves. I looked at some vintage-looking wall-mounted readymade units, but none of them felt right. Now, I knew I wanted an architectural sconce (replacing the one that came with the apartment). So it was then that I thought of doing two asymmetrical shelves with floor-to-ceiling brass bars. There was another detail I was kinda obsessed with, and of course, it was never going to be a copy, because that’s stealing and wrong, but I’d had Flack Studio’s curved utensil bar on my mind since the first time I saw it in Troye Sivan’s AD tour. I wanted/was deserapte to do some kind of curve in the bars. The wonderful and talented Julie Rose was at my place for dinner when I told her my ideas, she gave me some great feedback, and then, without me even asking, made that render above! Naturally, it turned out a bit different in the final design, but this was so helpful to get the initial idea visualized. Thank you, Julie, for always being the best design buddy!!
You might be thinking, well, your sweet little ideas are great and all, but how and WHO is going to make this custom shelving piece for you?? Enter BuildLane. I reached out to see if they might be interested, and they said yes! I thank the universe every day that they did. While their bread and butter are upholstered furniture and case goods, they can do anything, and that’s what they did with this piece. They only work with designers and firms, so if you fall into that category or know someone who does, make sure they know about them. The process was so streamlined, the communication was great, and you will see in a minute how impeccable their work is. I also have a very important and special piece in my bedroom from them, too, so I really do stand by their work. Plus, I did get an LA factory tour, which was like being at Disneyland for me, and got to see even more of what they do. So impressed.
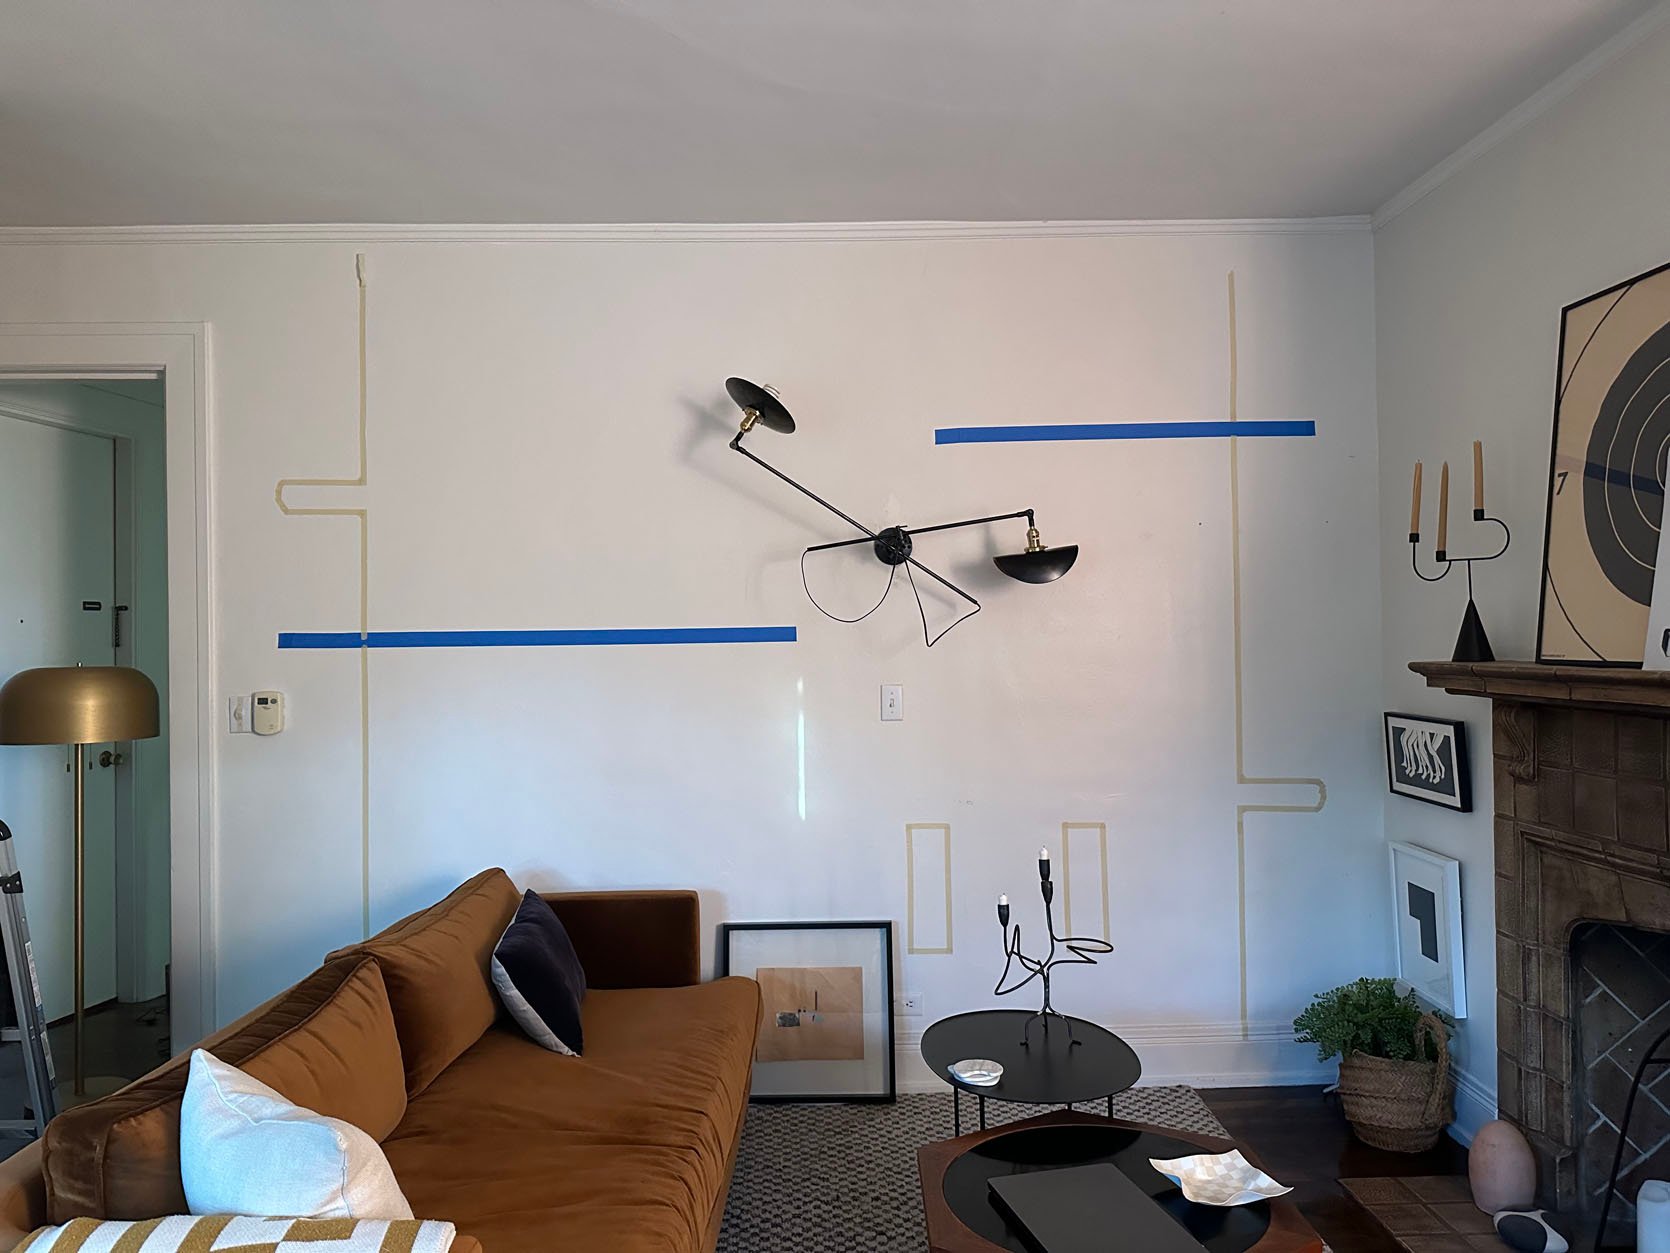
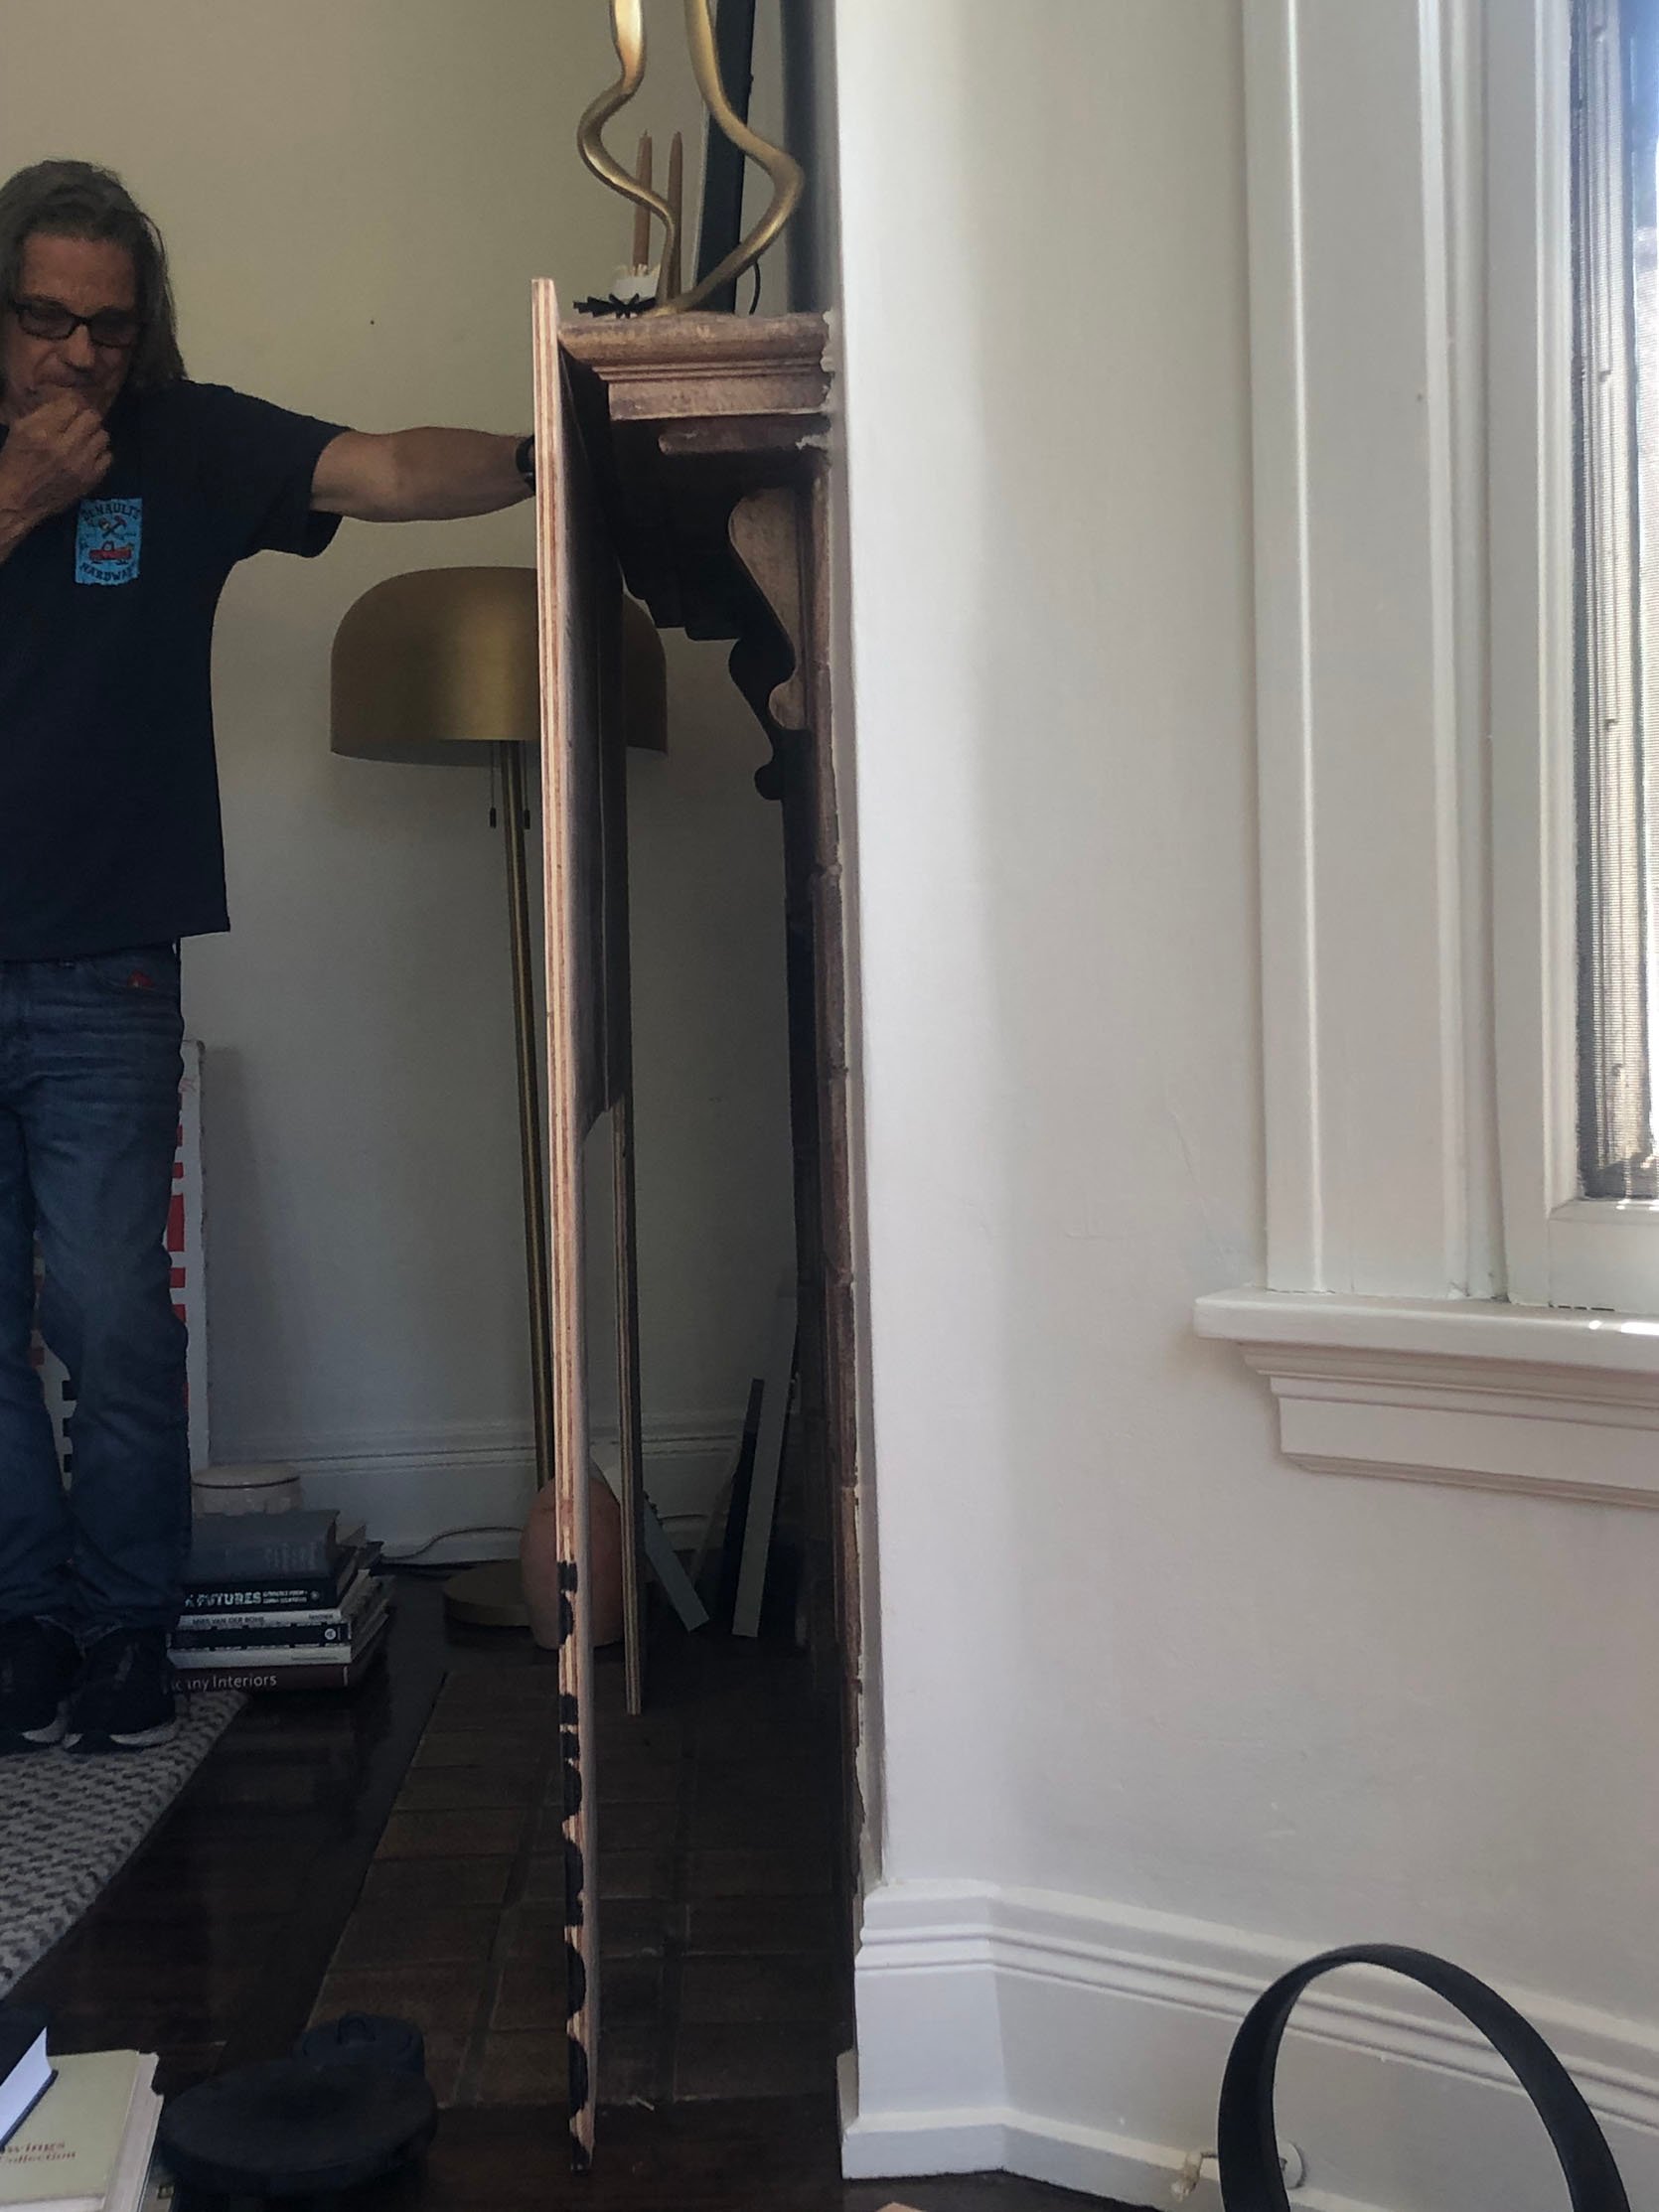
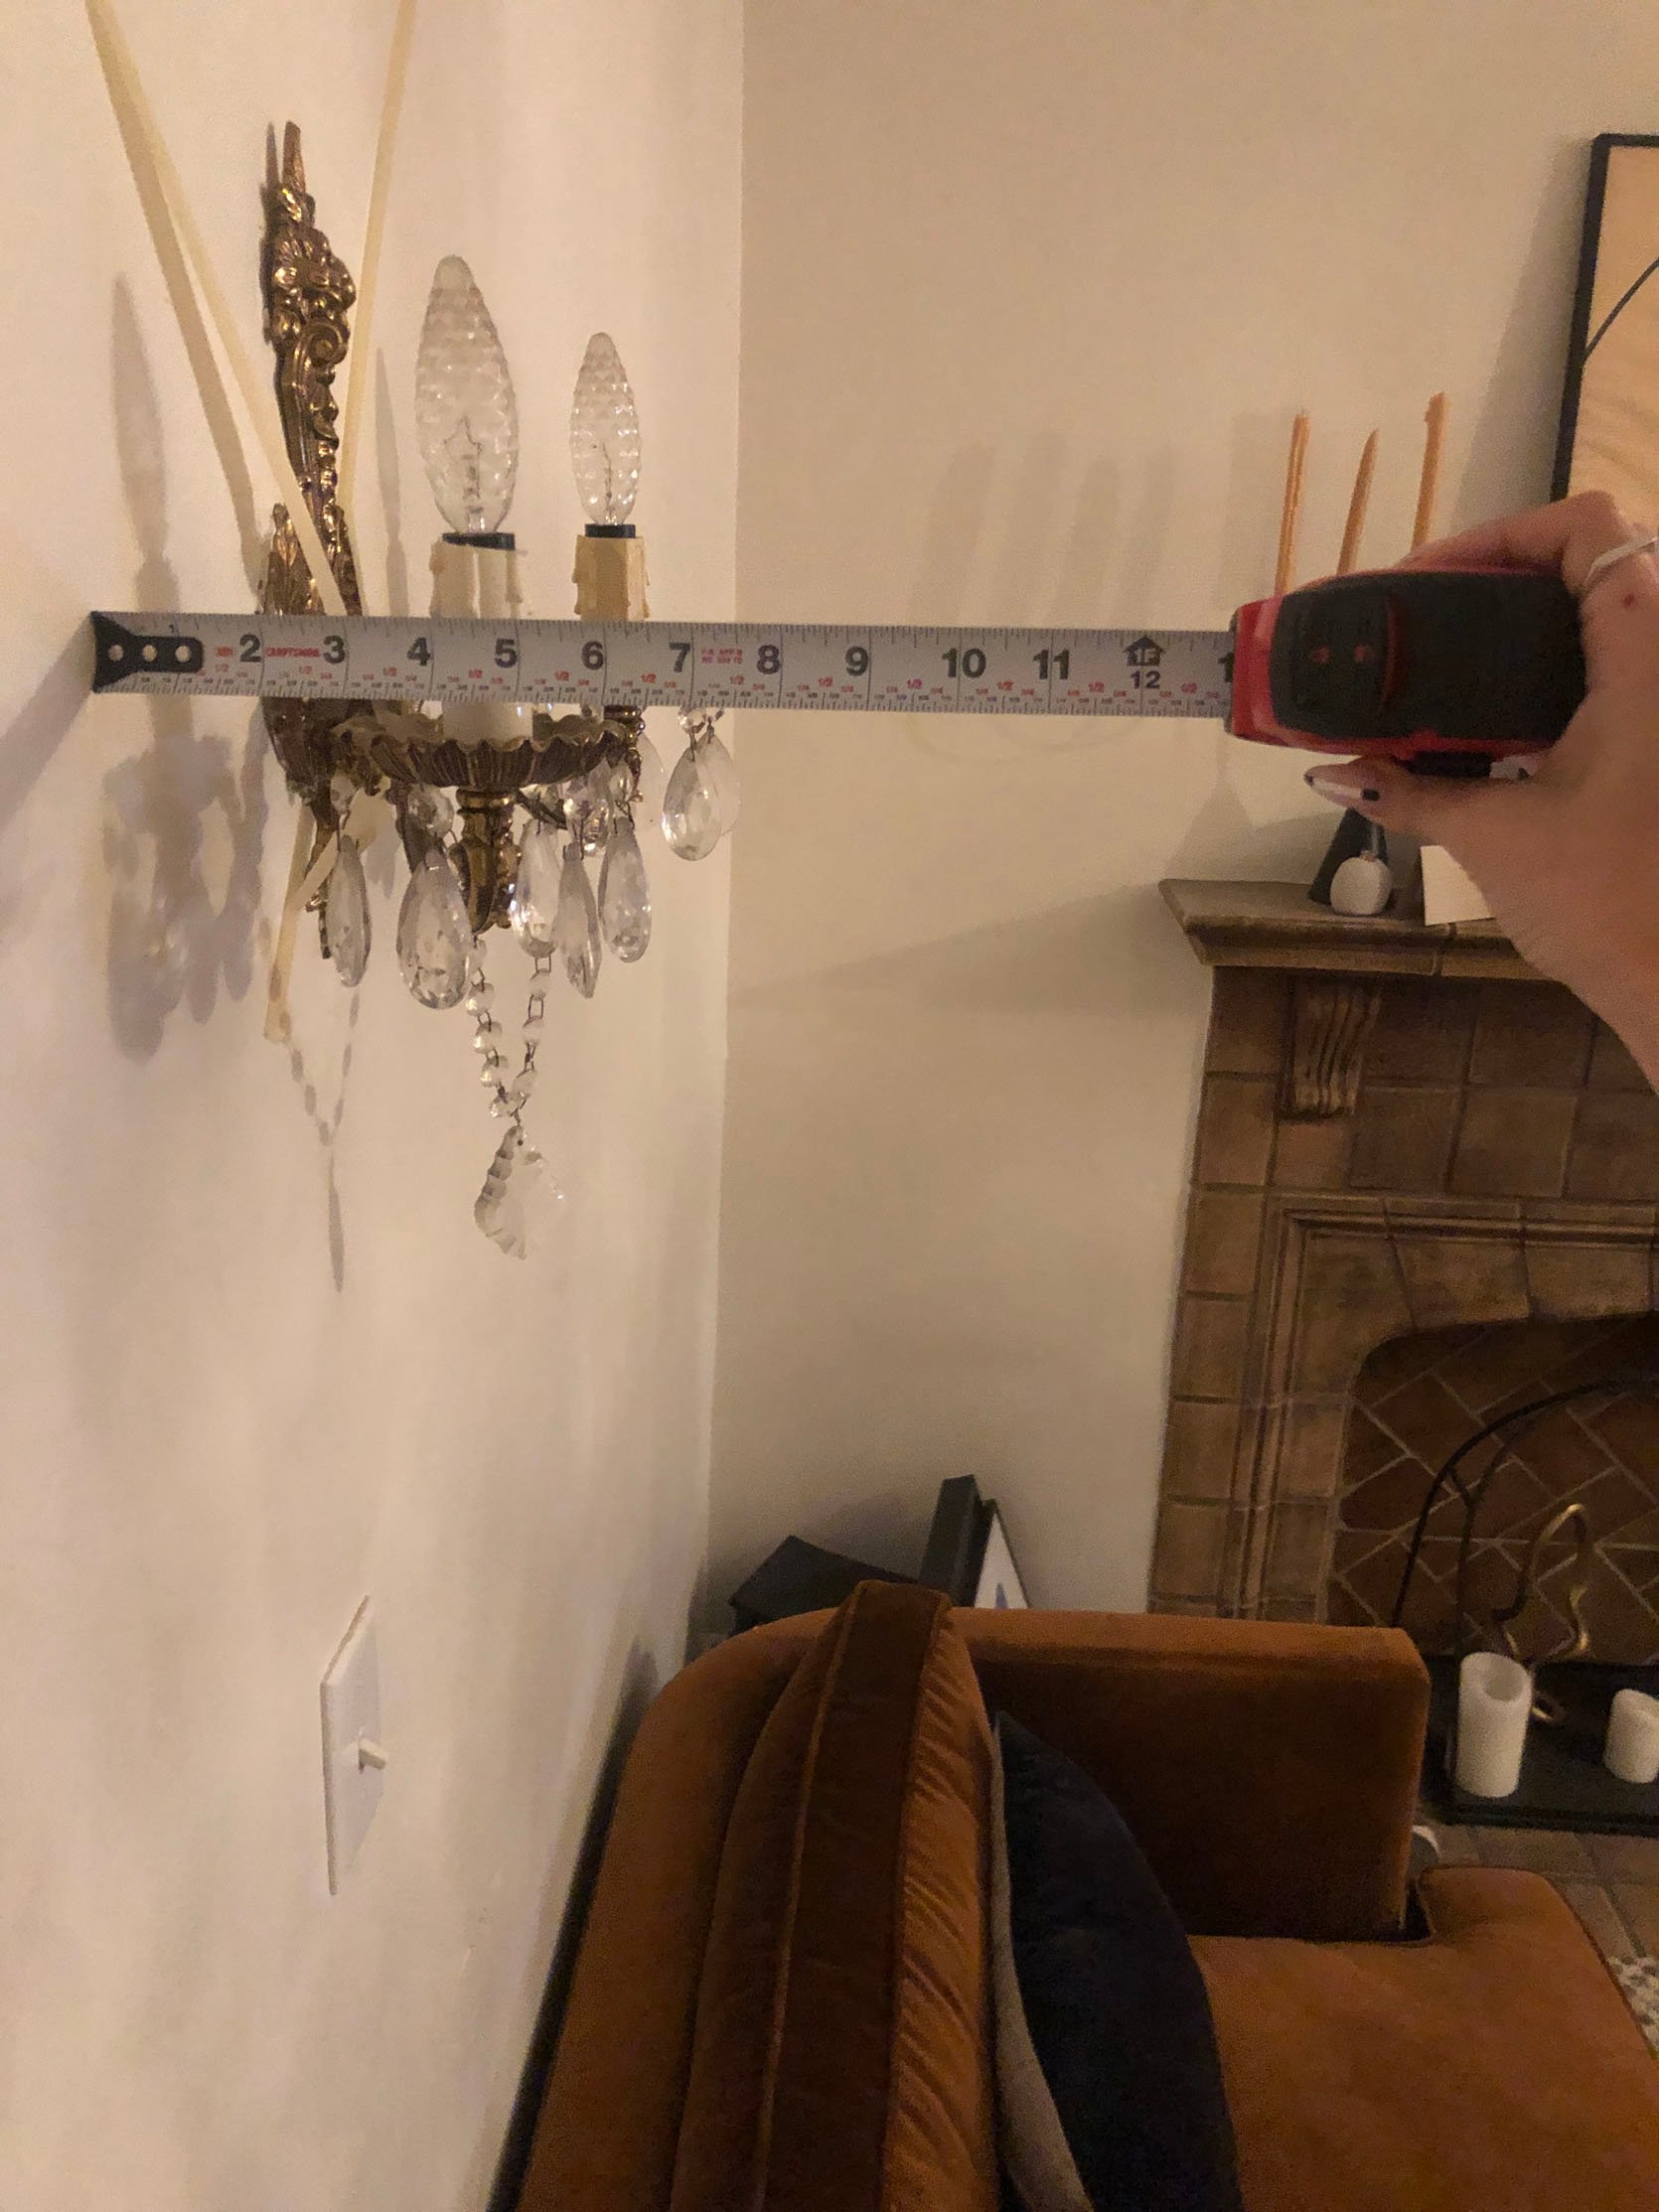
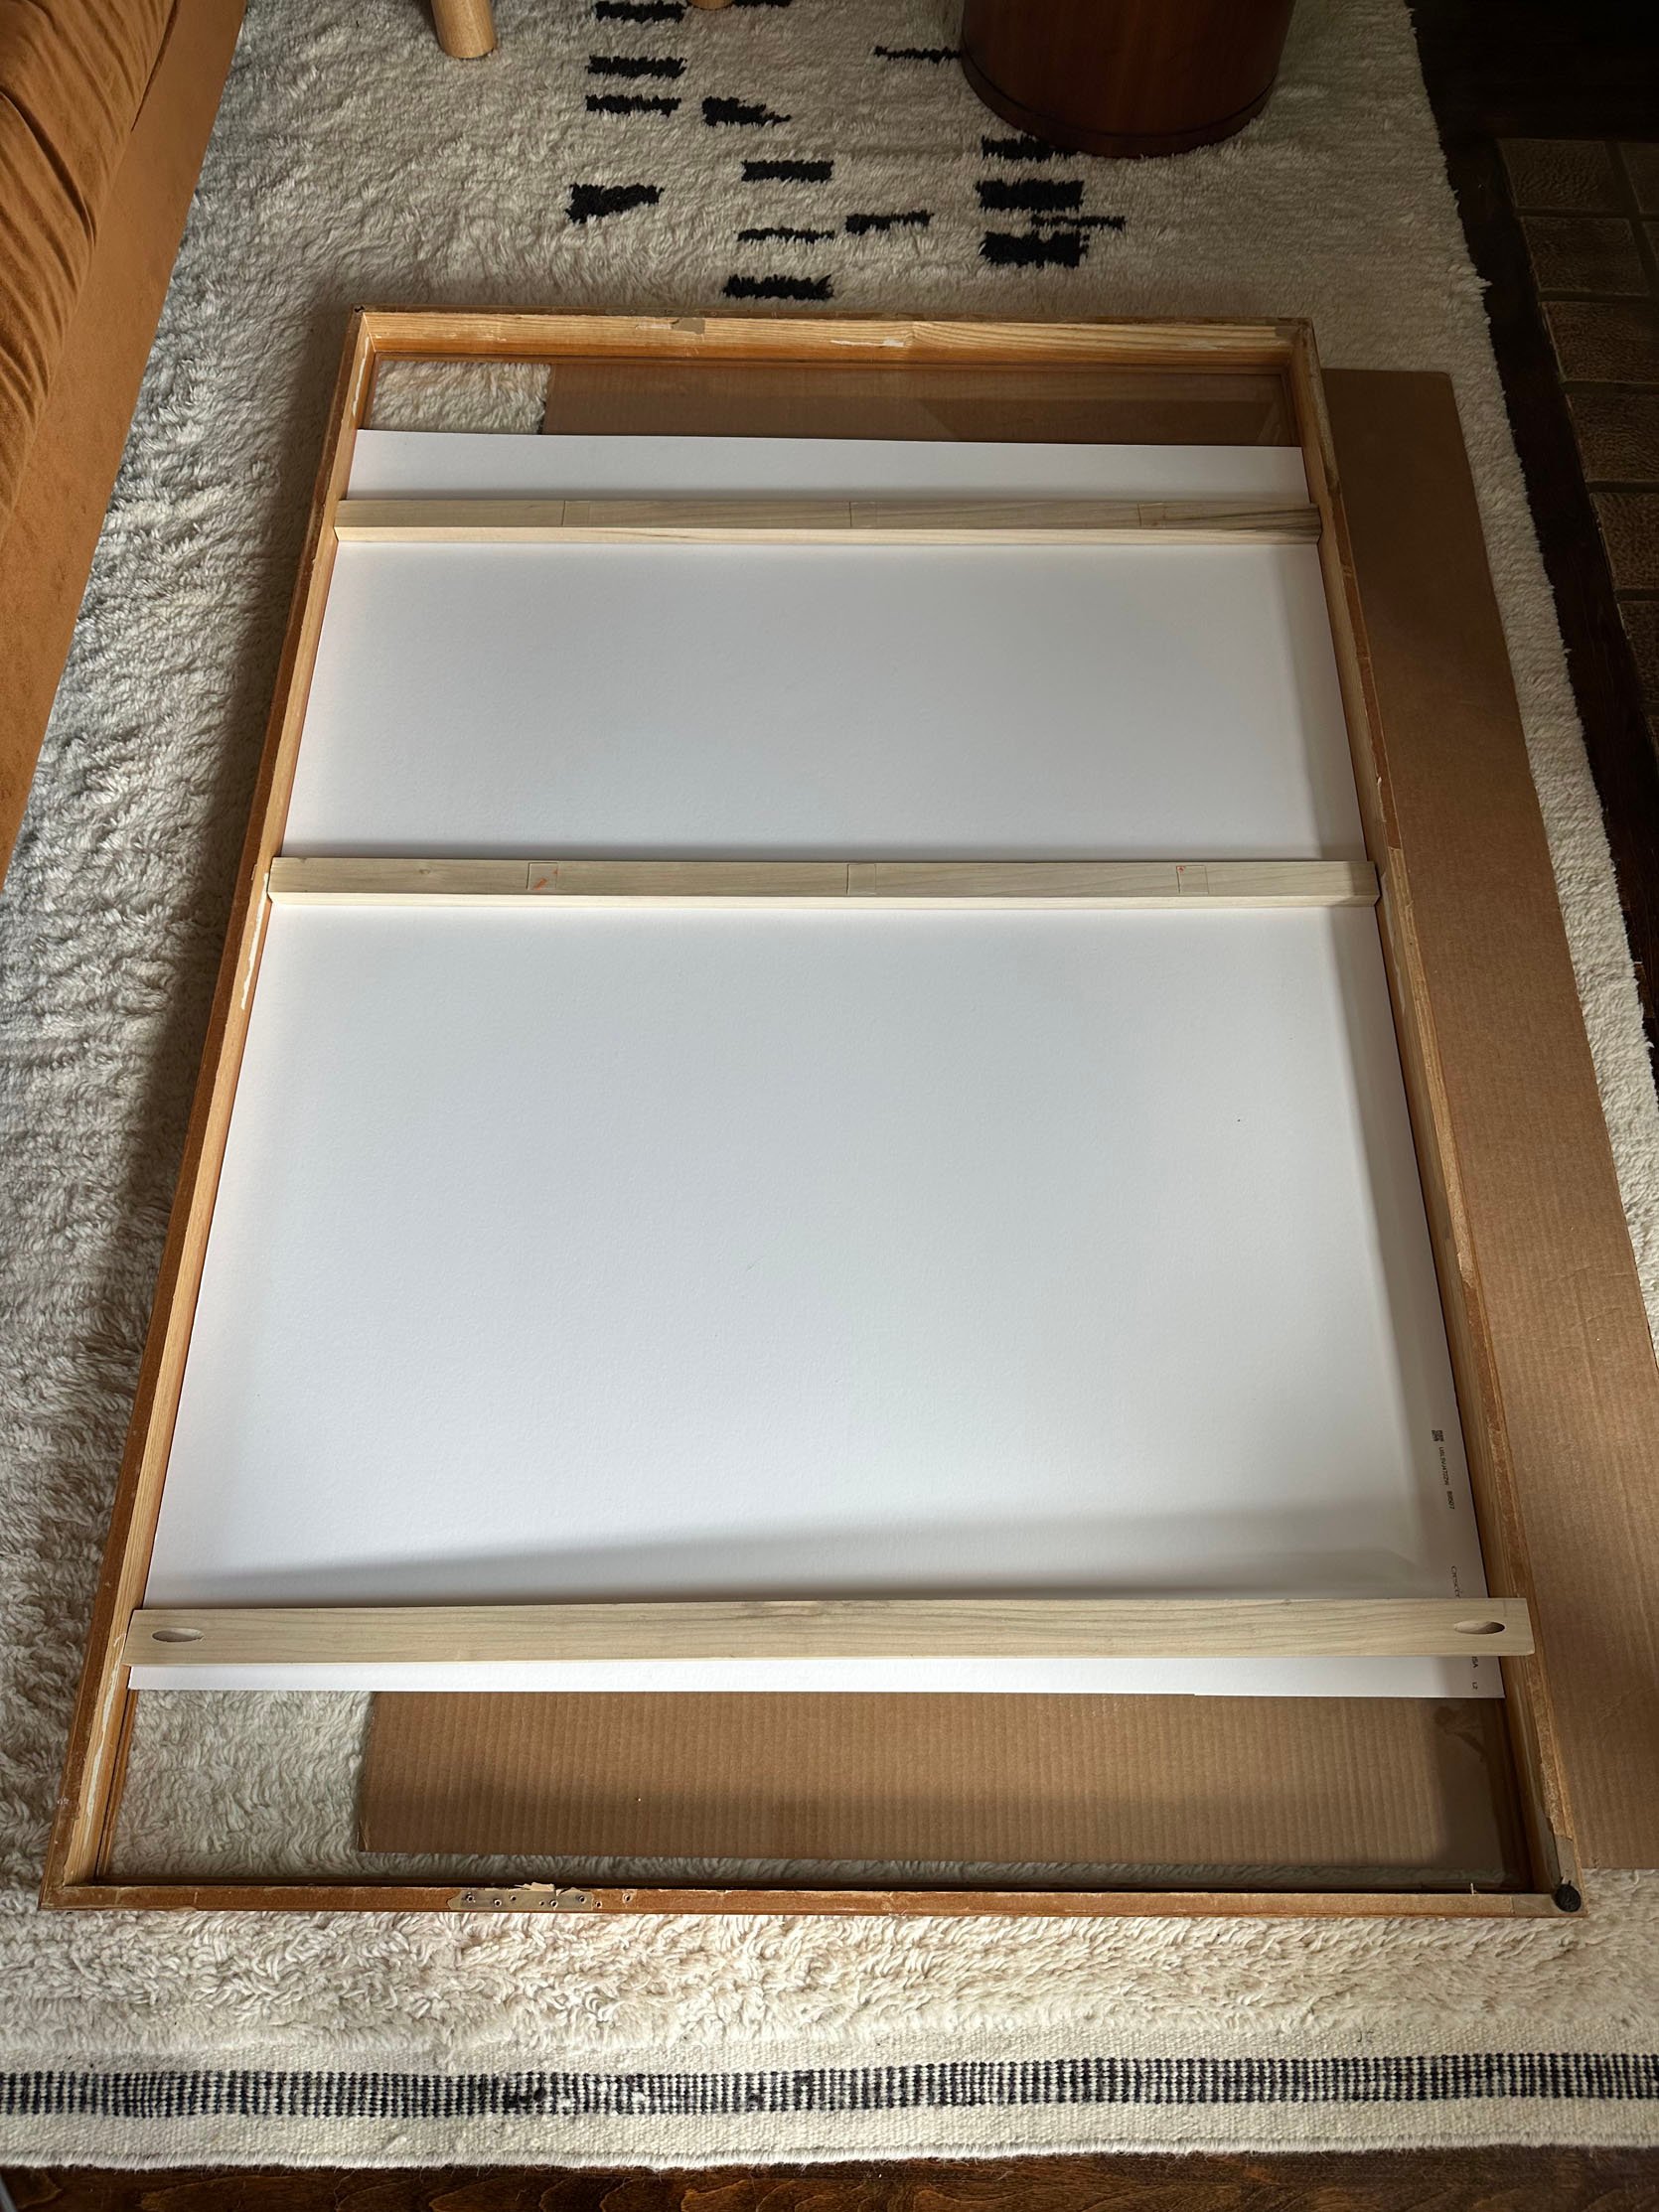
Here was my very professional tape job to make sure I knew where I wanted everything to land. And yes, I was extremely stressed about making a mistake and ruining everything. Oh, and don’t worry, I’ll be talking about that sconce later:)
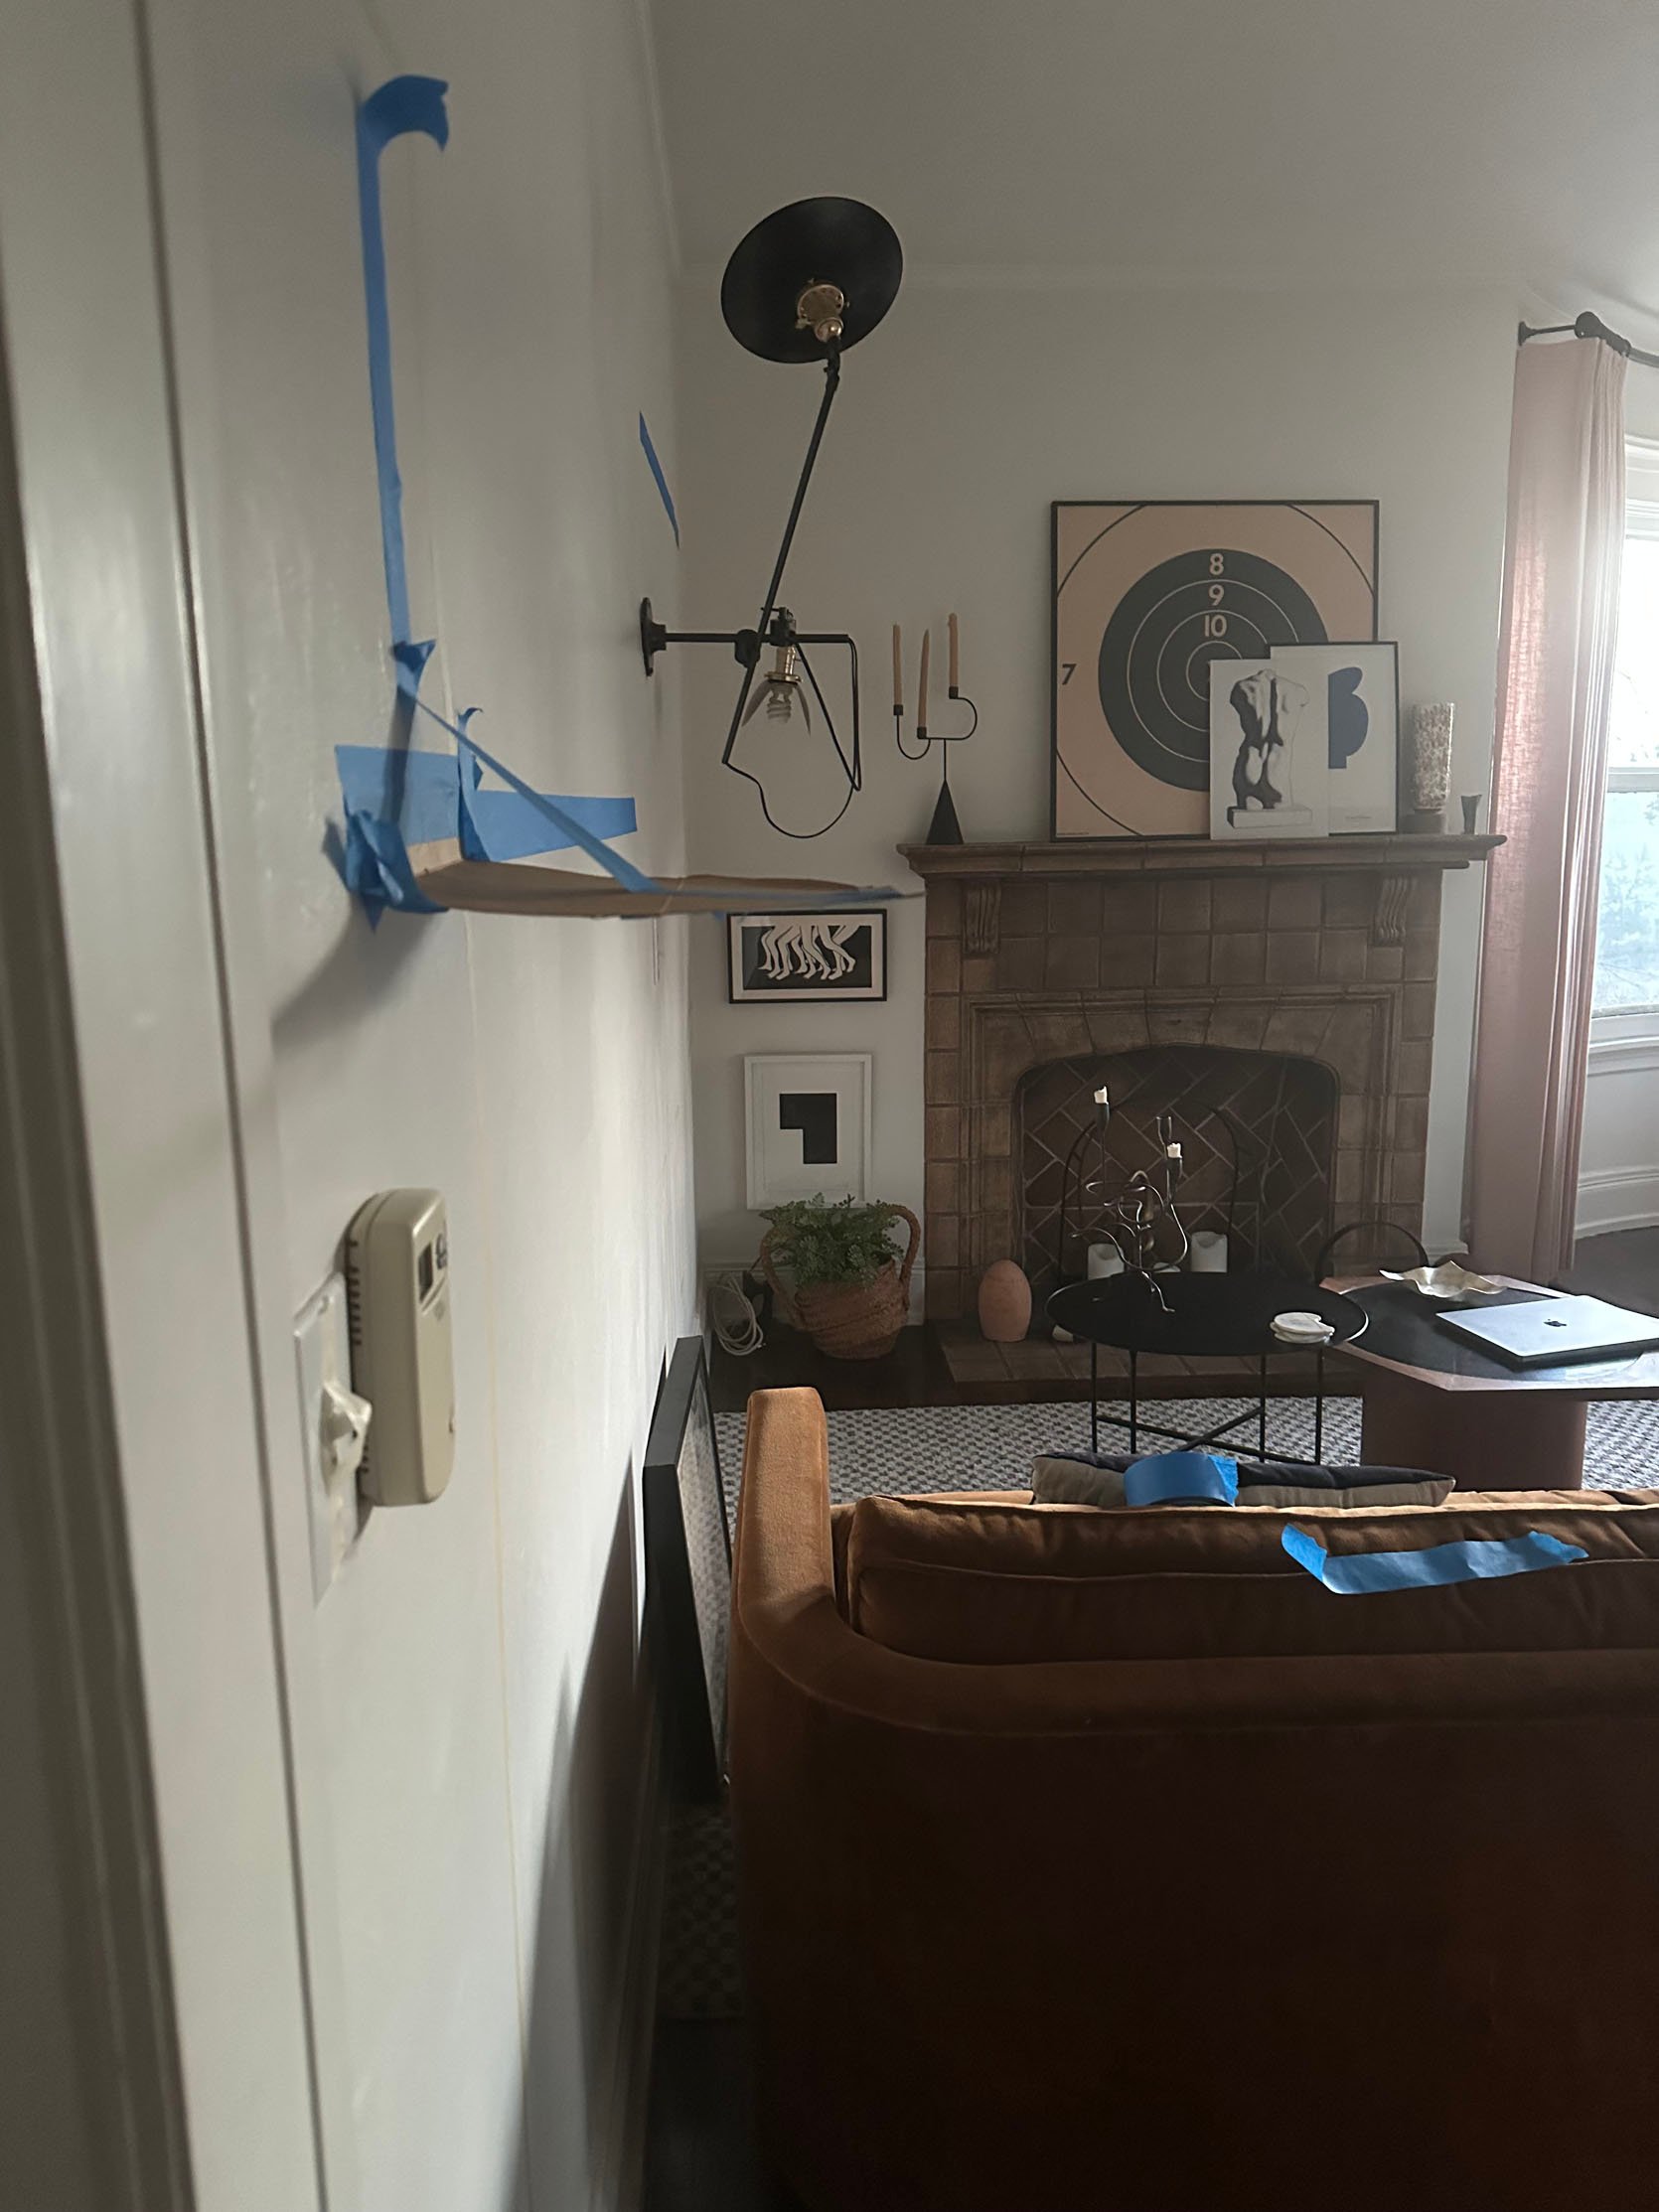
Custom furniture is no joke, despite how ridiculous and comical my cardboard shelf was, ha. It’s also why I was so grateful to have BuildLane to be able to make sure everything was exact and made sense.
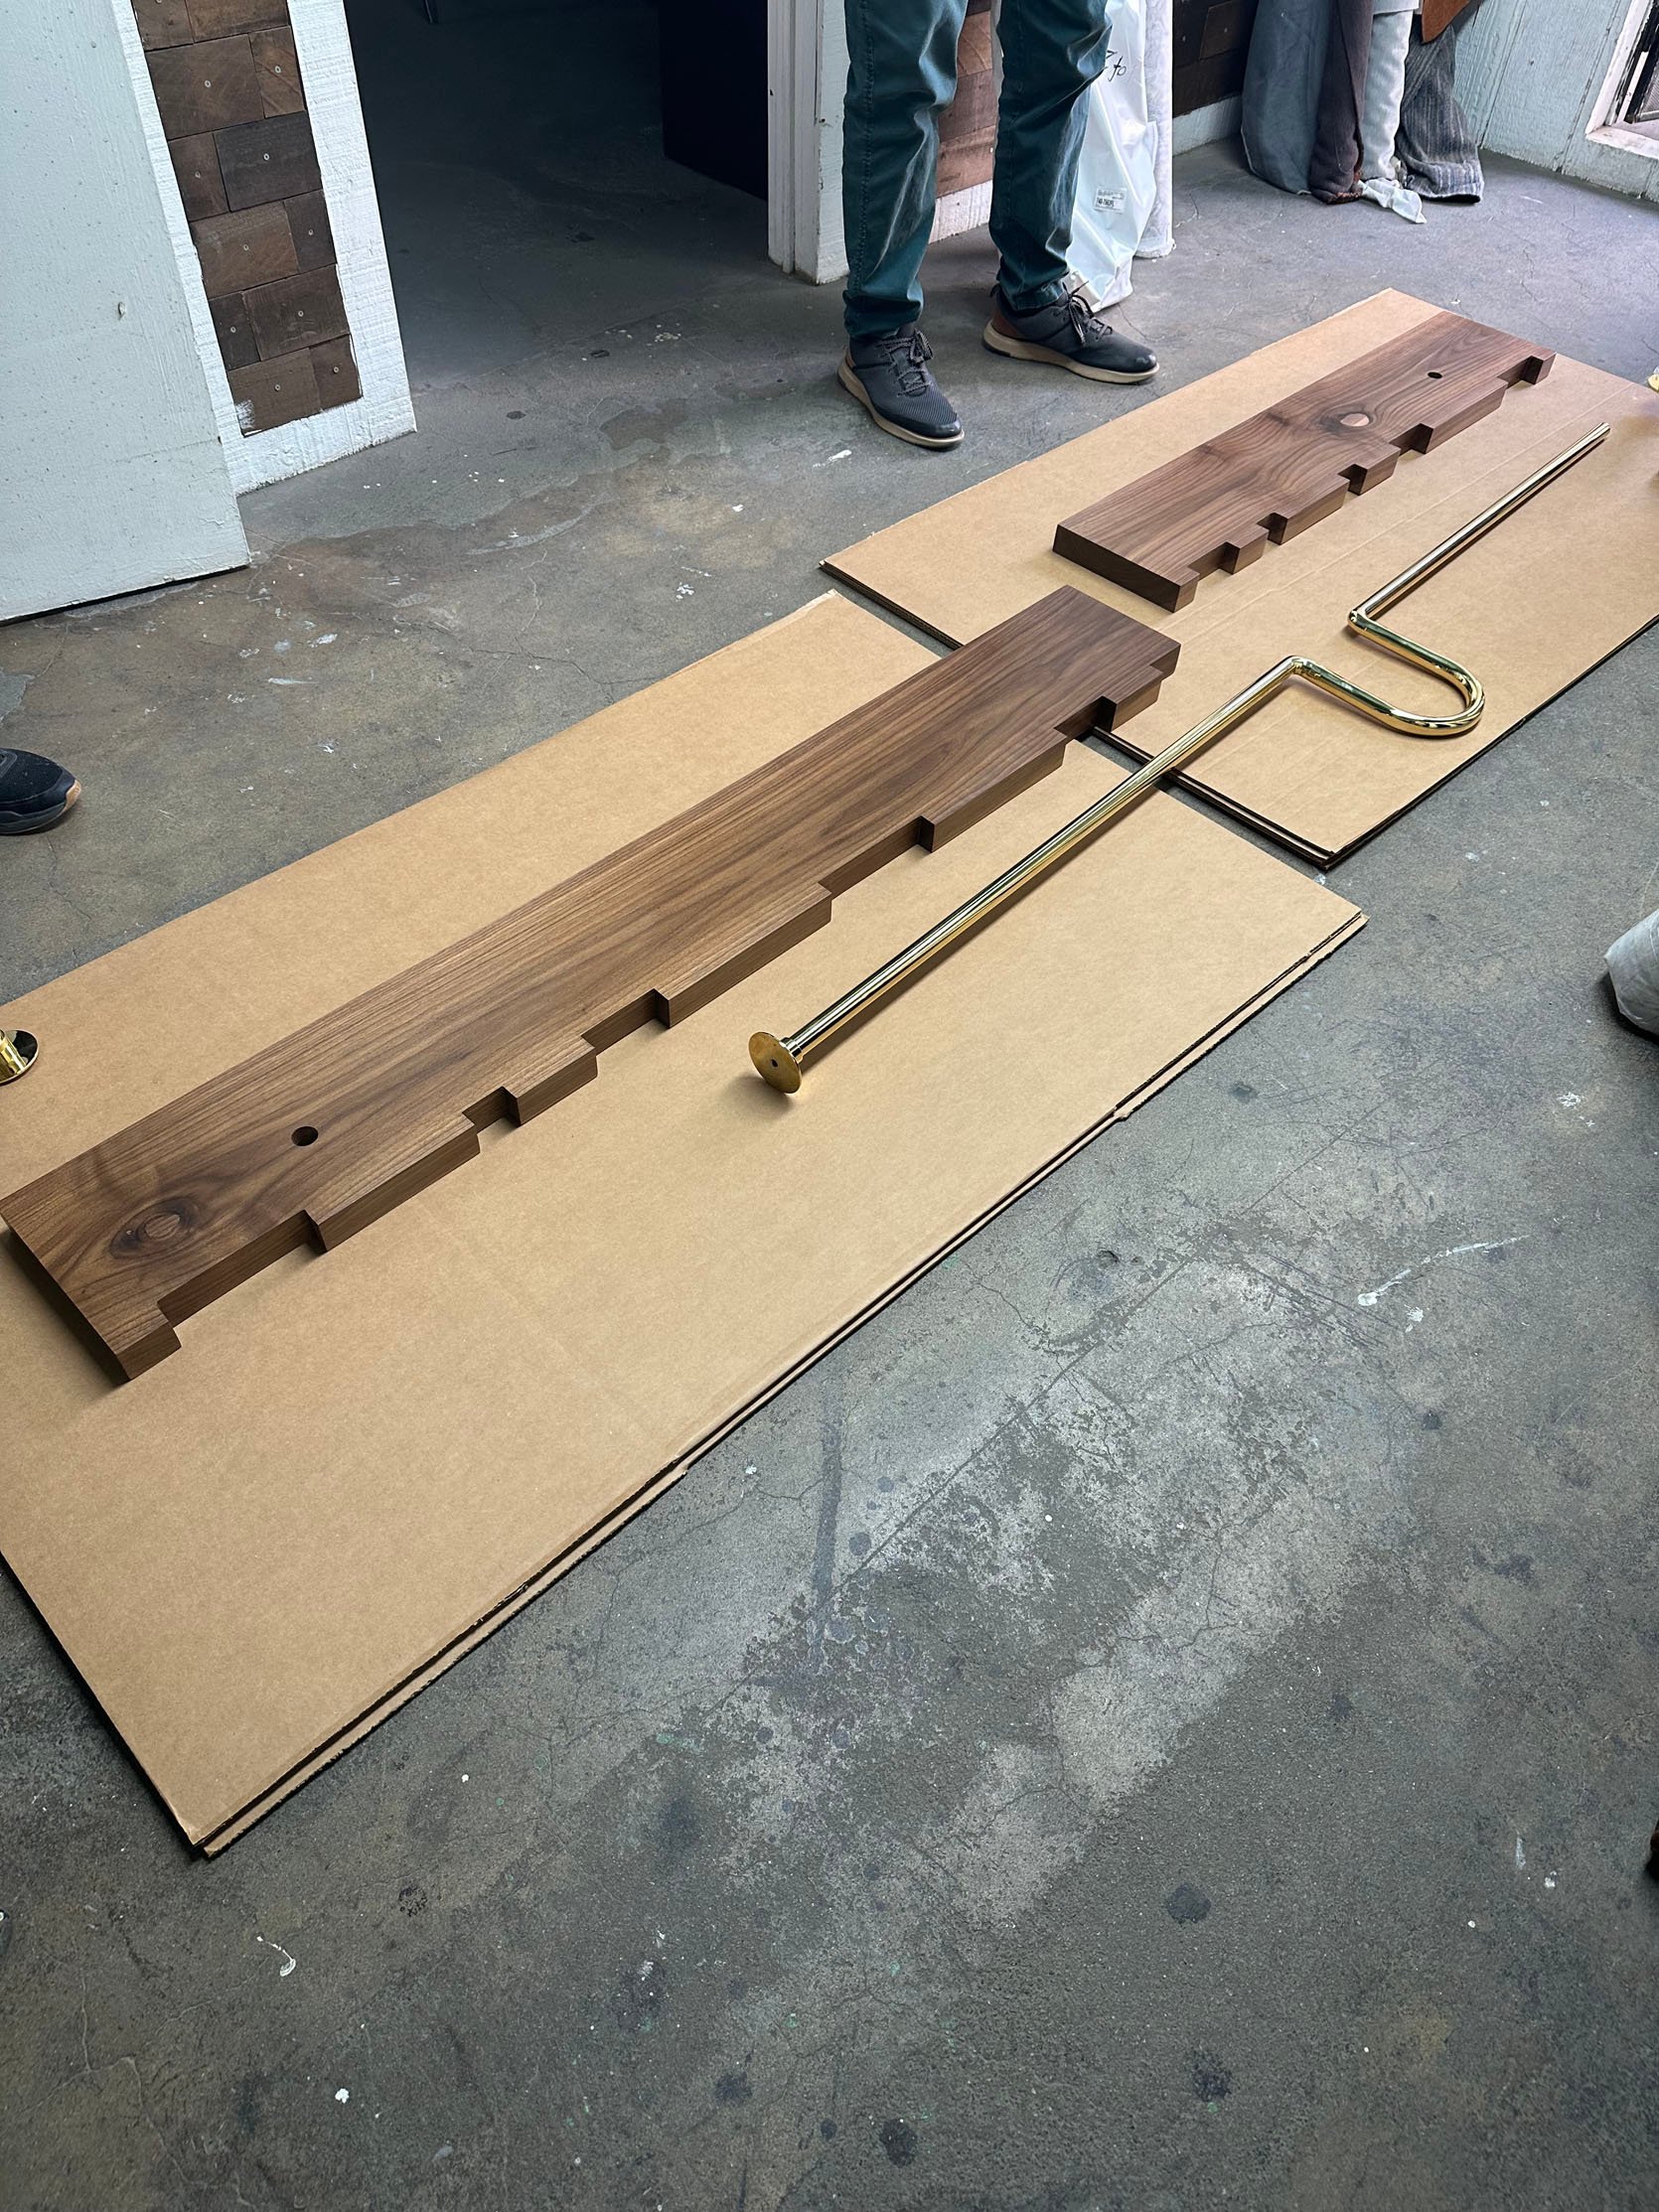
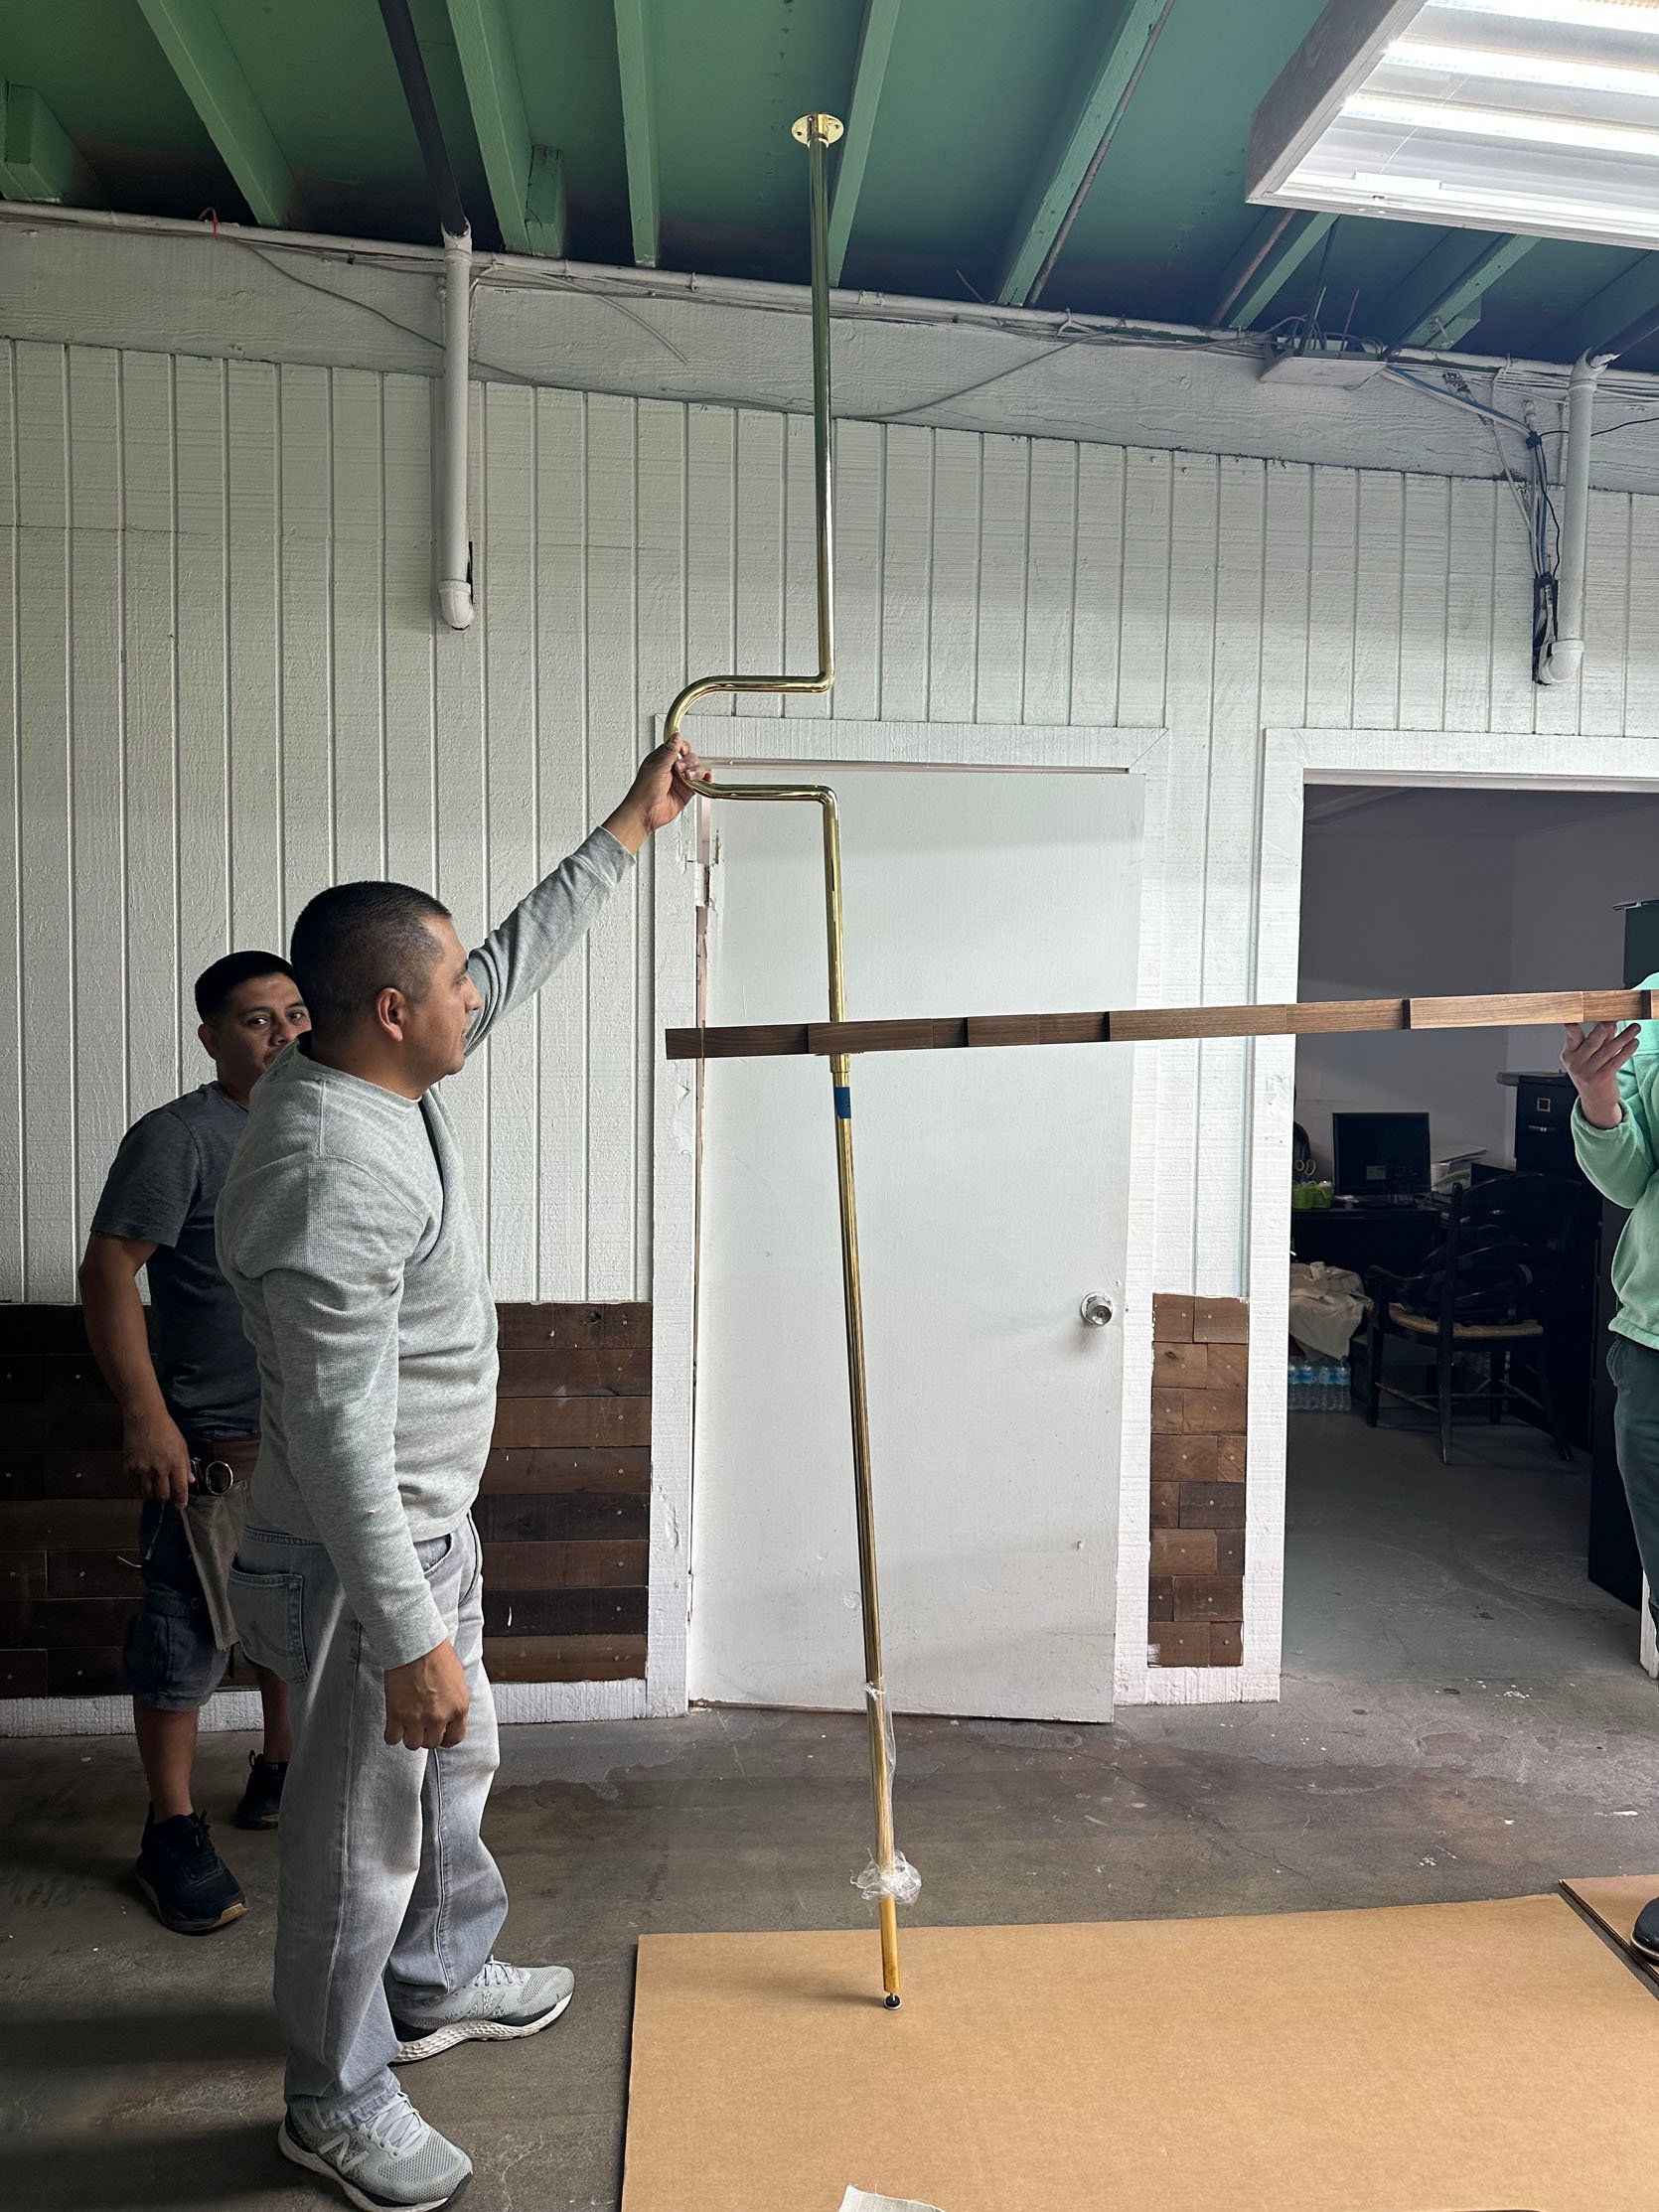
And then Christmas morning came! Just kidding, but also maybe this was better? Seeing what I came up with in my head, made into a beautiful physical piece, was beyond words. Frank and the whole BuildLane team really went above and beyond. The shelves were perfect.
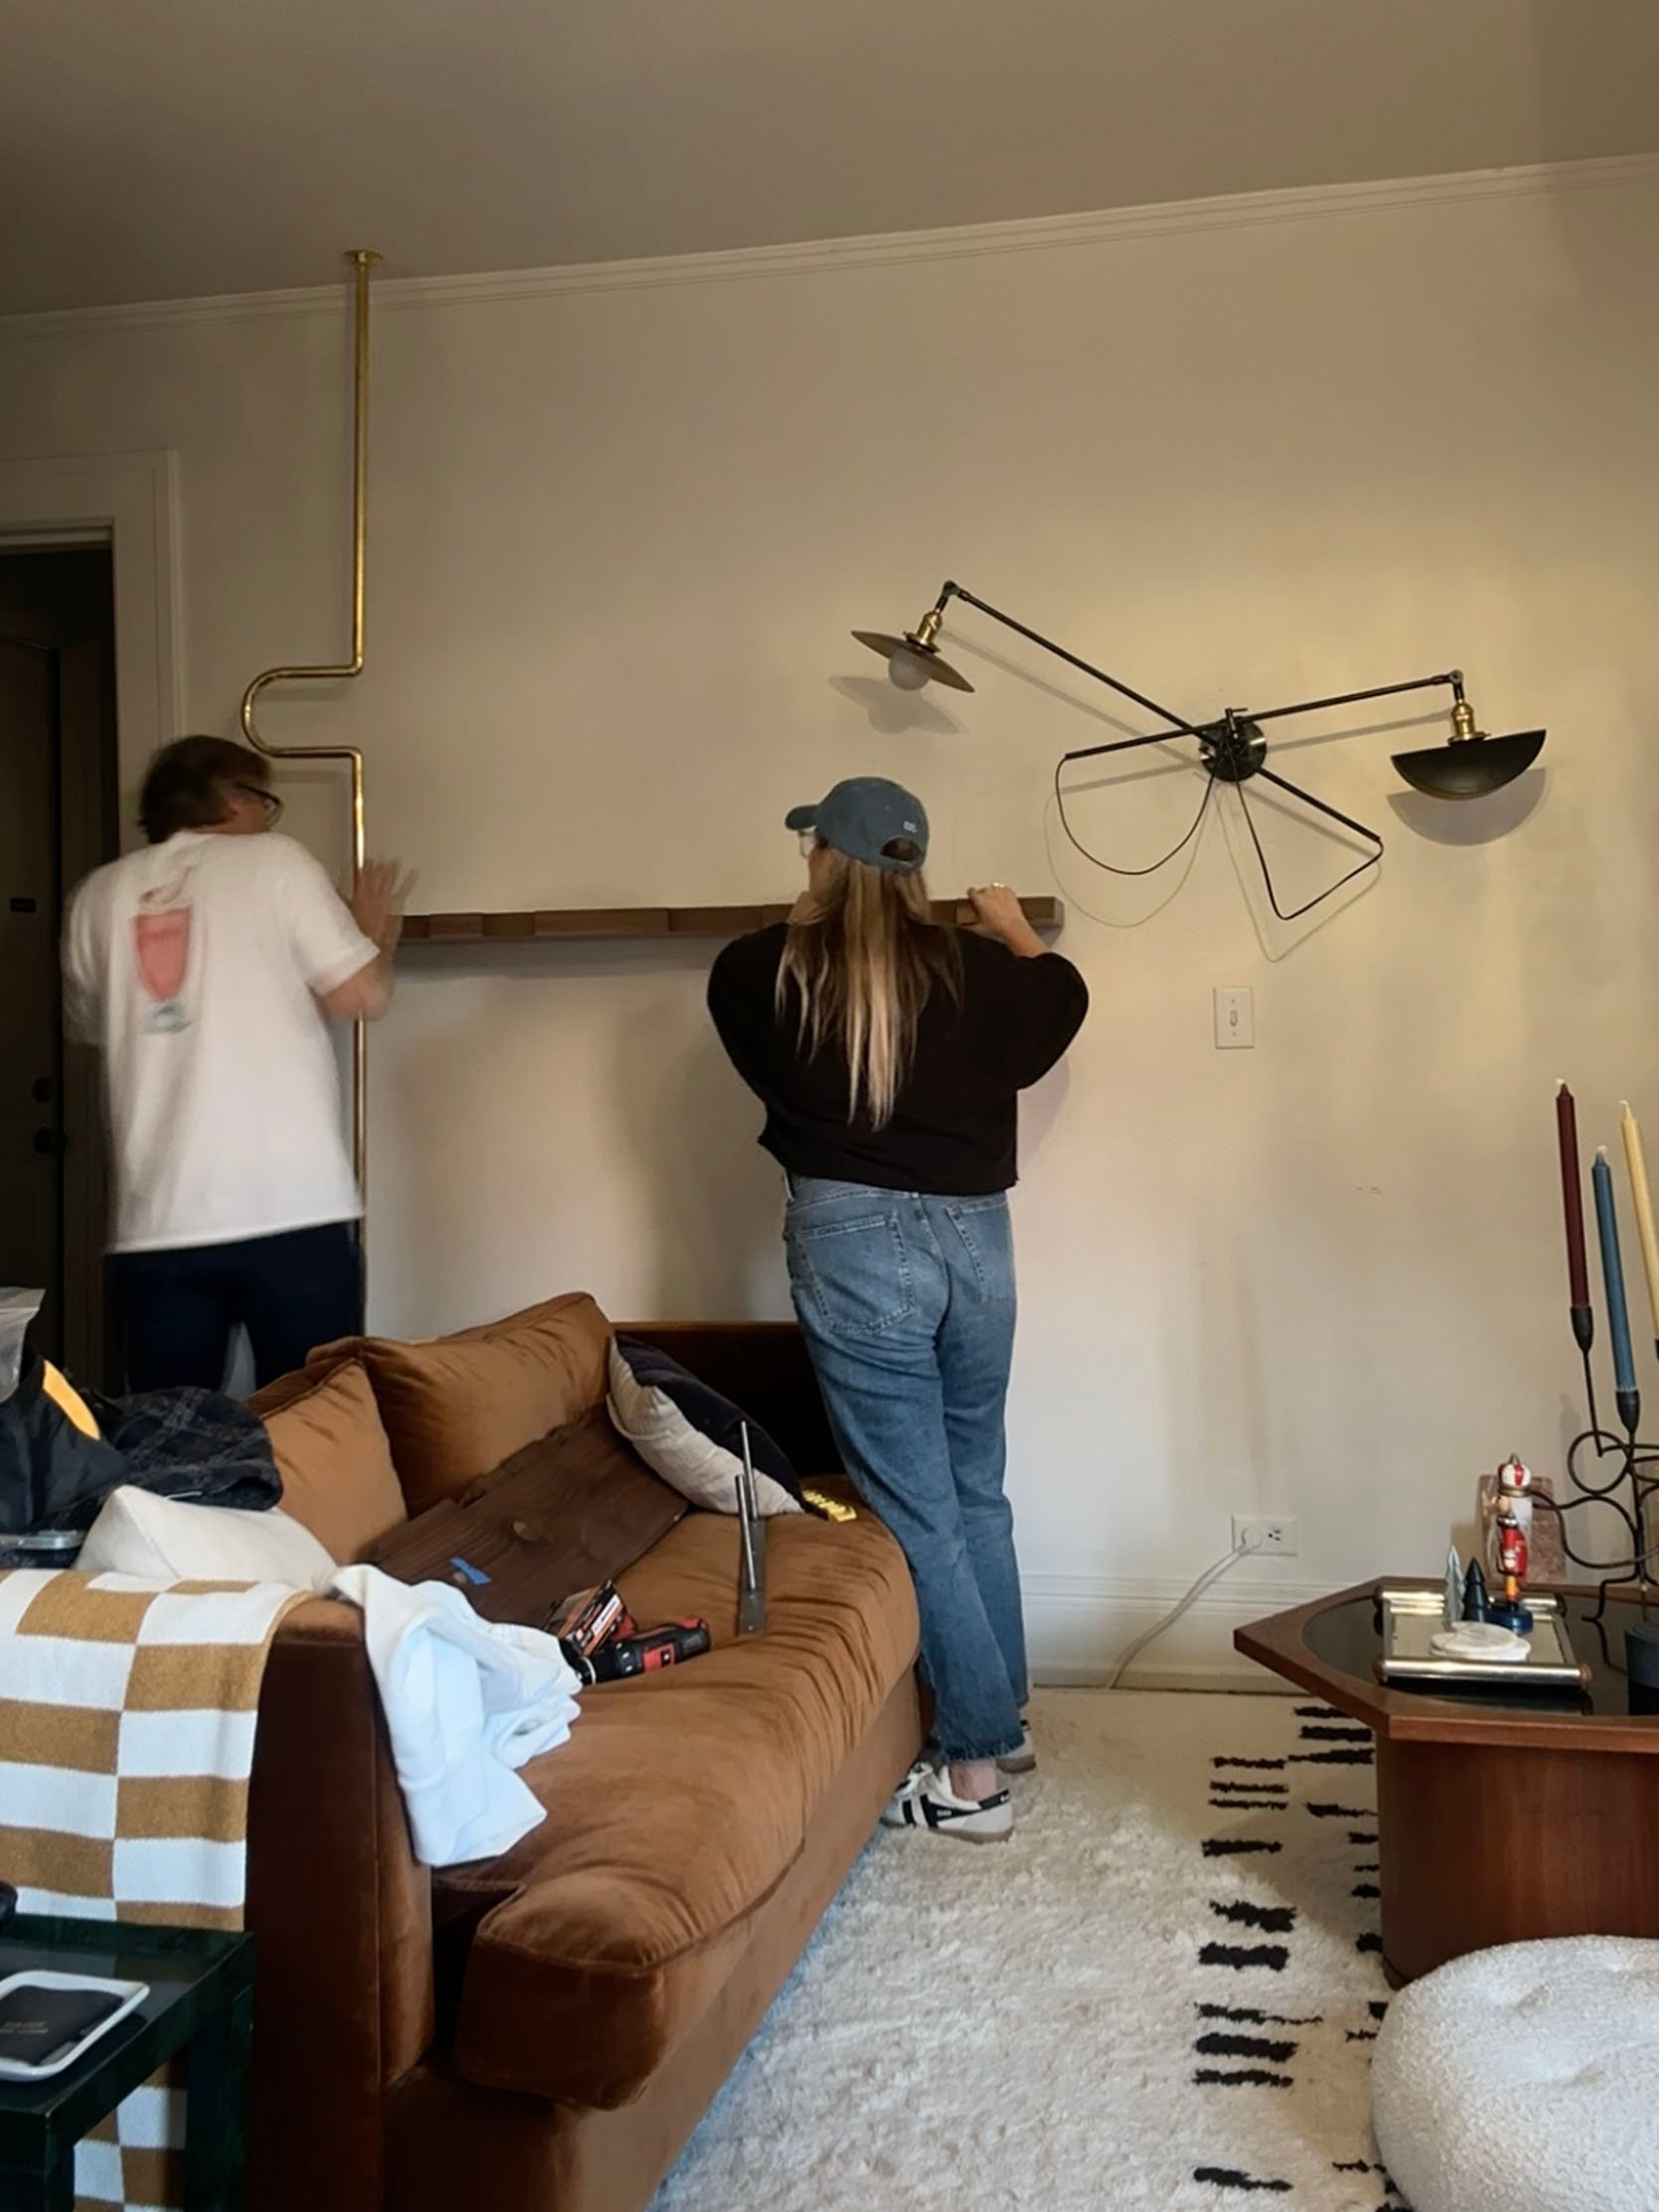
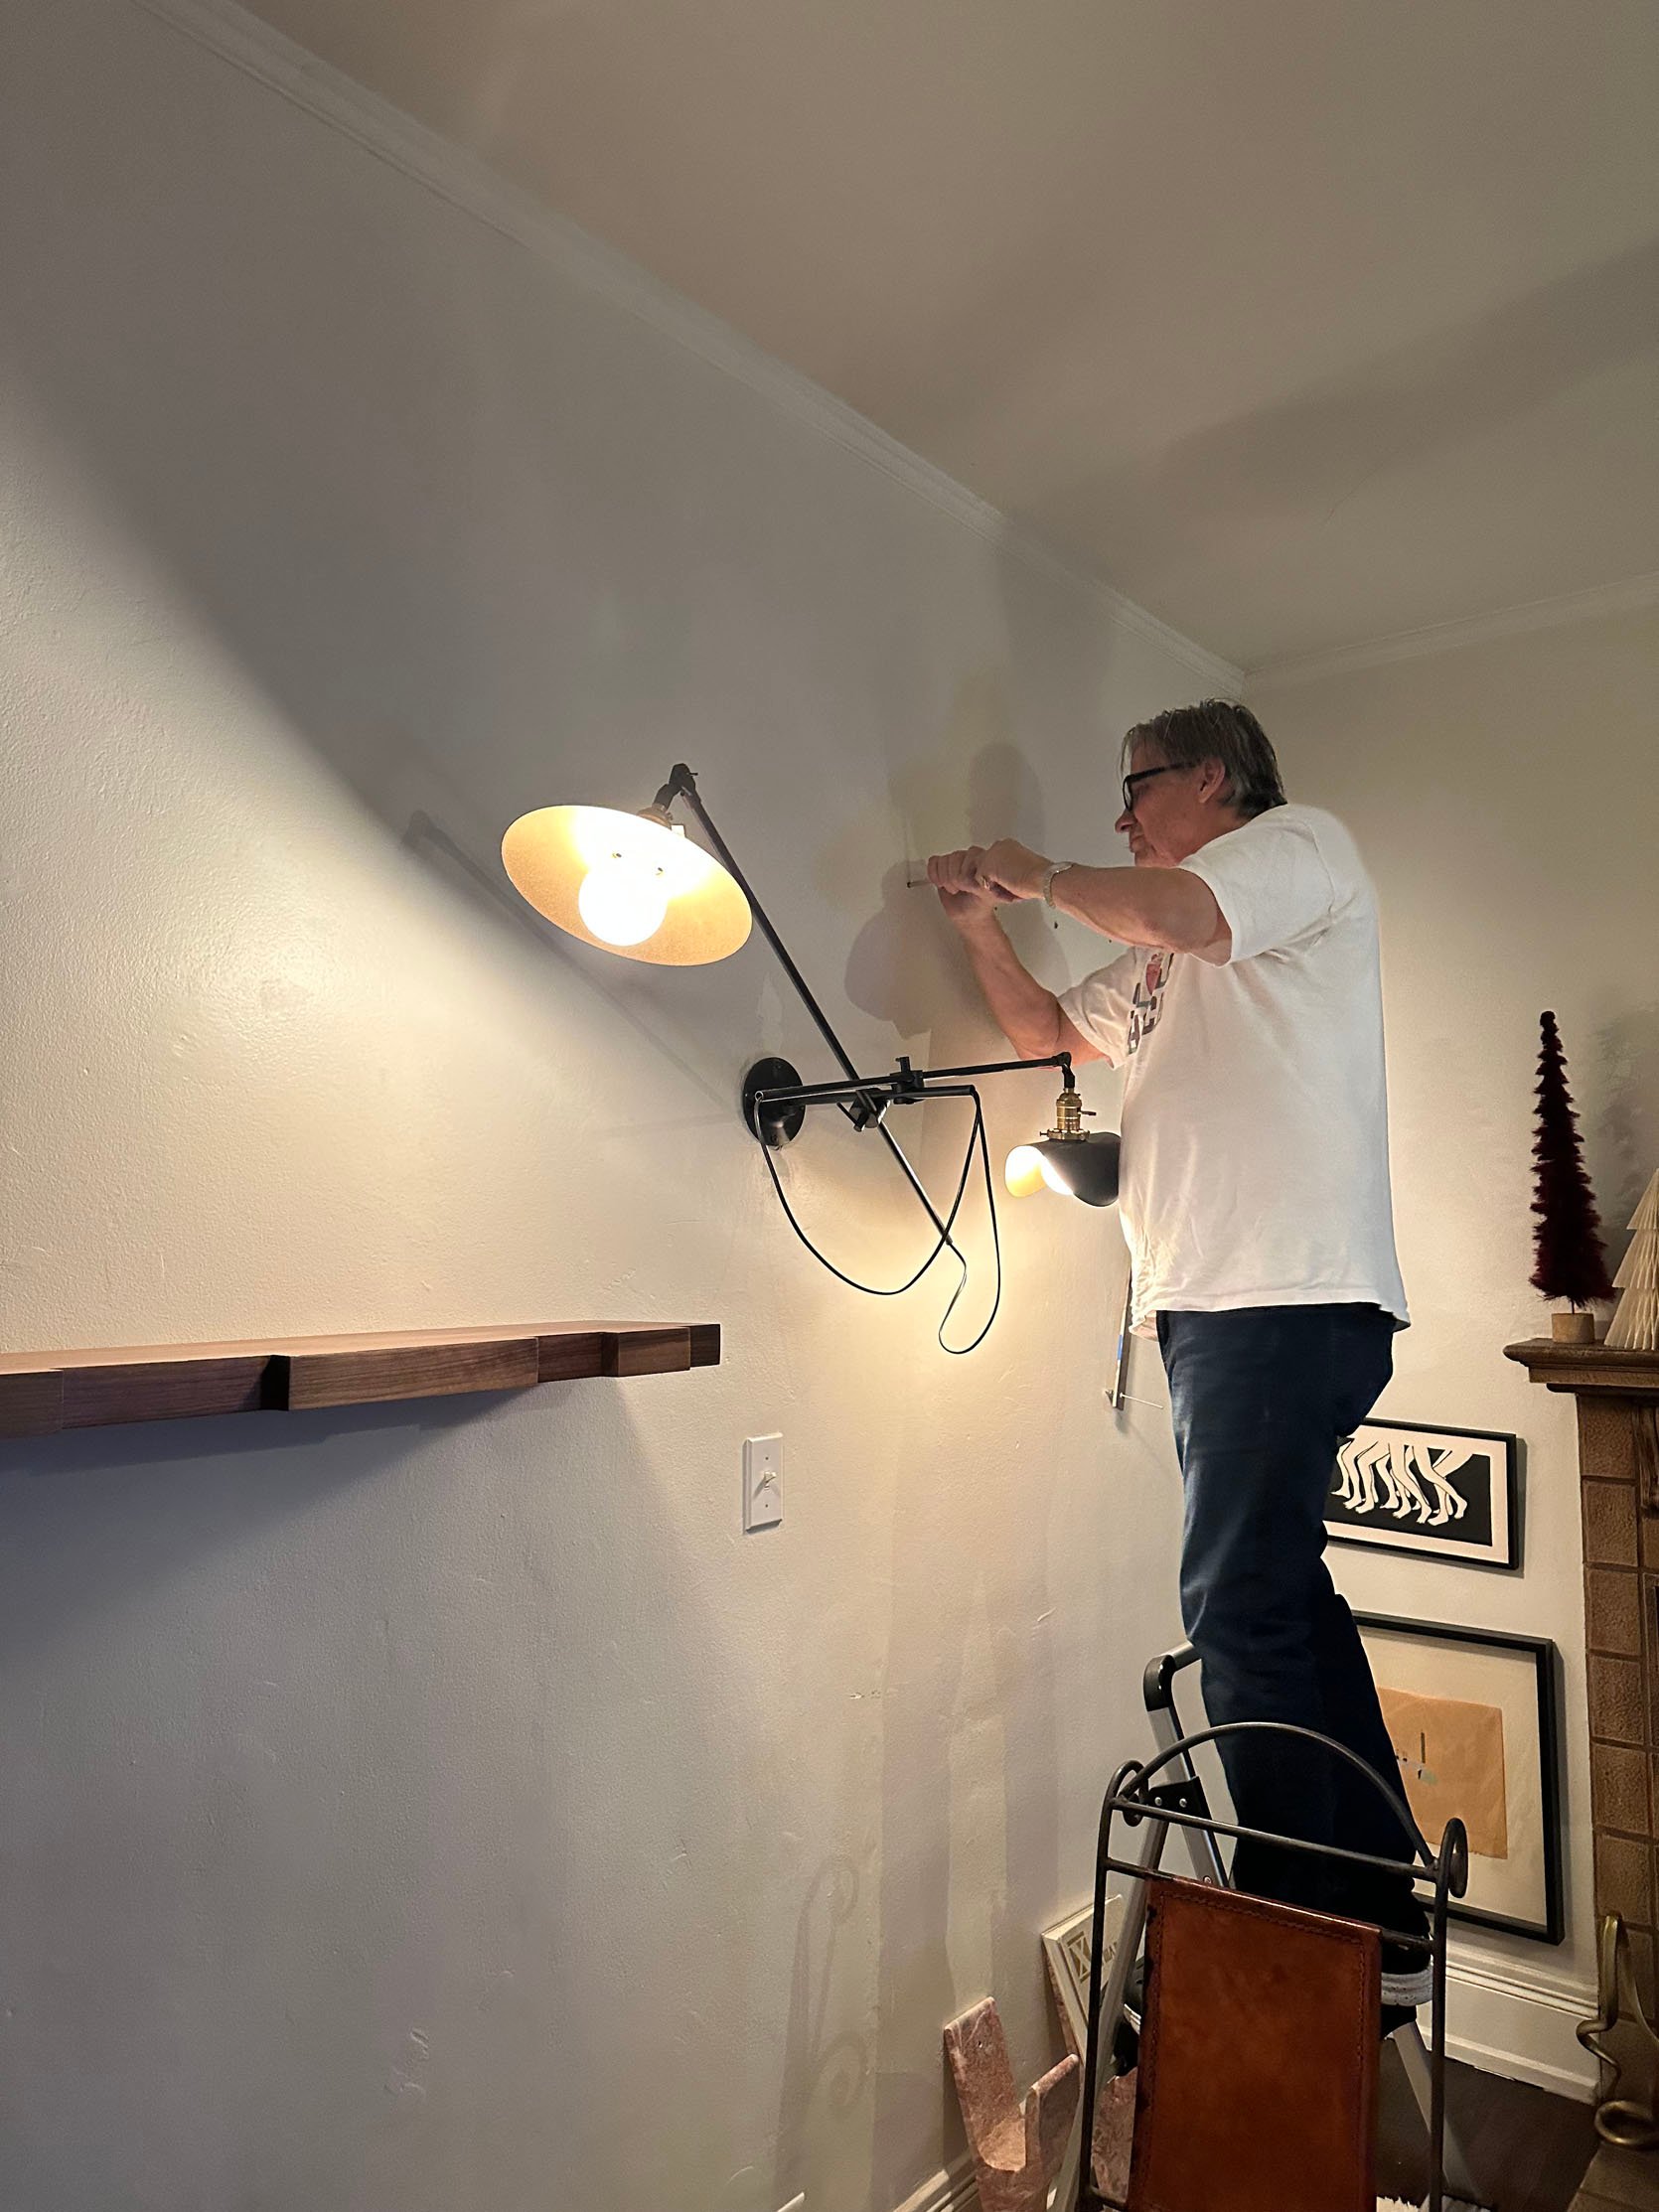
I need and want to give another (but not the last) shoutout to my dad. He came down to install them with me, and we only got into a couple of small arguments! And in case any of you are thinking that I drilled into the hardwood floors, the answer is ABSOLUTELY NOT. BuildLane (and a huge thank you to Stephen) made sure that the bottom of the poles had levelers and that there was a bracket at the top of each pole to secure it to the ceiling. The shelves themselves also have hidden brackets, so everything is super safe and secured.
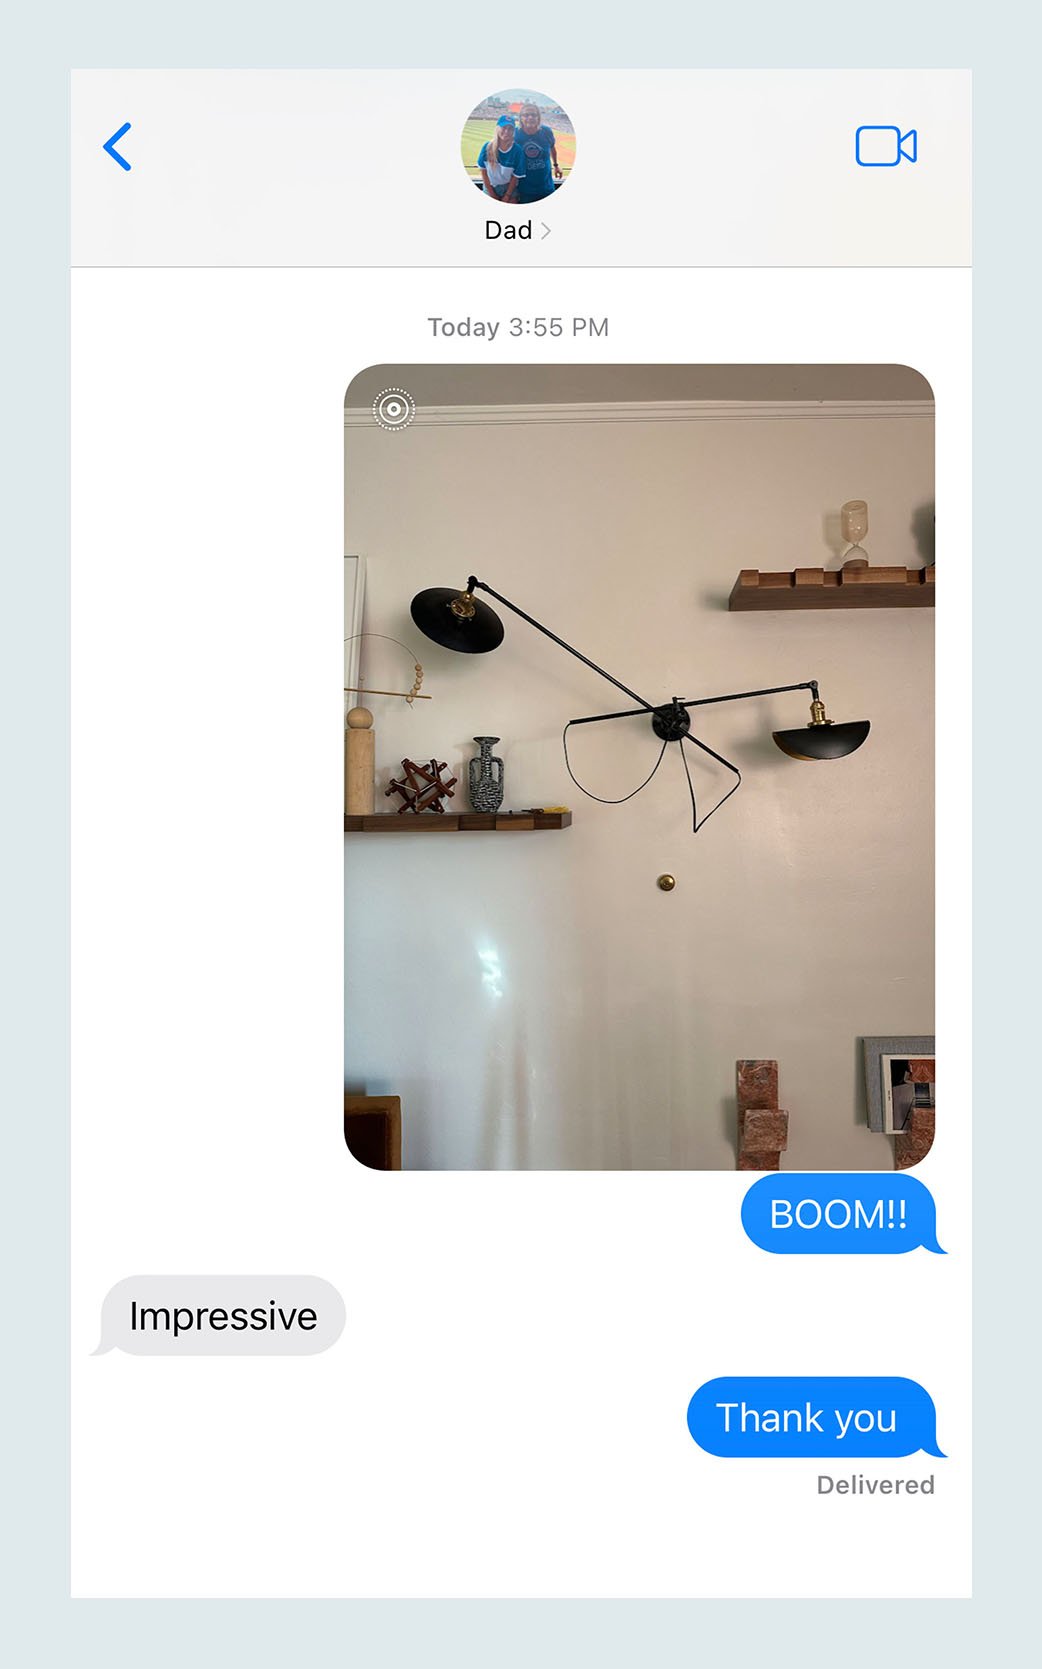
I sent this picture to my dad after I replaced the standard (not cute) light switch that was there with the vintage one I bought when I visited him in Paris (I wrote about that trip here). It was a process that I heavily questioned at least 3 times because let’s just say A LOT of spackle was used having to go from a rectangular switch to a small circle. Honestly, I’m surprised I got an “Impressive” and not “Good thing I taught you everything you know.” I’ll take the wins where I can get them. But I’m also sure he said it in his head.
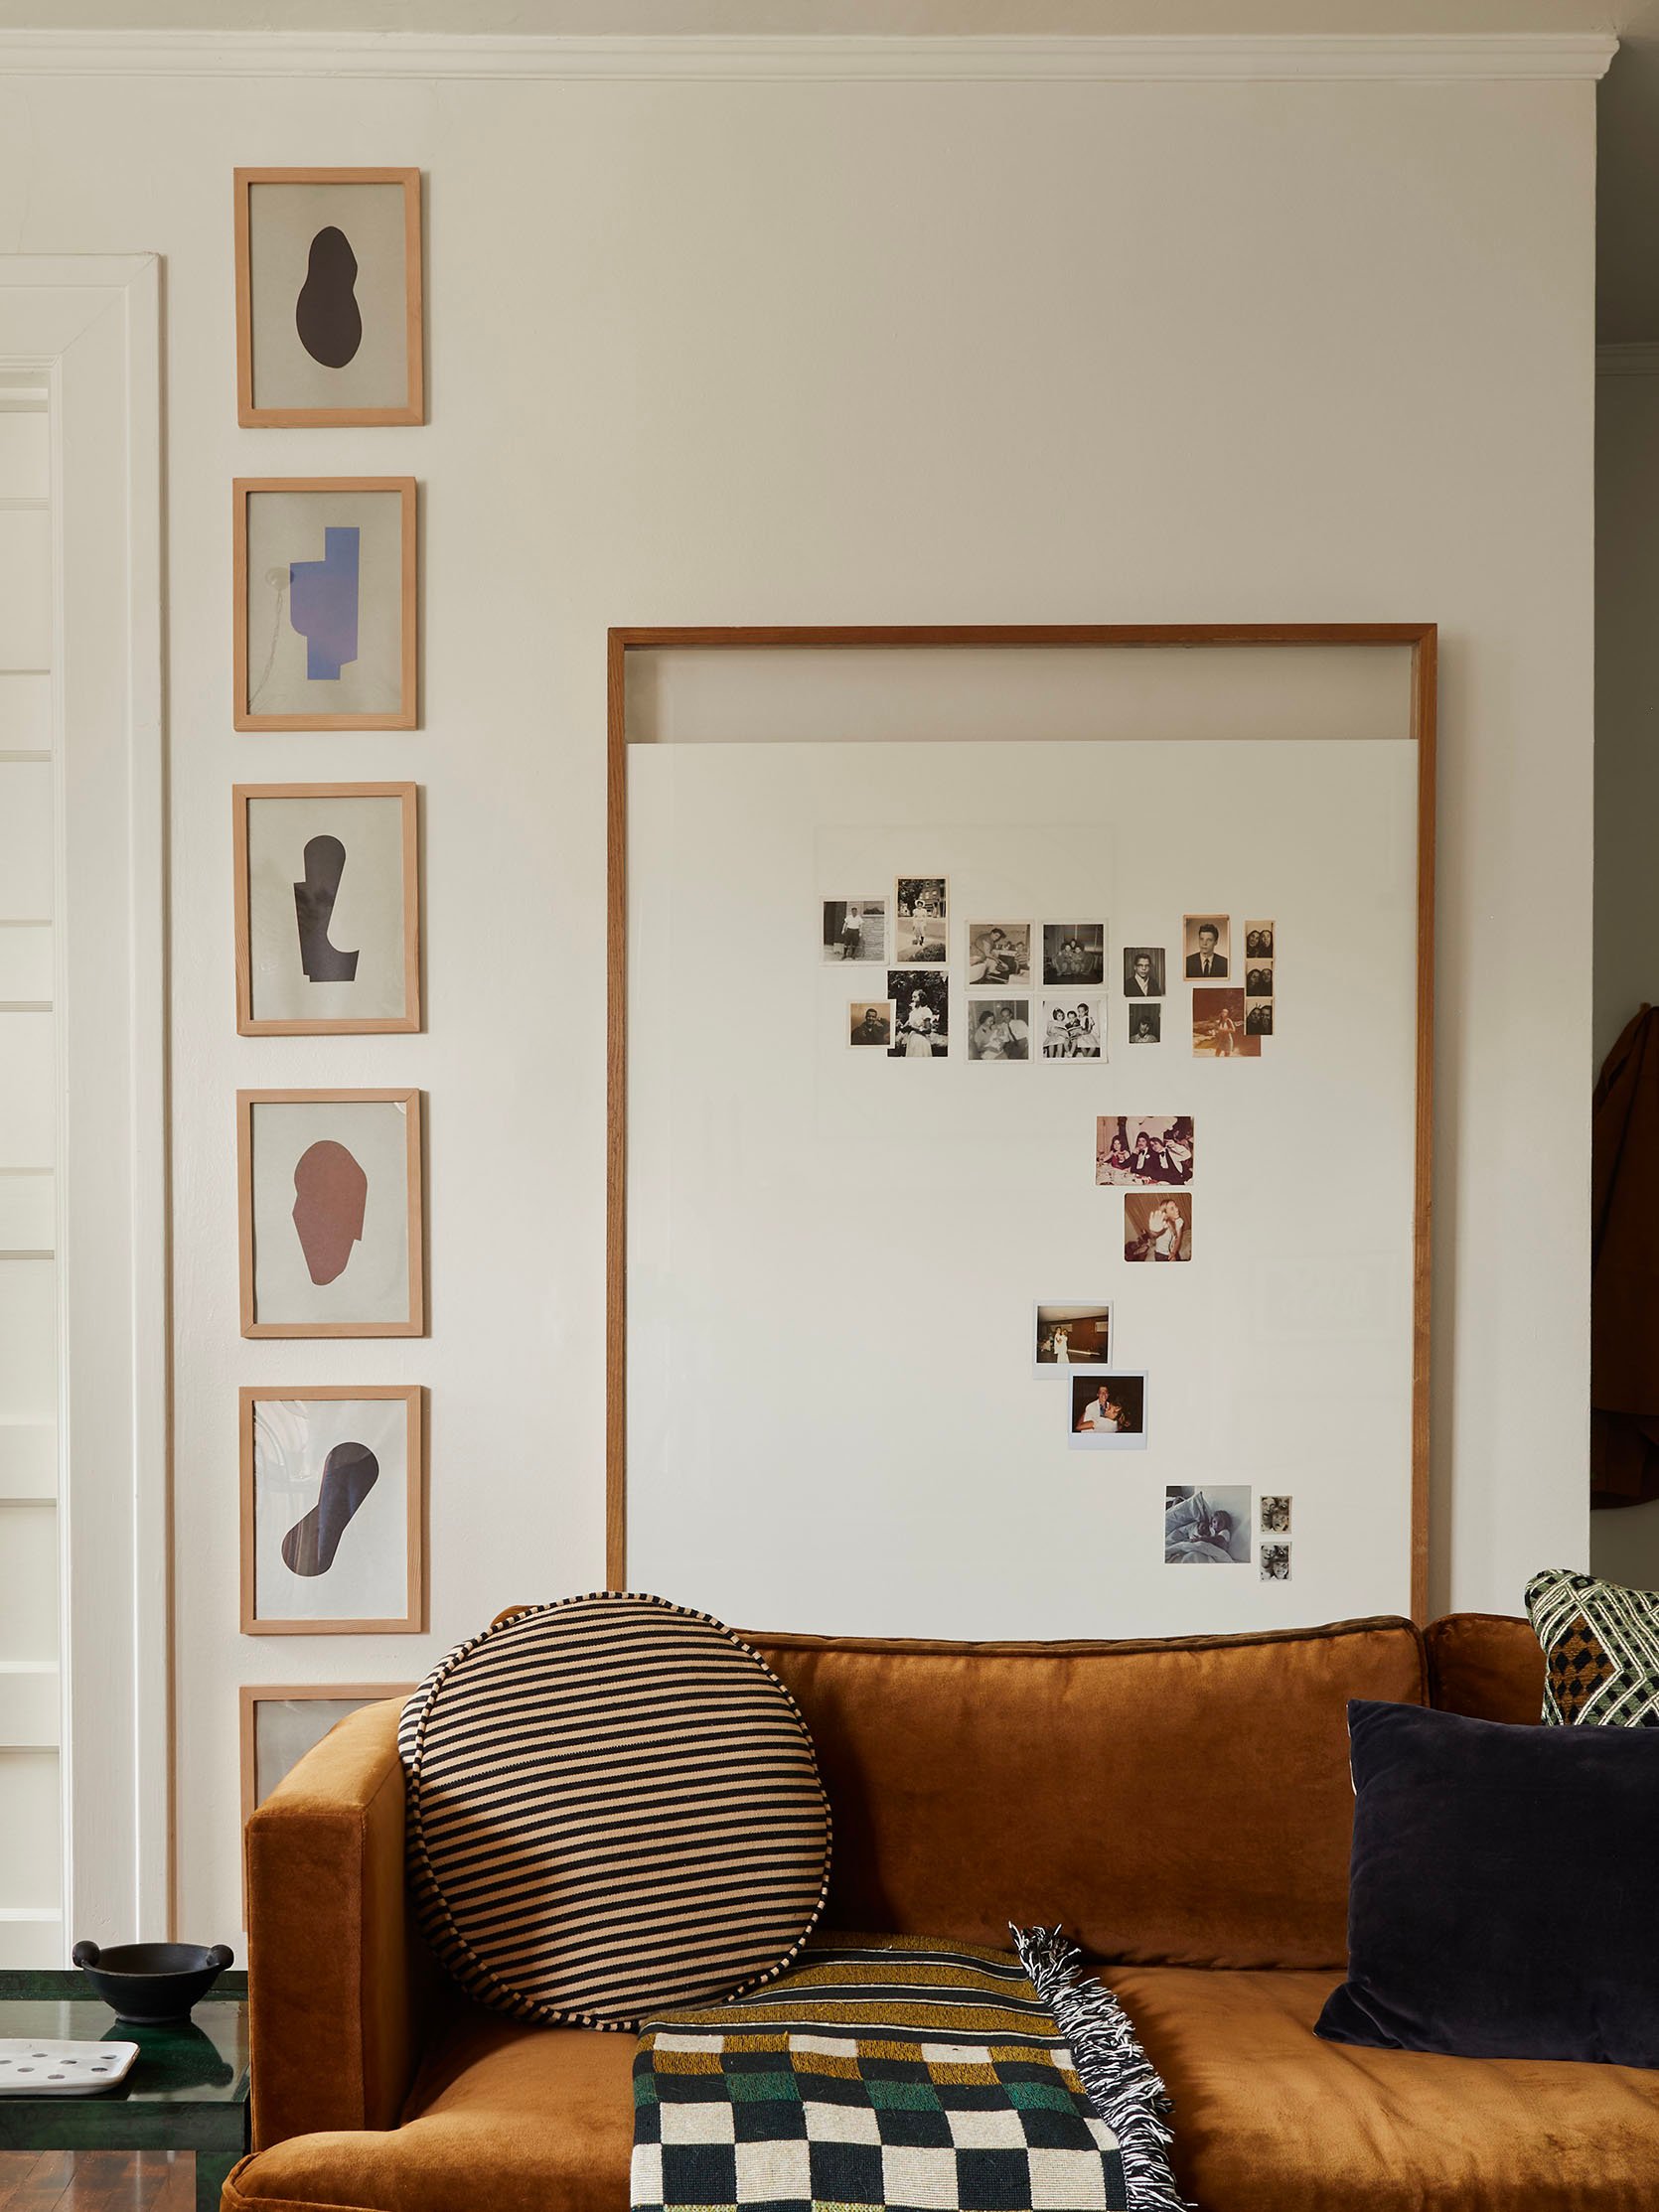
Finding “Colorful” Art
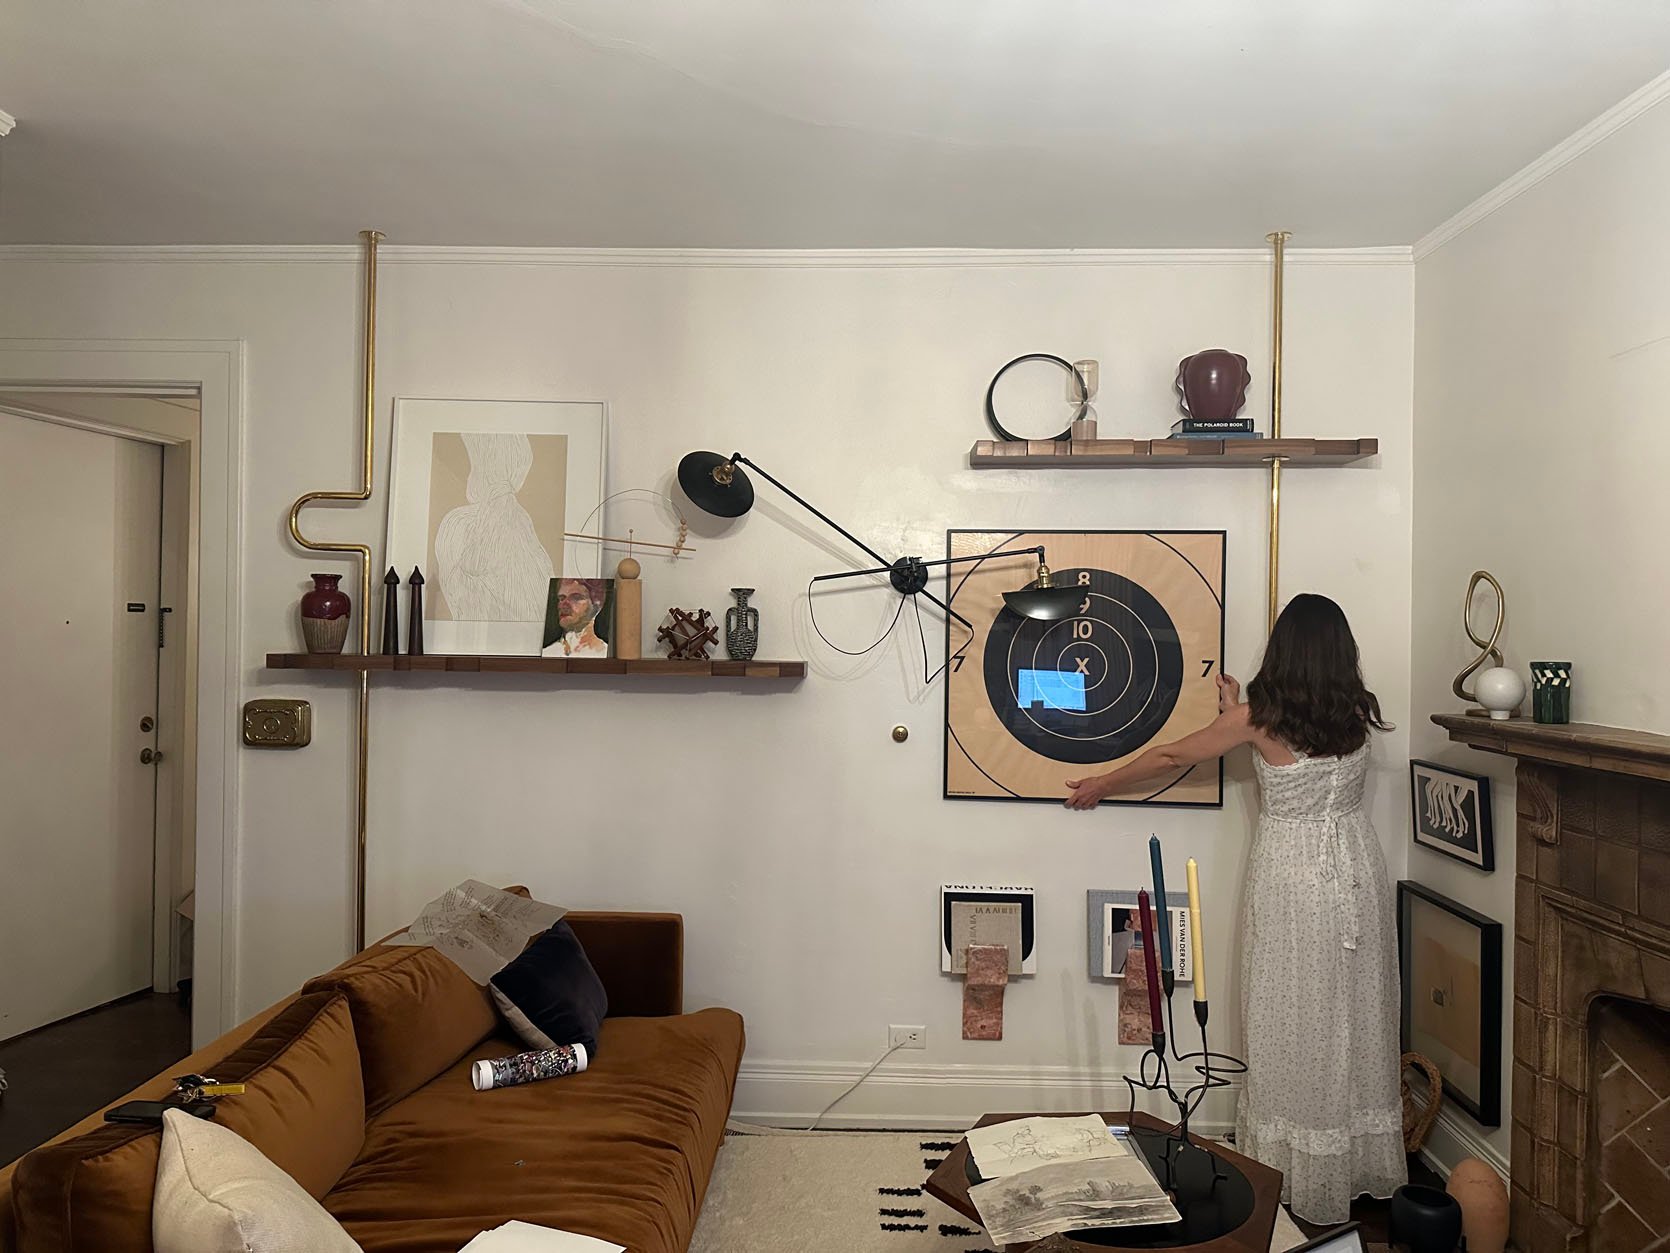

Then came choosing art. Aside from those dreamy pink stone wall-mounted book holders, I didn’t have a solid art plan. I was playing with what I had, and nothing was looking how I wanted. That large graphic piece was meant to go over the fireplace, but I decided to try it on this wall. I liked it on the right, but the black part made one of the lamp shades nearly disappear (Julie thankfully pointed that out), and I didn’t love it enough on the left to then have to find a new piece for above the fireplace. (Also, thank you to my dear friend Franchesca for being the best art holder.) Designing is better (and easier) when you have friends.
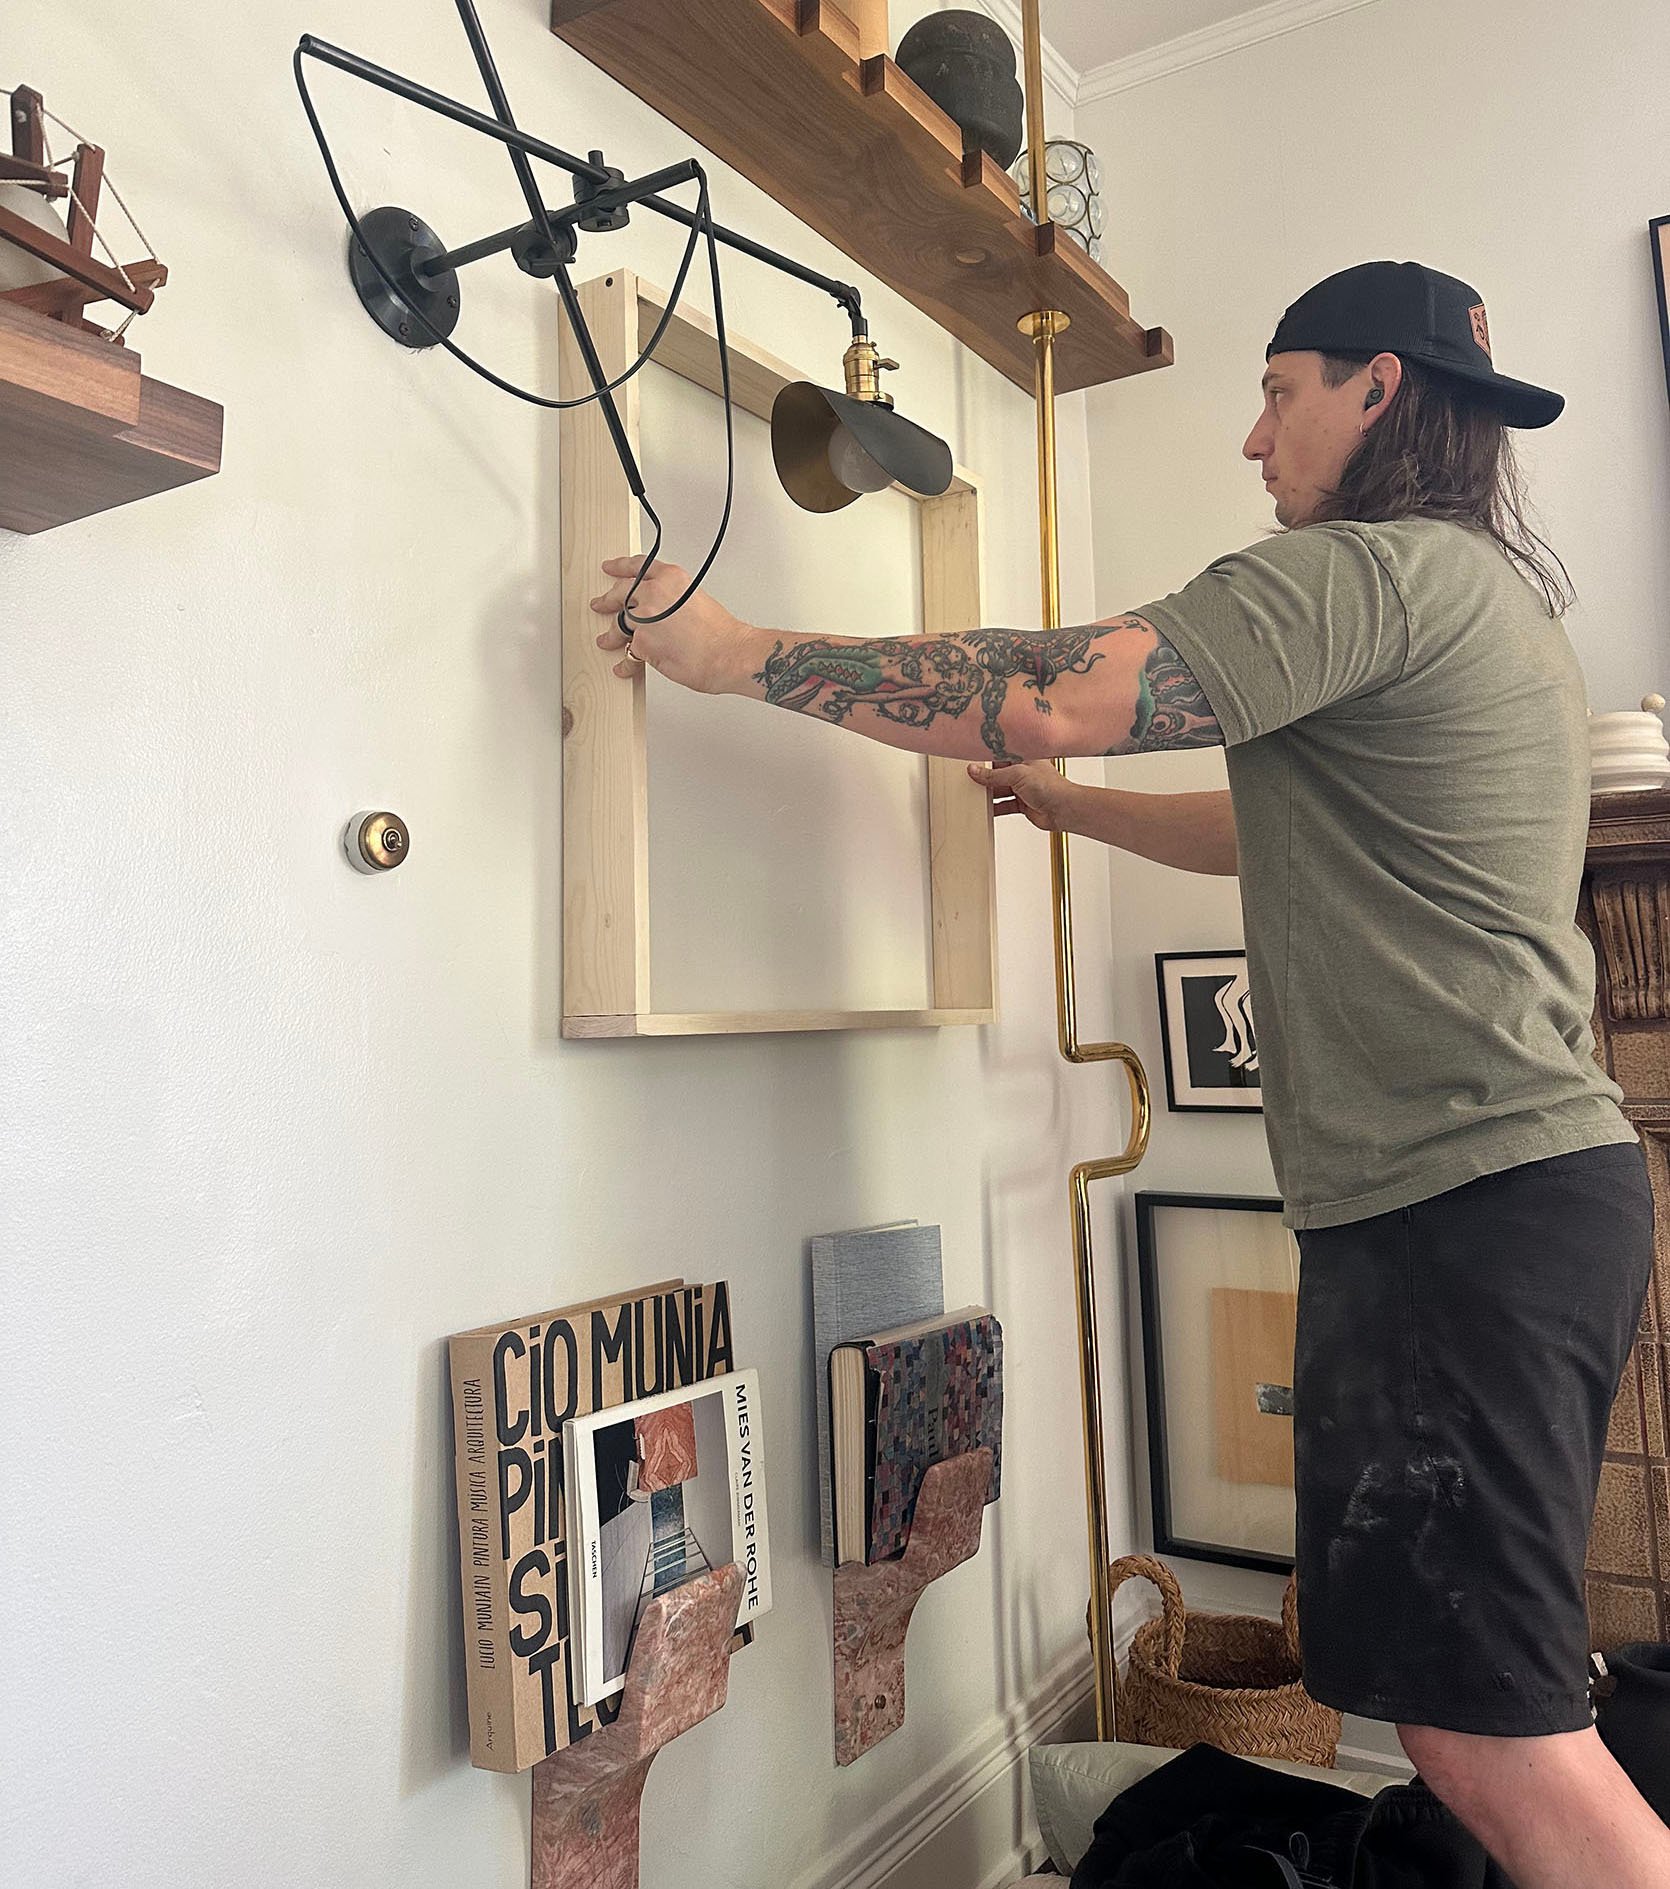
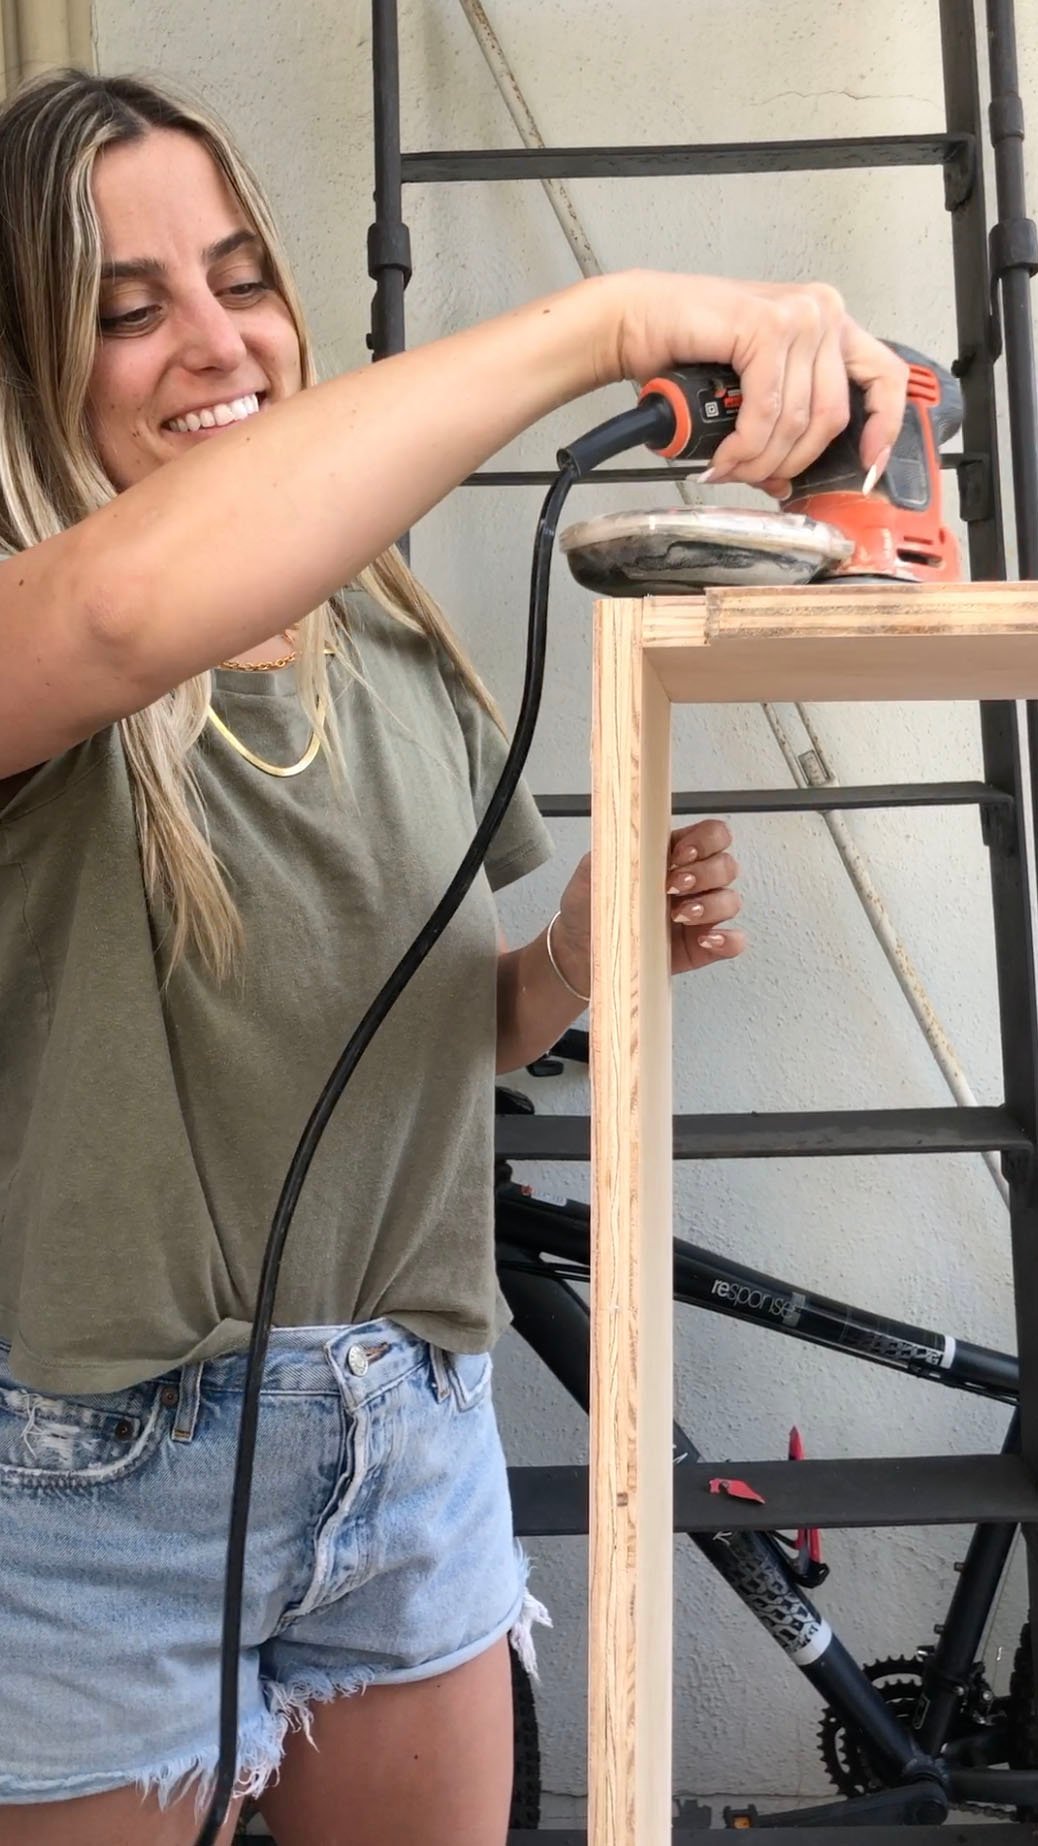
Meet my brother, Morgan, and my next victim, whom I conned into helping me with a DIY project. If you read The Link Up, then you may remember I had an emergency ovarian torsion surgery earlier this year (see ya, right fallopian tube!). 0/10, Do not recommend. However, a very sweet silver lining was that my brother immediately flew down to take care of me for a few days. For an older sister to have her little brother wait on them hand and foot…10000/10! Highly recommend. One of the projects that I had been wanting to do was build a frame for a DIY art piece to fill in that right side. But guess who couldn’t lift over 10 lbs for a month and had a brother who’s very handy at her disposal? ME. So when he asked if there was anything I needed help with, Mo Man was going to be building me my frame.
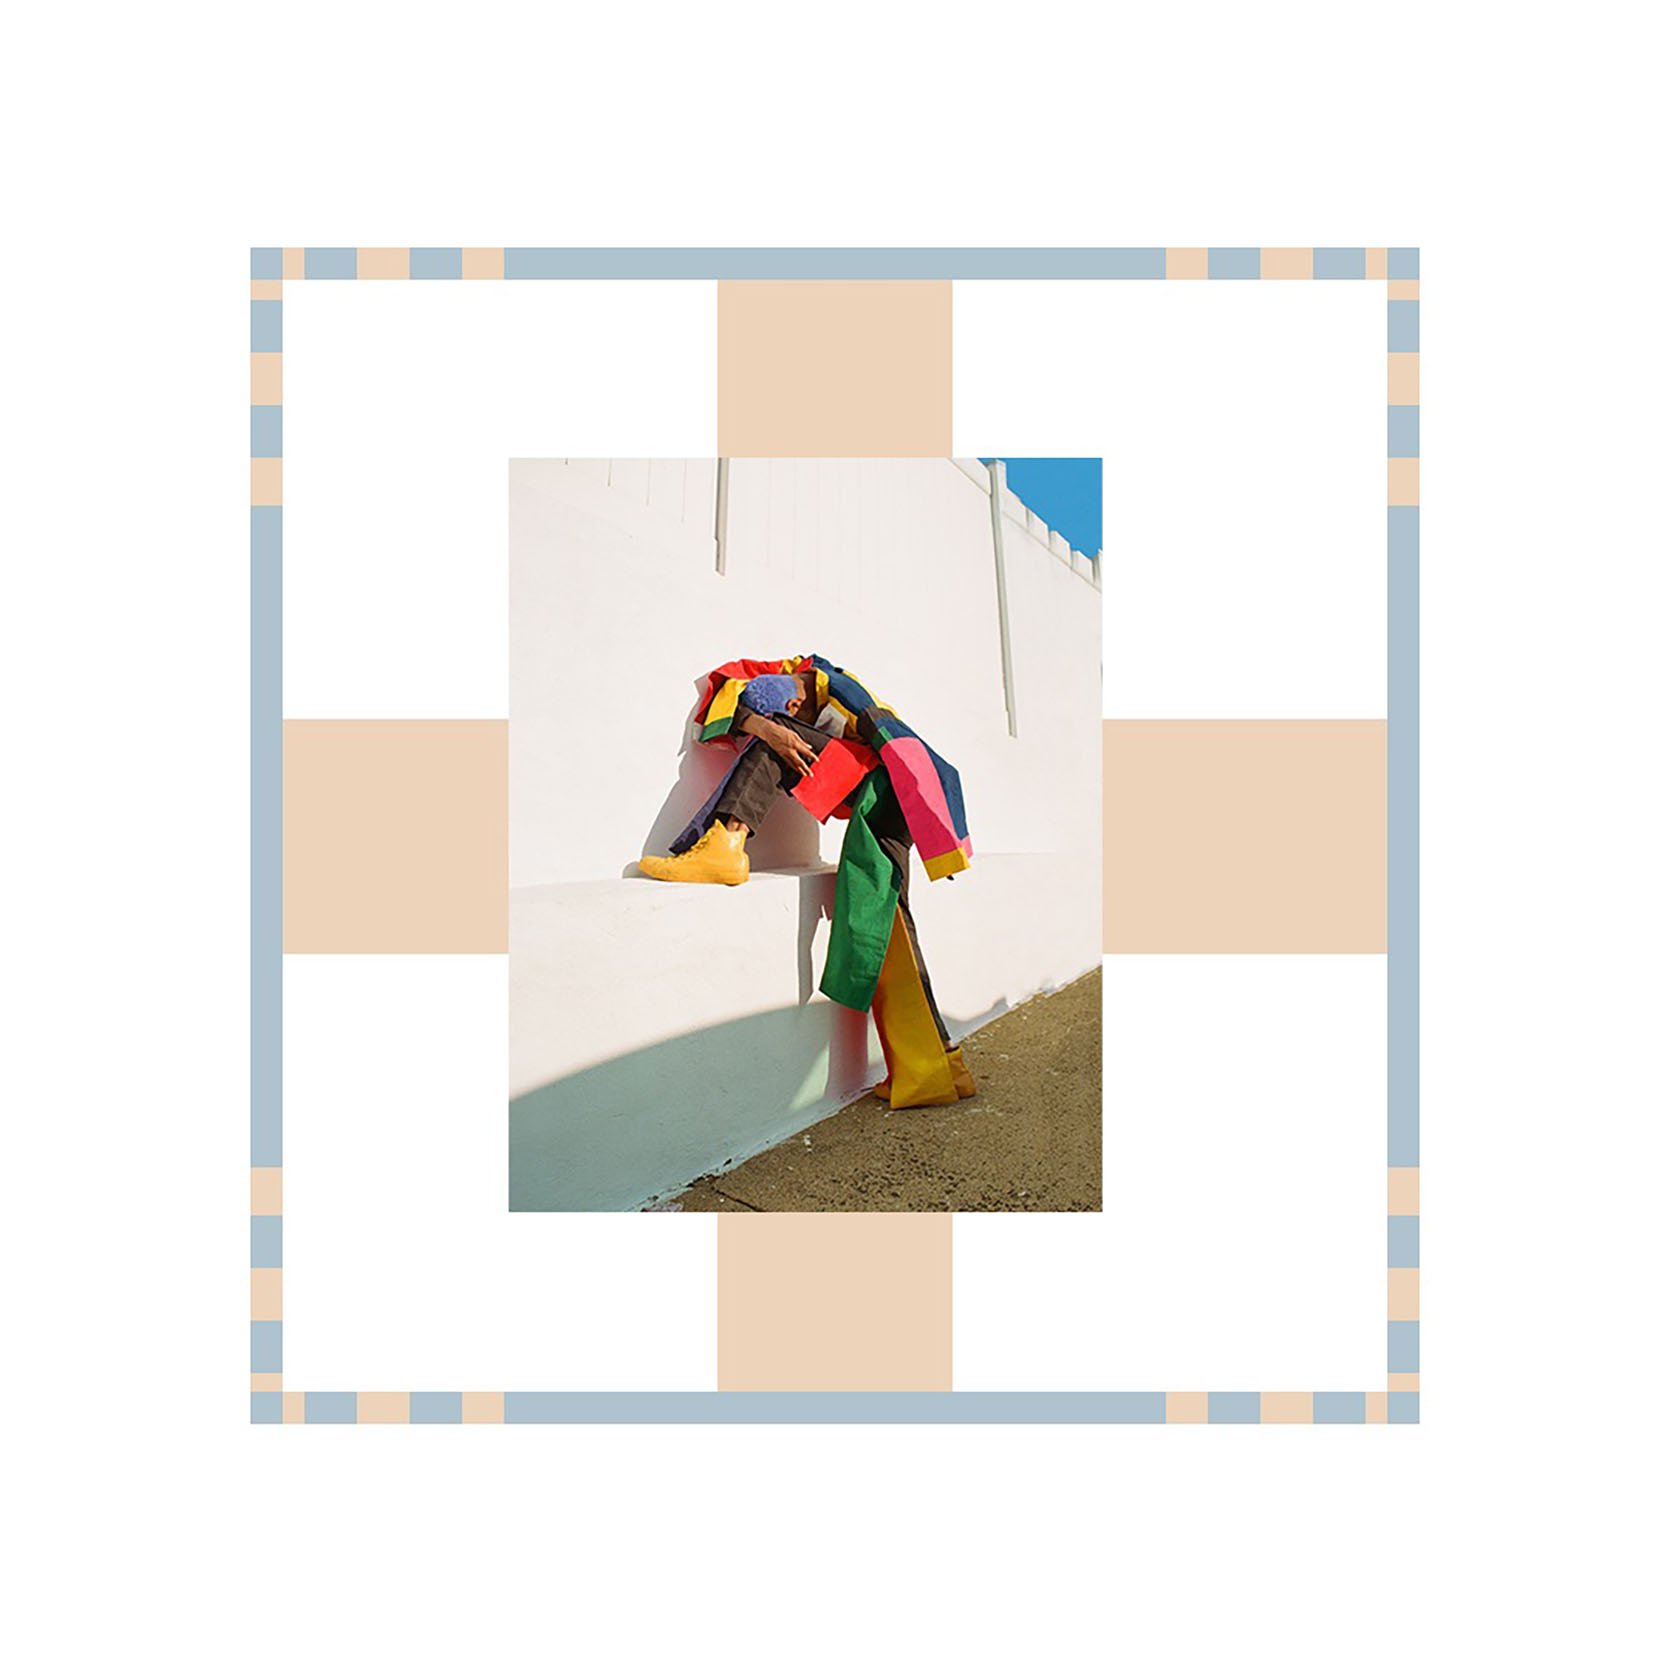
My goal with this piece of art was to add more color to the space. Almost all of my art is black, white, tan, brown, gray, you get it. However, I have this amazing, boldly colored photo print by Arielle Bobb-Willis that I really wanted to display. I bought the paint for the frame, taped out my pattern, and planned to mix the perfect blue. Let’s just say I couldn’t really get the color I wanted, and as I was looking at the frame and even the photo print, it just didn’t feel like a perfect fit for this room. I waited to fully scrap the idea until I found the right piece, and boy, did I. I can’t wait to tell you that story. That gorgeous photo print will find a home in the future.
The Nesting Coffee Table
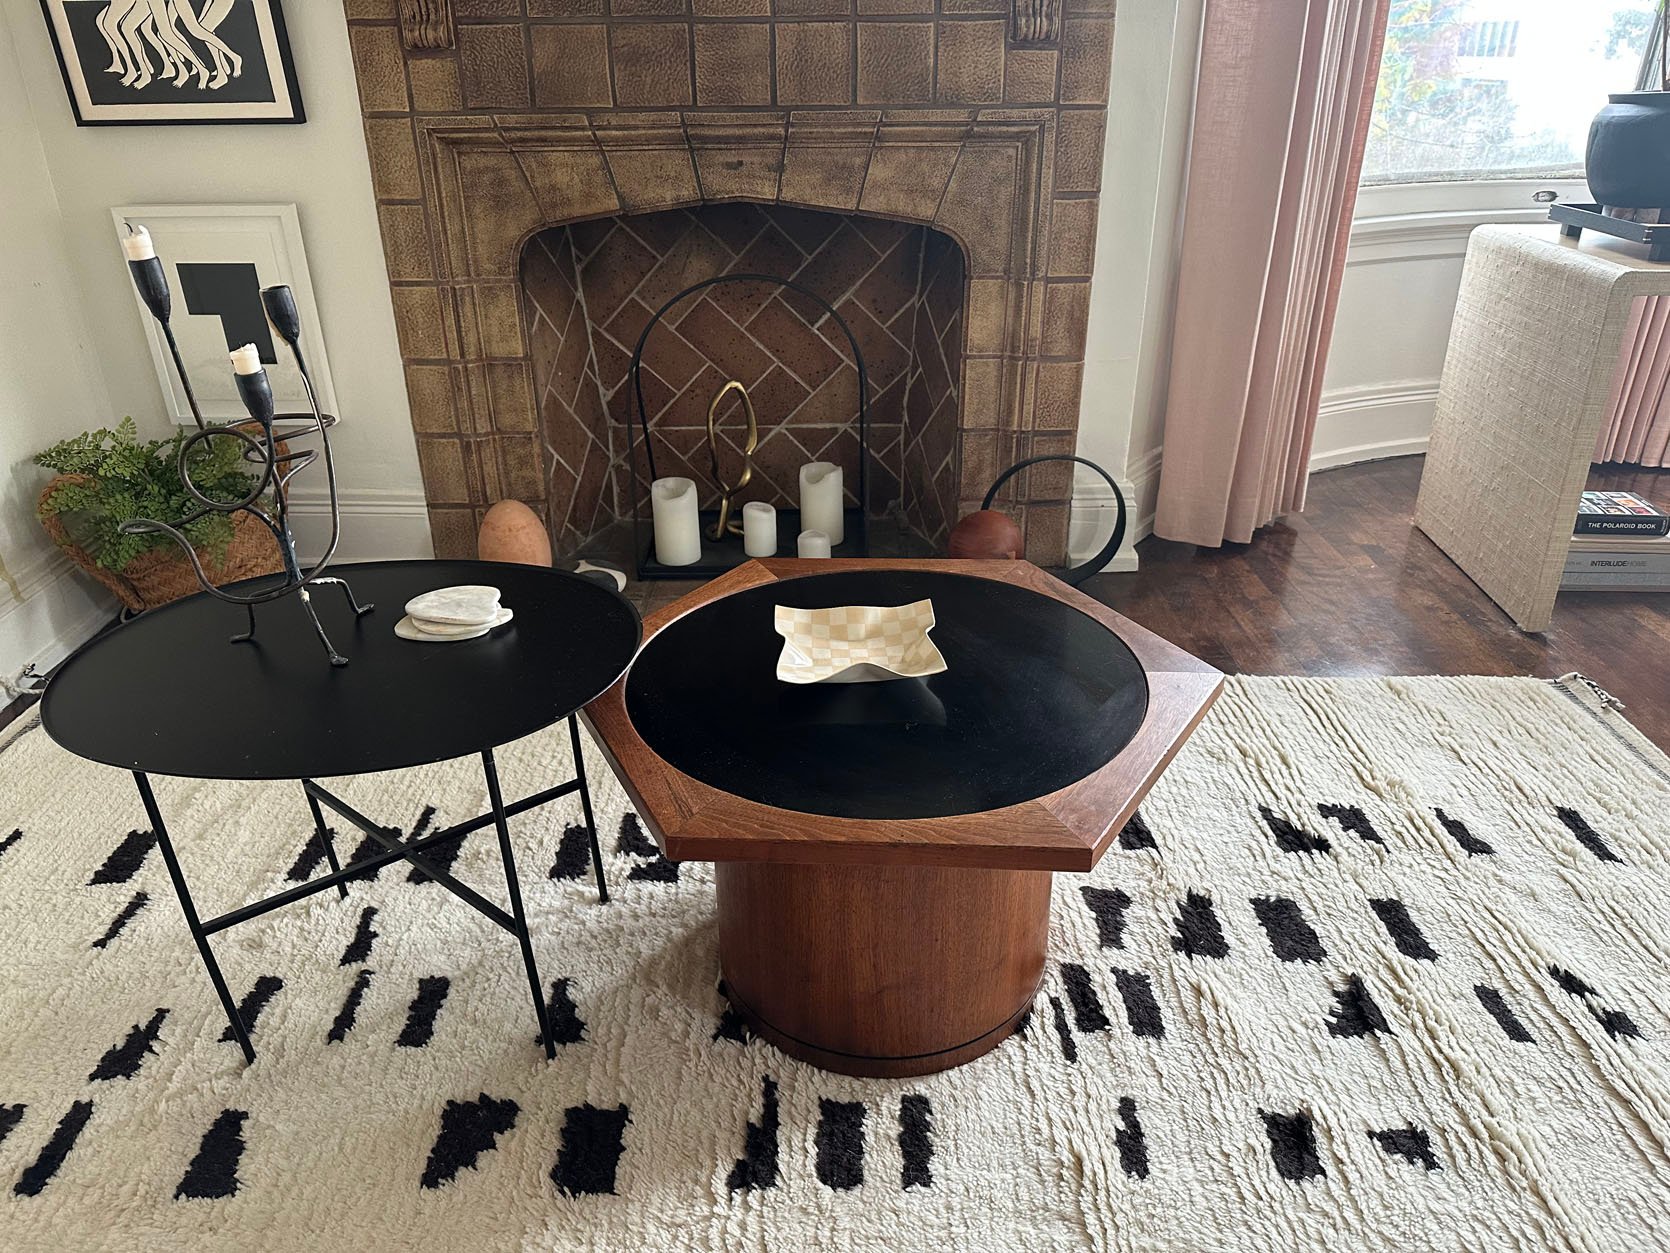
Since we’re on the topic of DIYs. Here’s a little story about my mismatched nesting coffee tables. That black one is from my last living room, and while I love it, it didn’t look right. But I had already purchased that incredible vintage one that I’m fairly certain I got a great deal on. I bought it for $375 (with Caitlin as my “travel/pickup in an unfamiliar area buddy”), but then saw the same one for at least $600 online. A win is a win! But that meant I needed a shorter nesting friend because just the vintage one would have been too small for the sofa on its own.
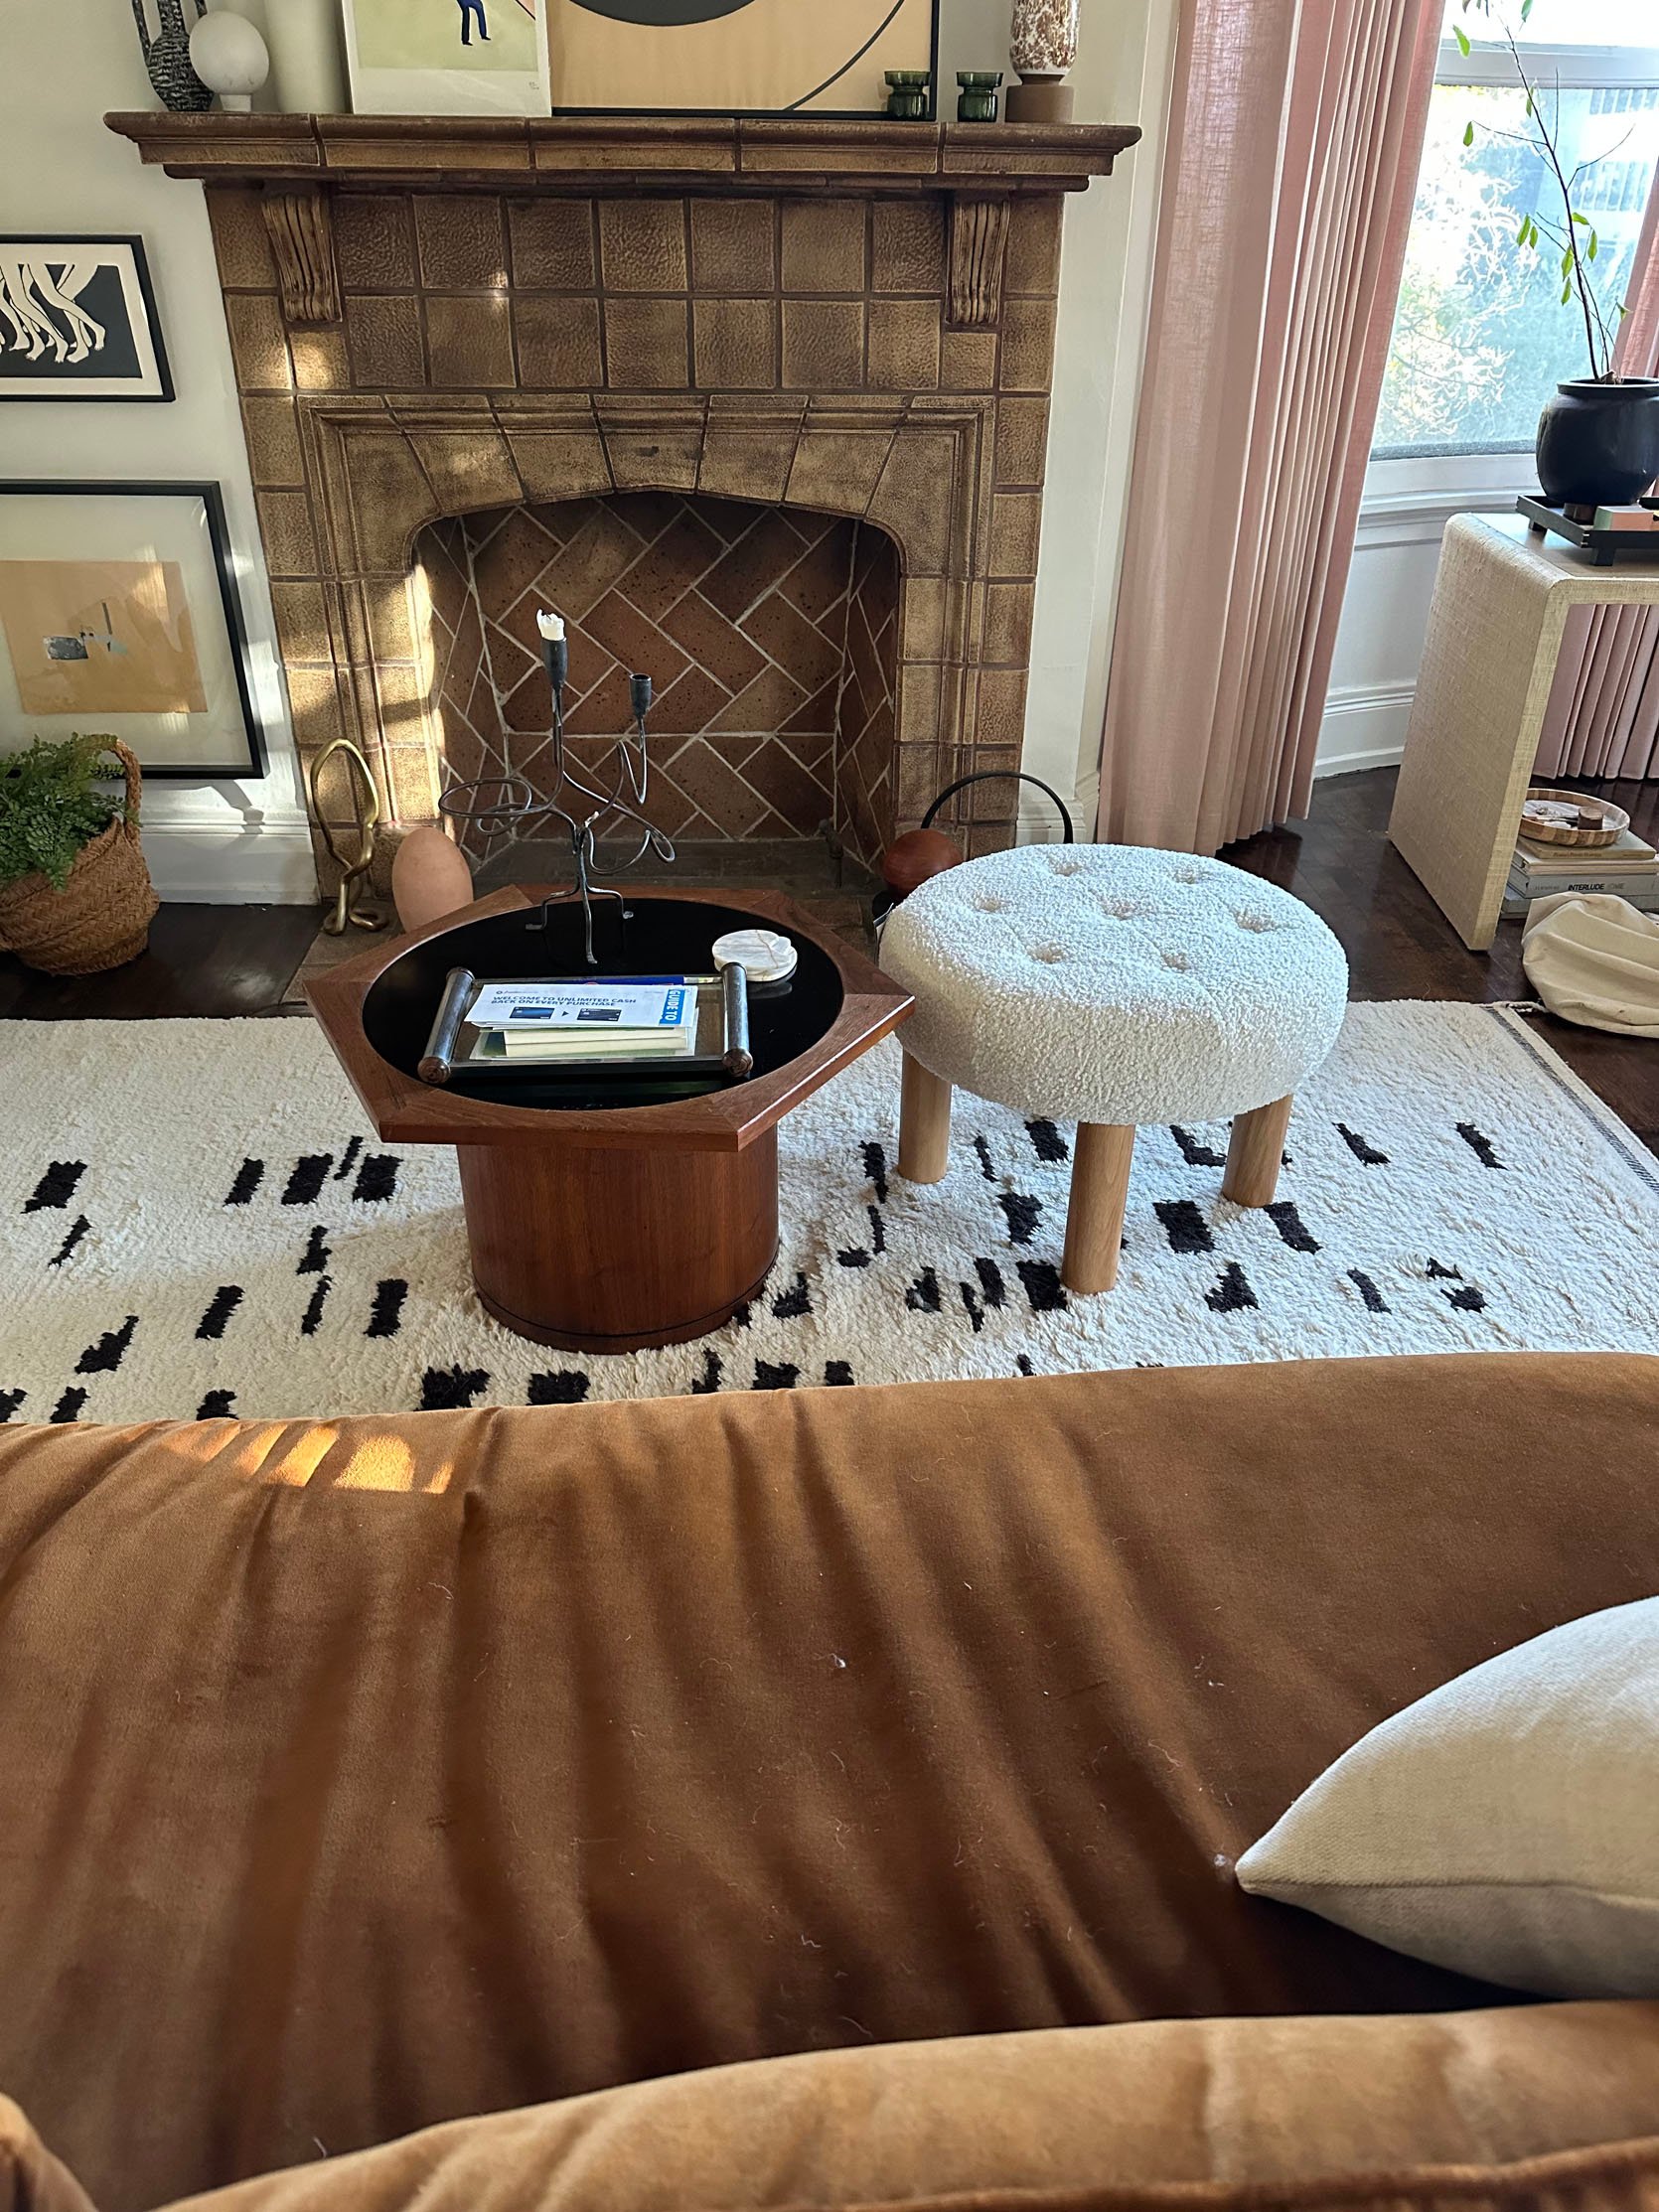
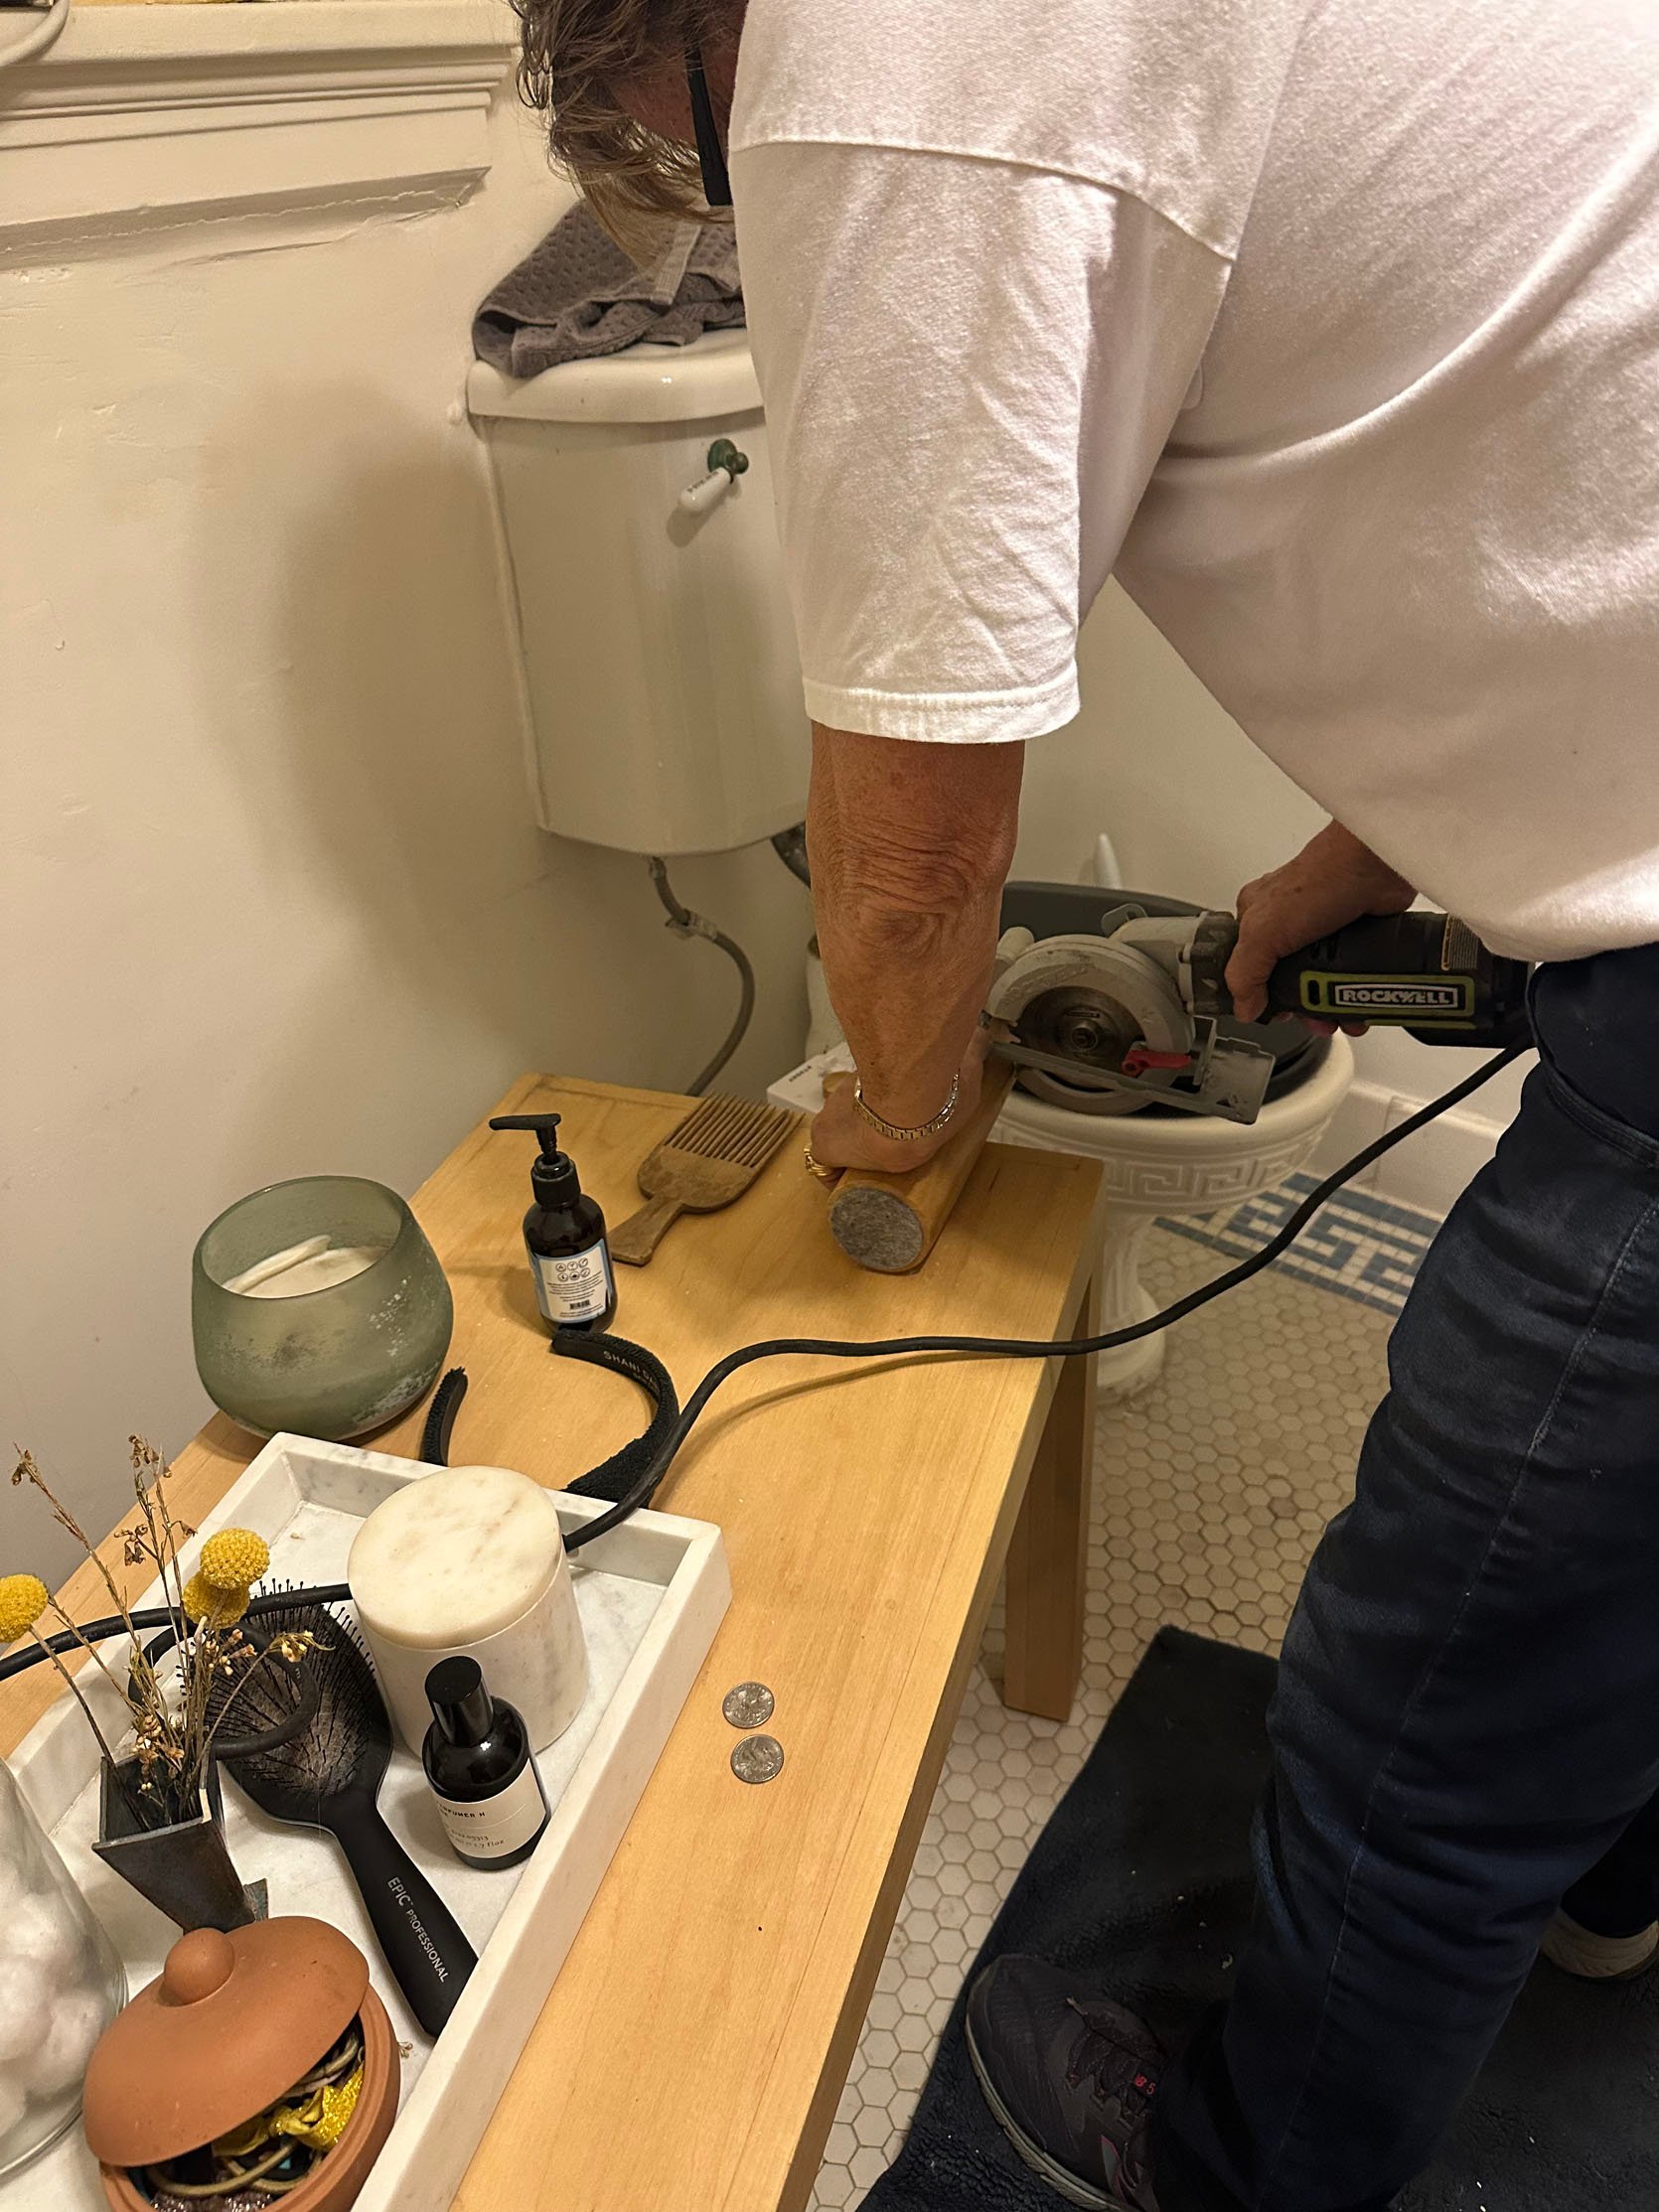
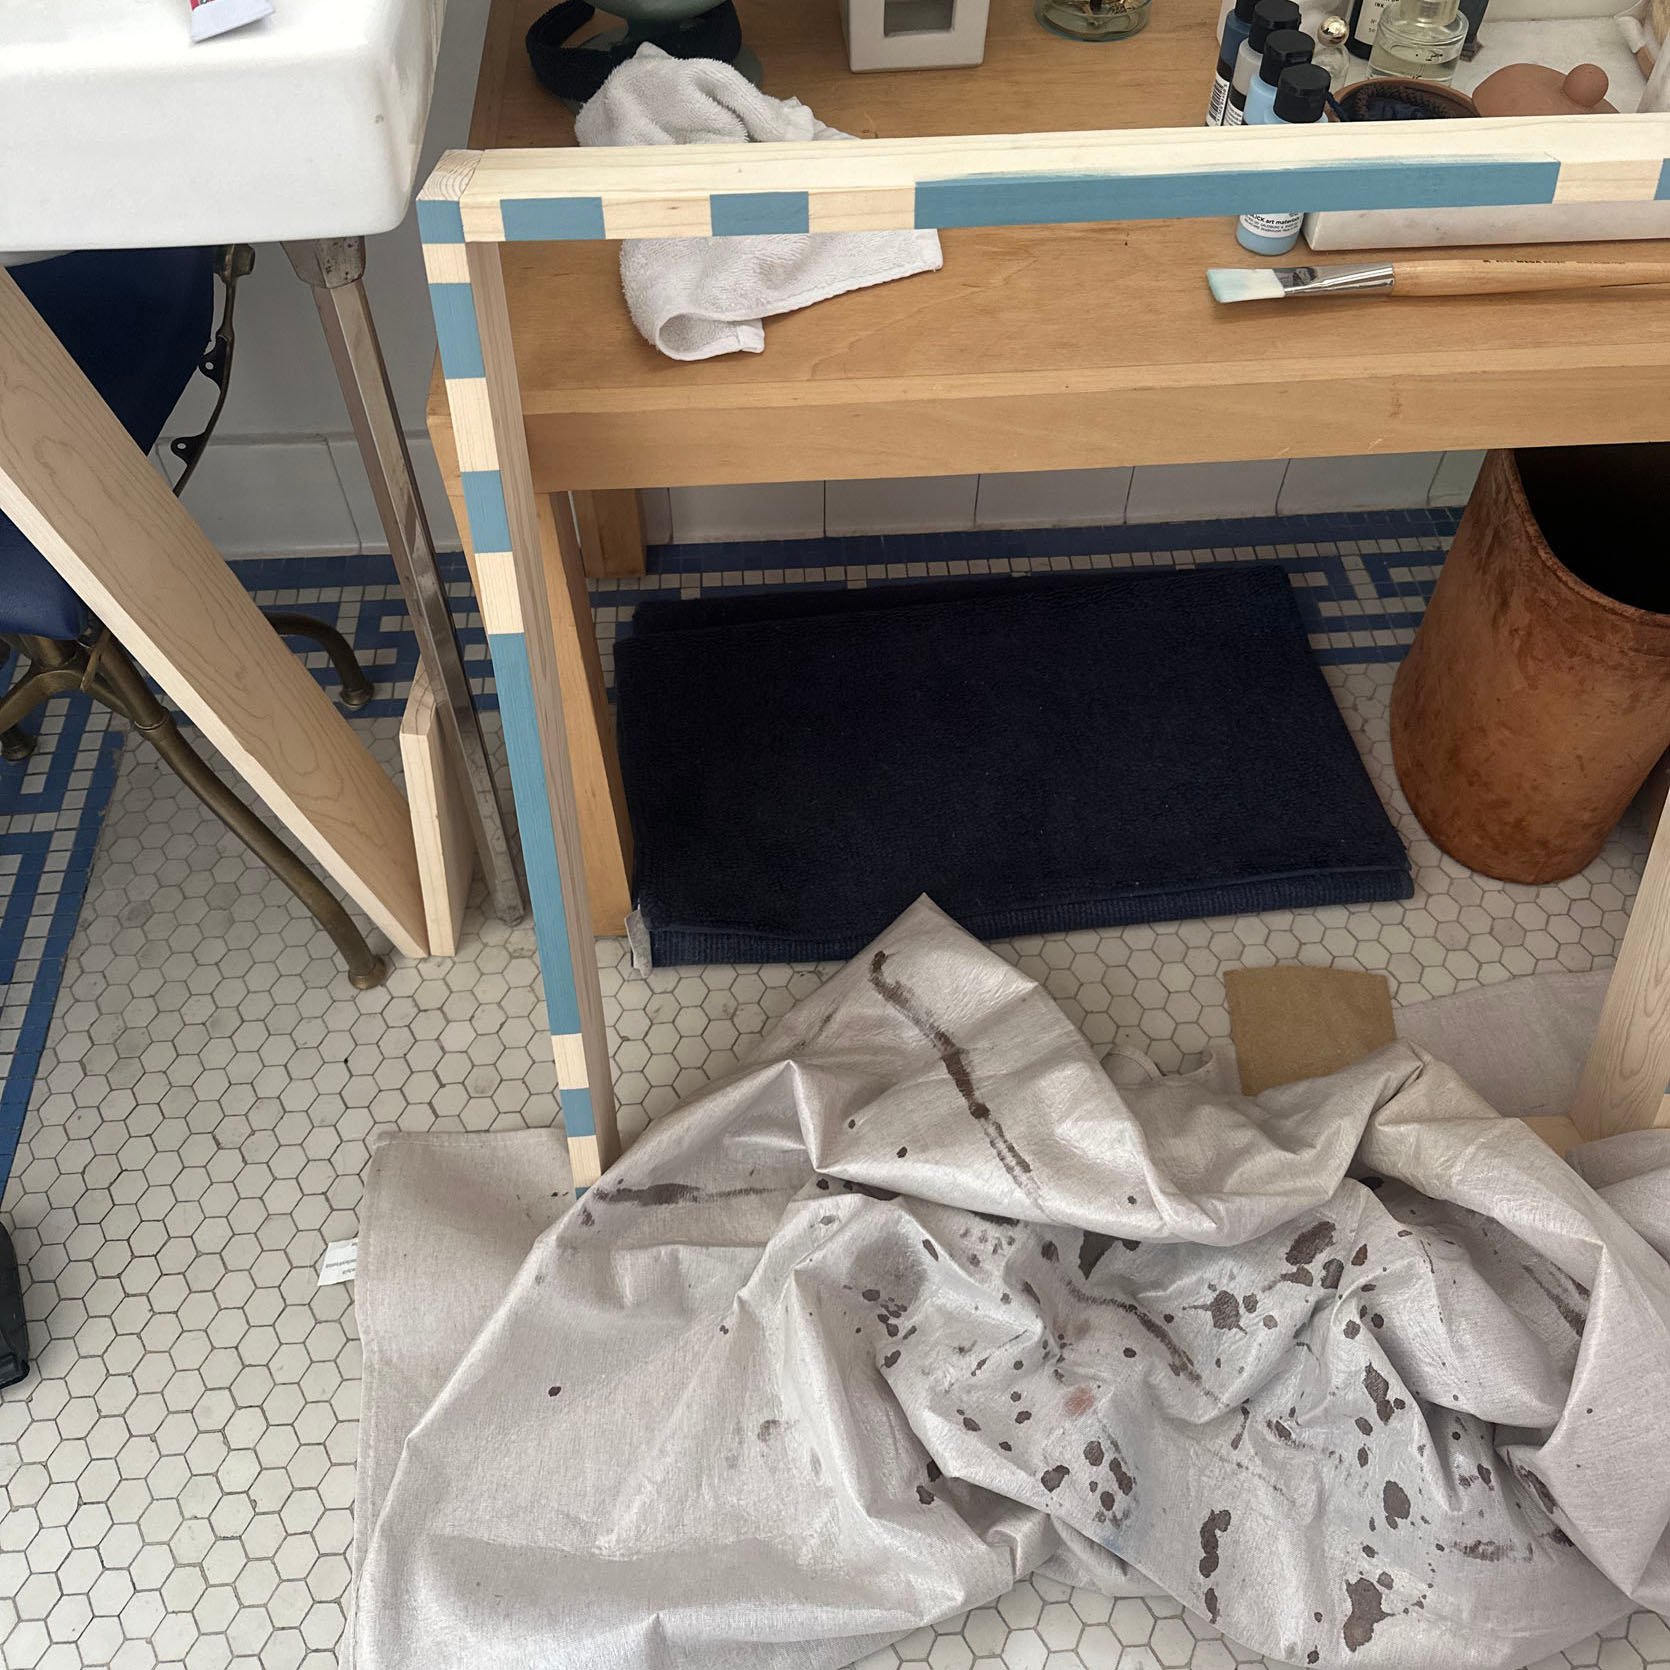
Then last year, I saw this ottoman on Target’s website and thought it could work. I knew it was too tall from the online description, so I went to potentially buy it in person and check to see if dear ole dad (or me) could chop off a few inches from the wooden legs. Well, as you can see from the workshop in my bathroom, it was a success.
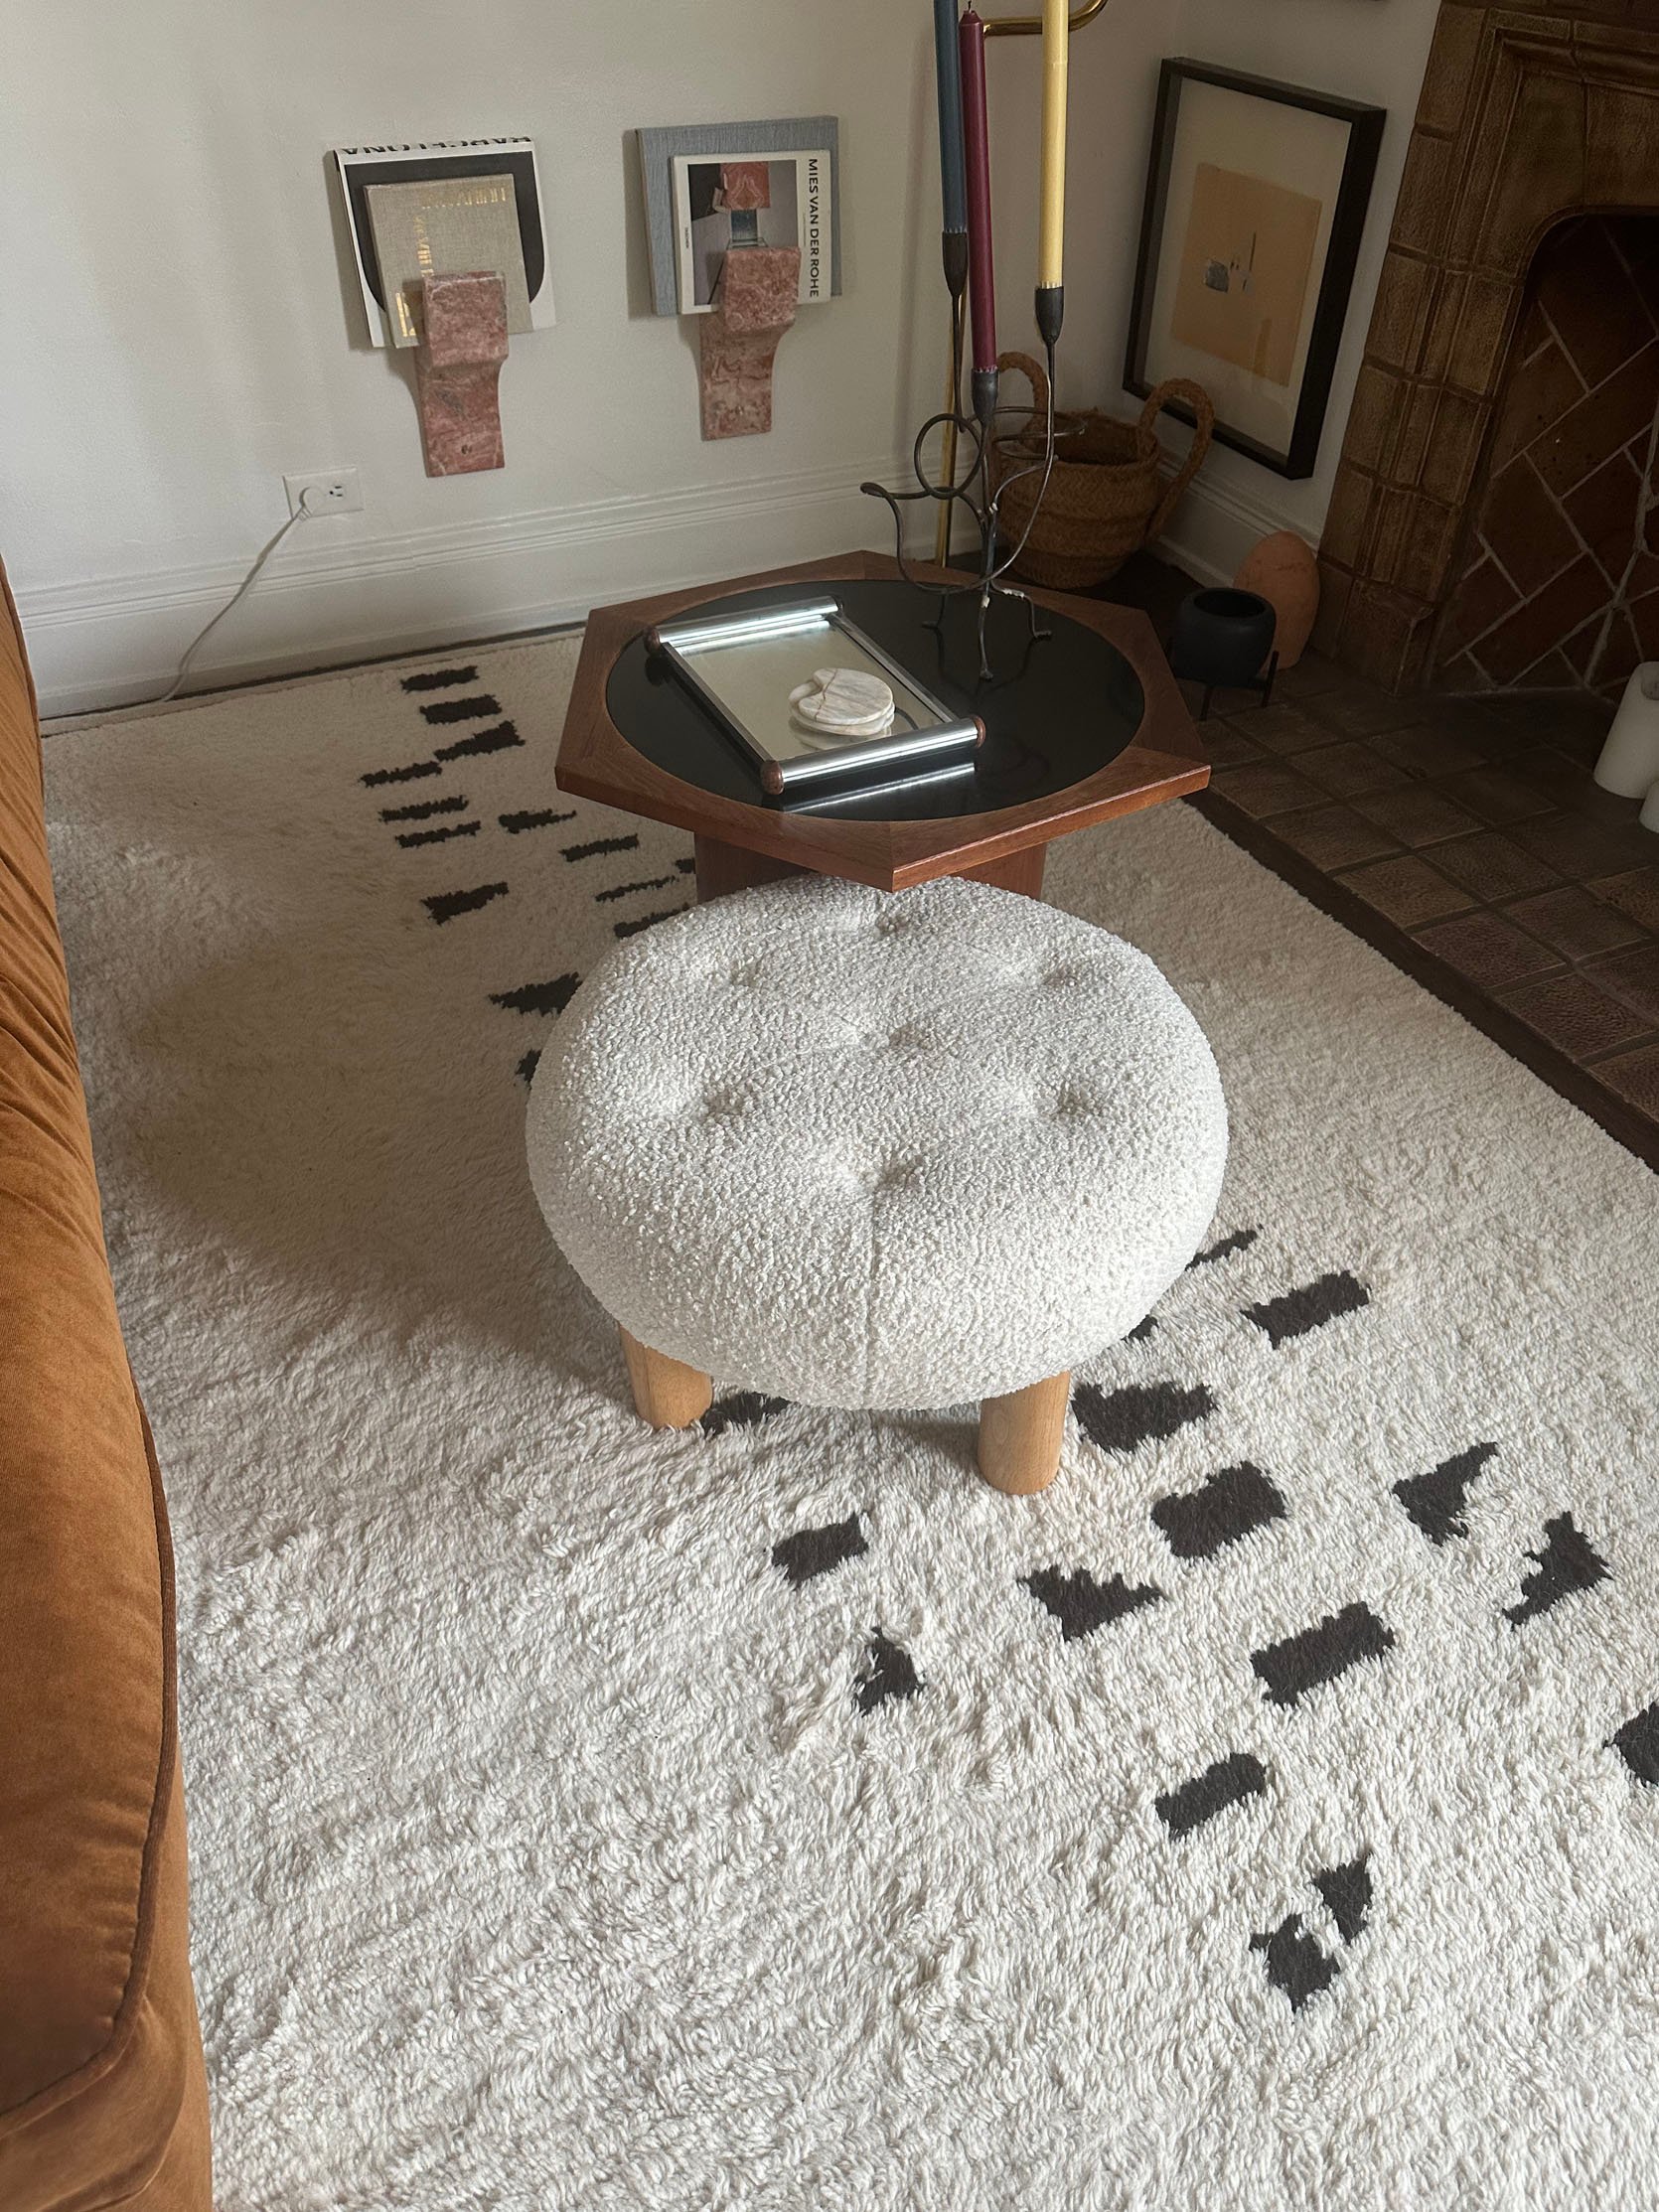
Tada! For $100ish, I was able to get the perfect shape and size I wanted with a little help from some power tools. I considered reupholstering it, but decided against it.
The Media Cabinet Bench Breakdown…The Mental Kind
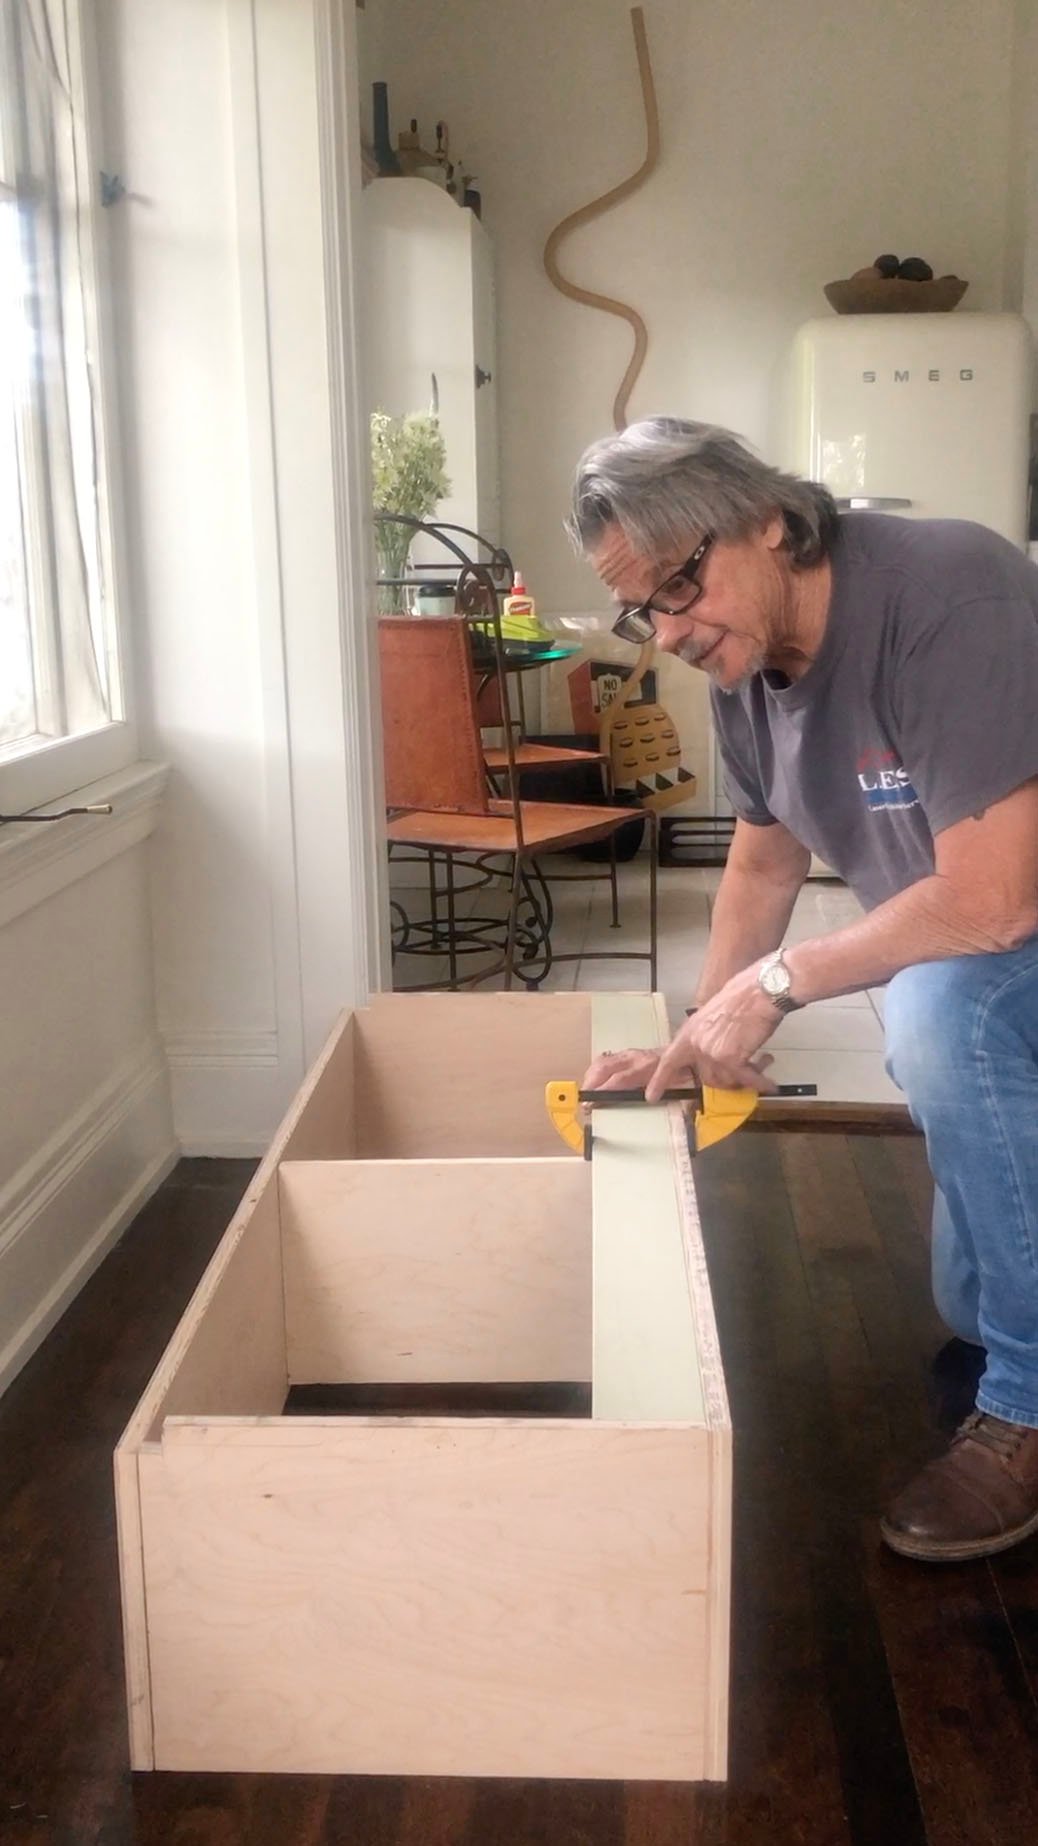
The actual last DIY my dad helped me with was my media cabinet/bench. He built the frame, then I sanded, stained, and almost lost my mind.
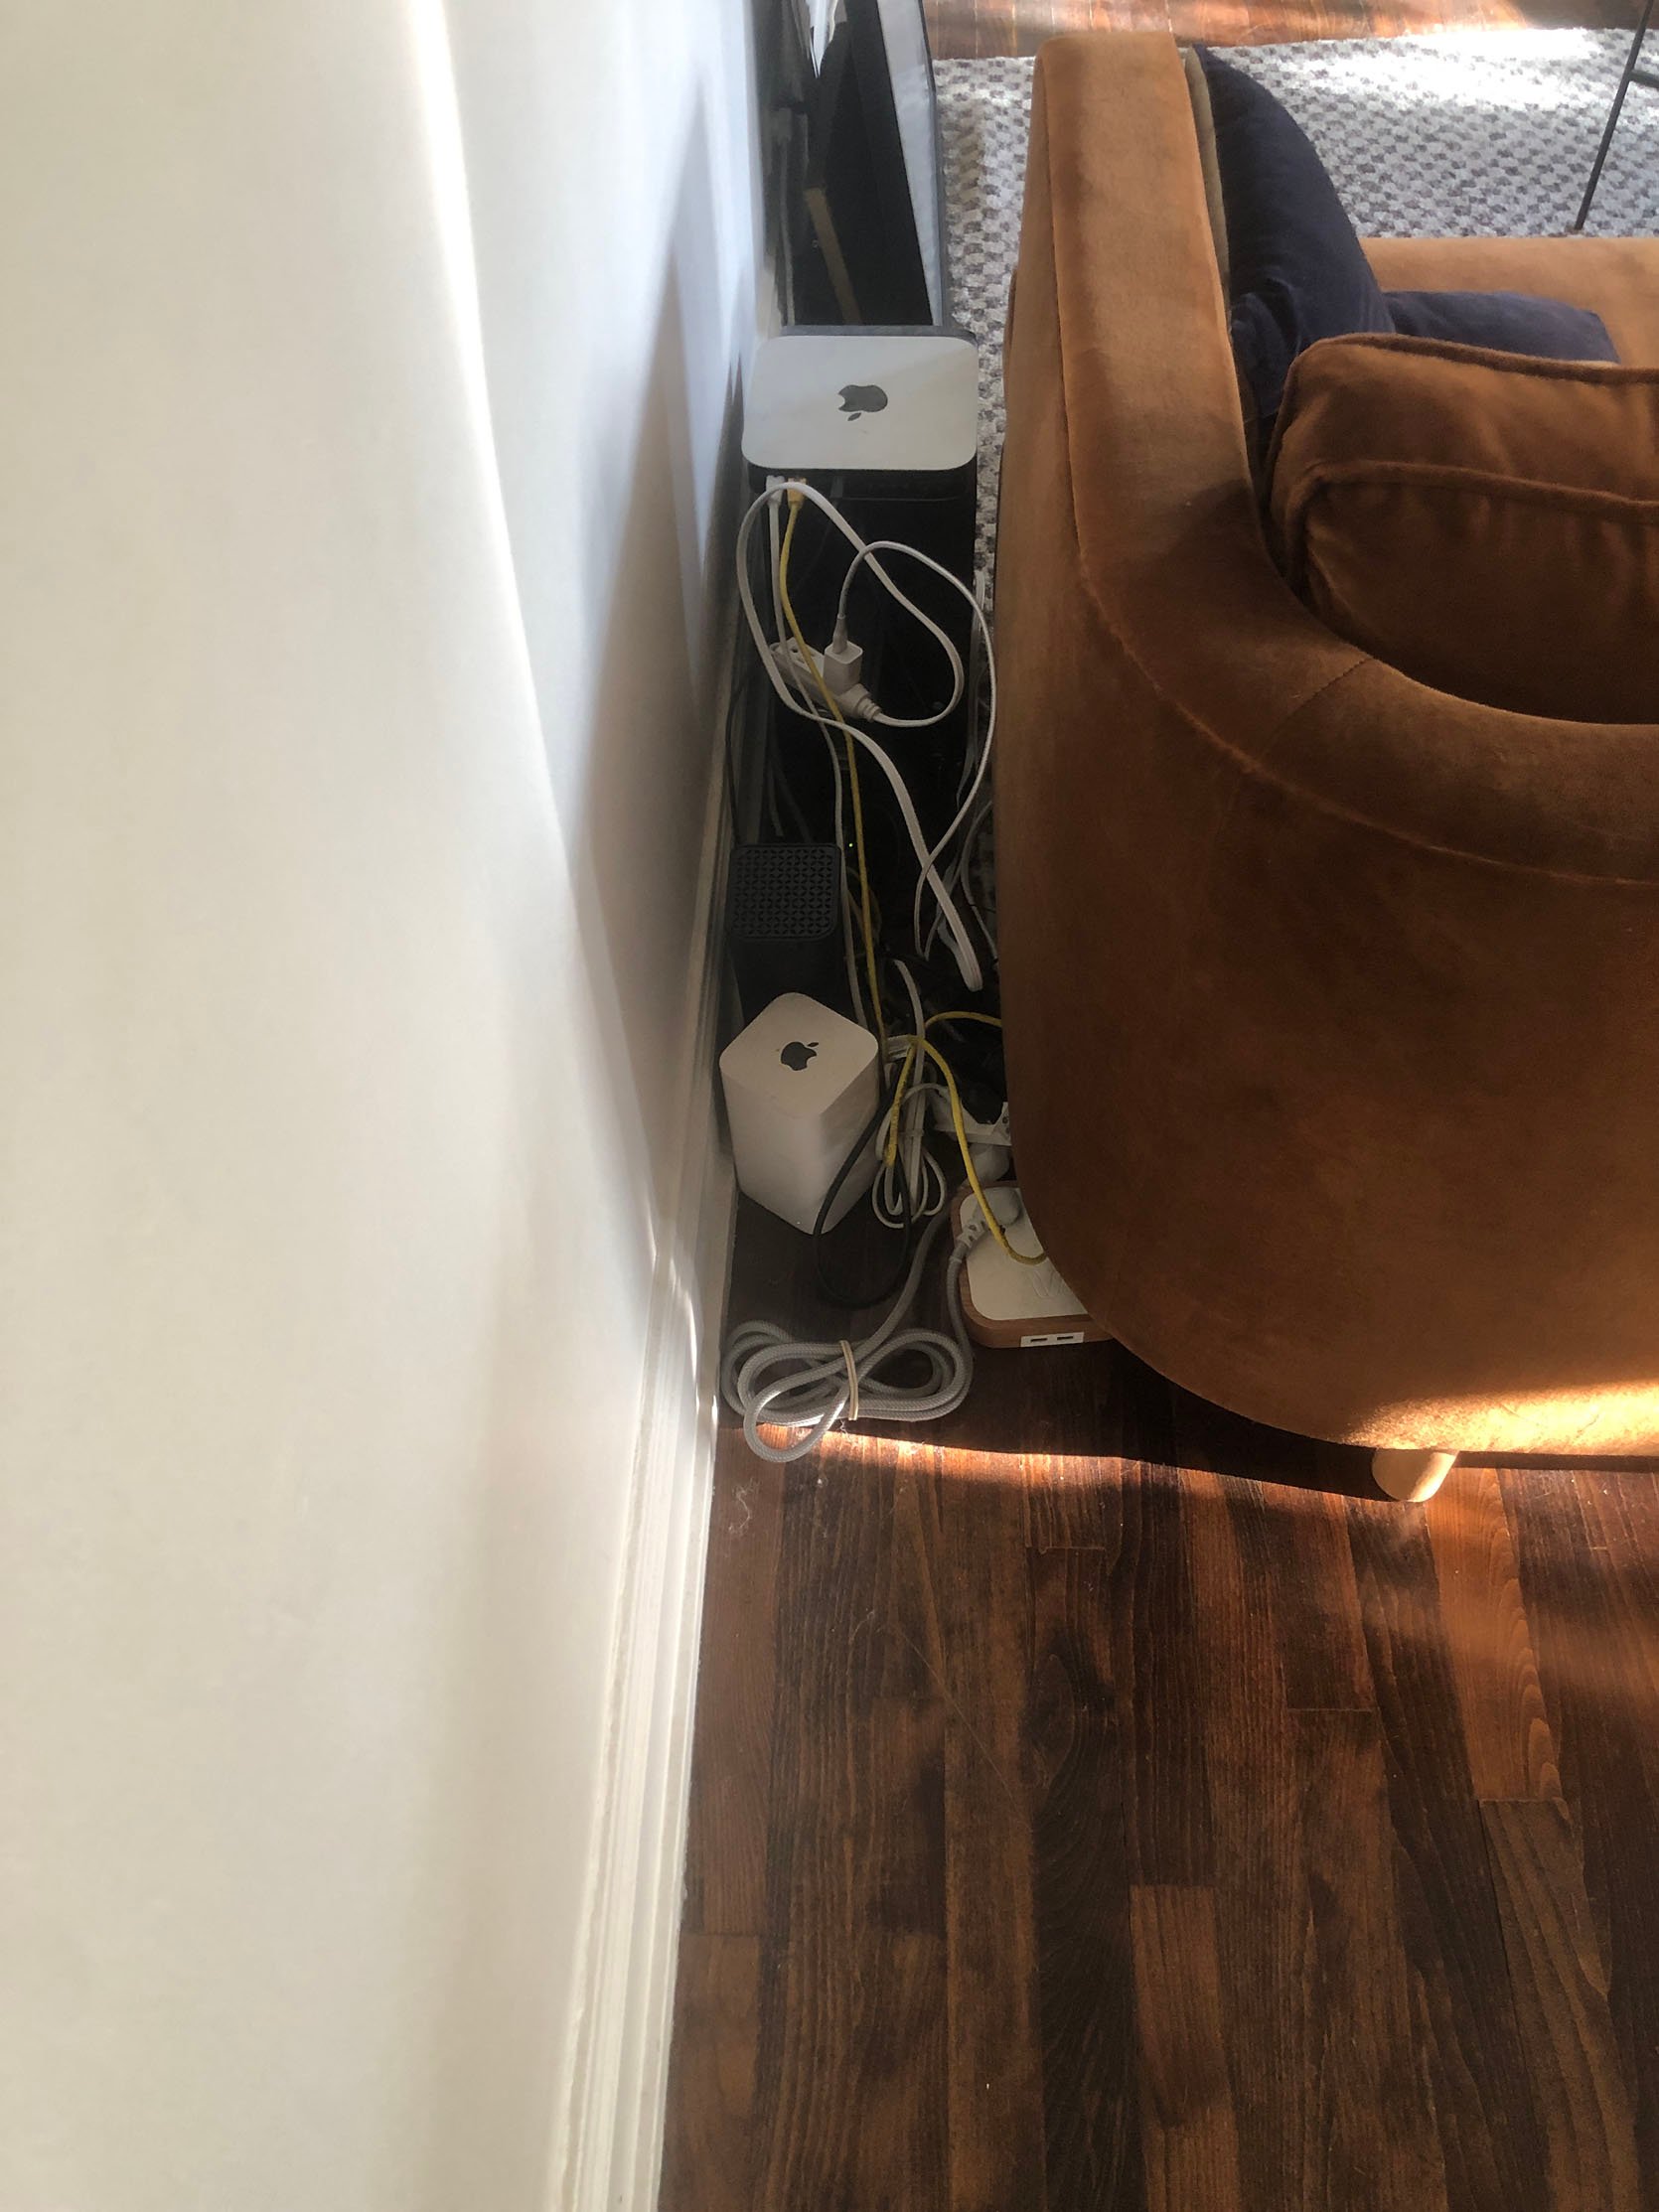
My main reason for the bench was to hide all of these unsightly electronics. I won’t bore you with the whole saga (like me realizing that after the bench was done, I FORGOT to consider that the internet access cable was on the opposite side of the room. Cool, cool, cool.) Don’t worry, there’s a happy ending.
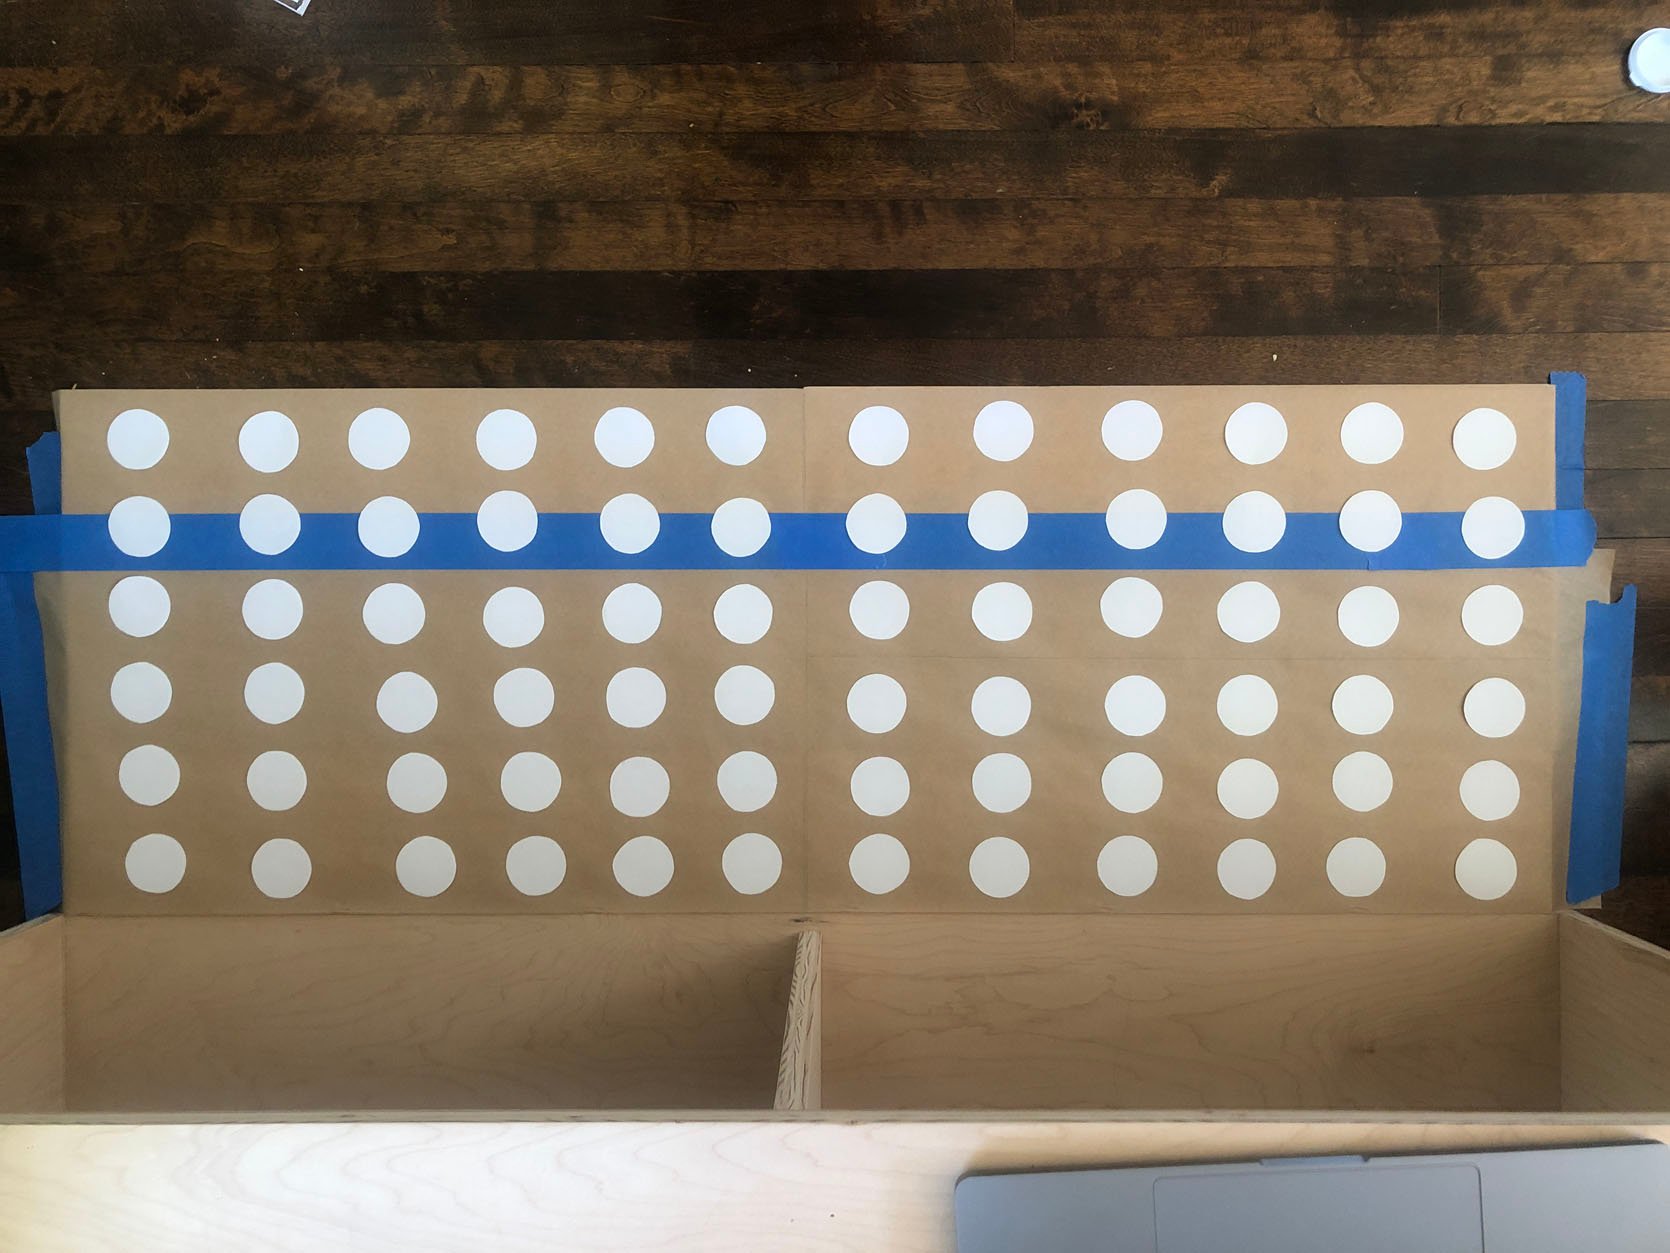
Welcome to the beginning of my losing my mind. I wouldn’t say math is my strength, so somewhat detailed measurements easily make my head spin right off. These were the cabinet doors and the beginning of “evenly” placing all of my future circle holes.
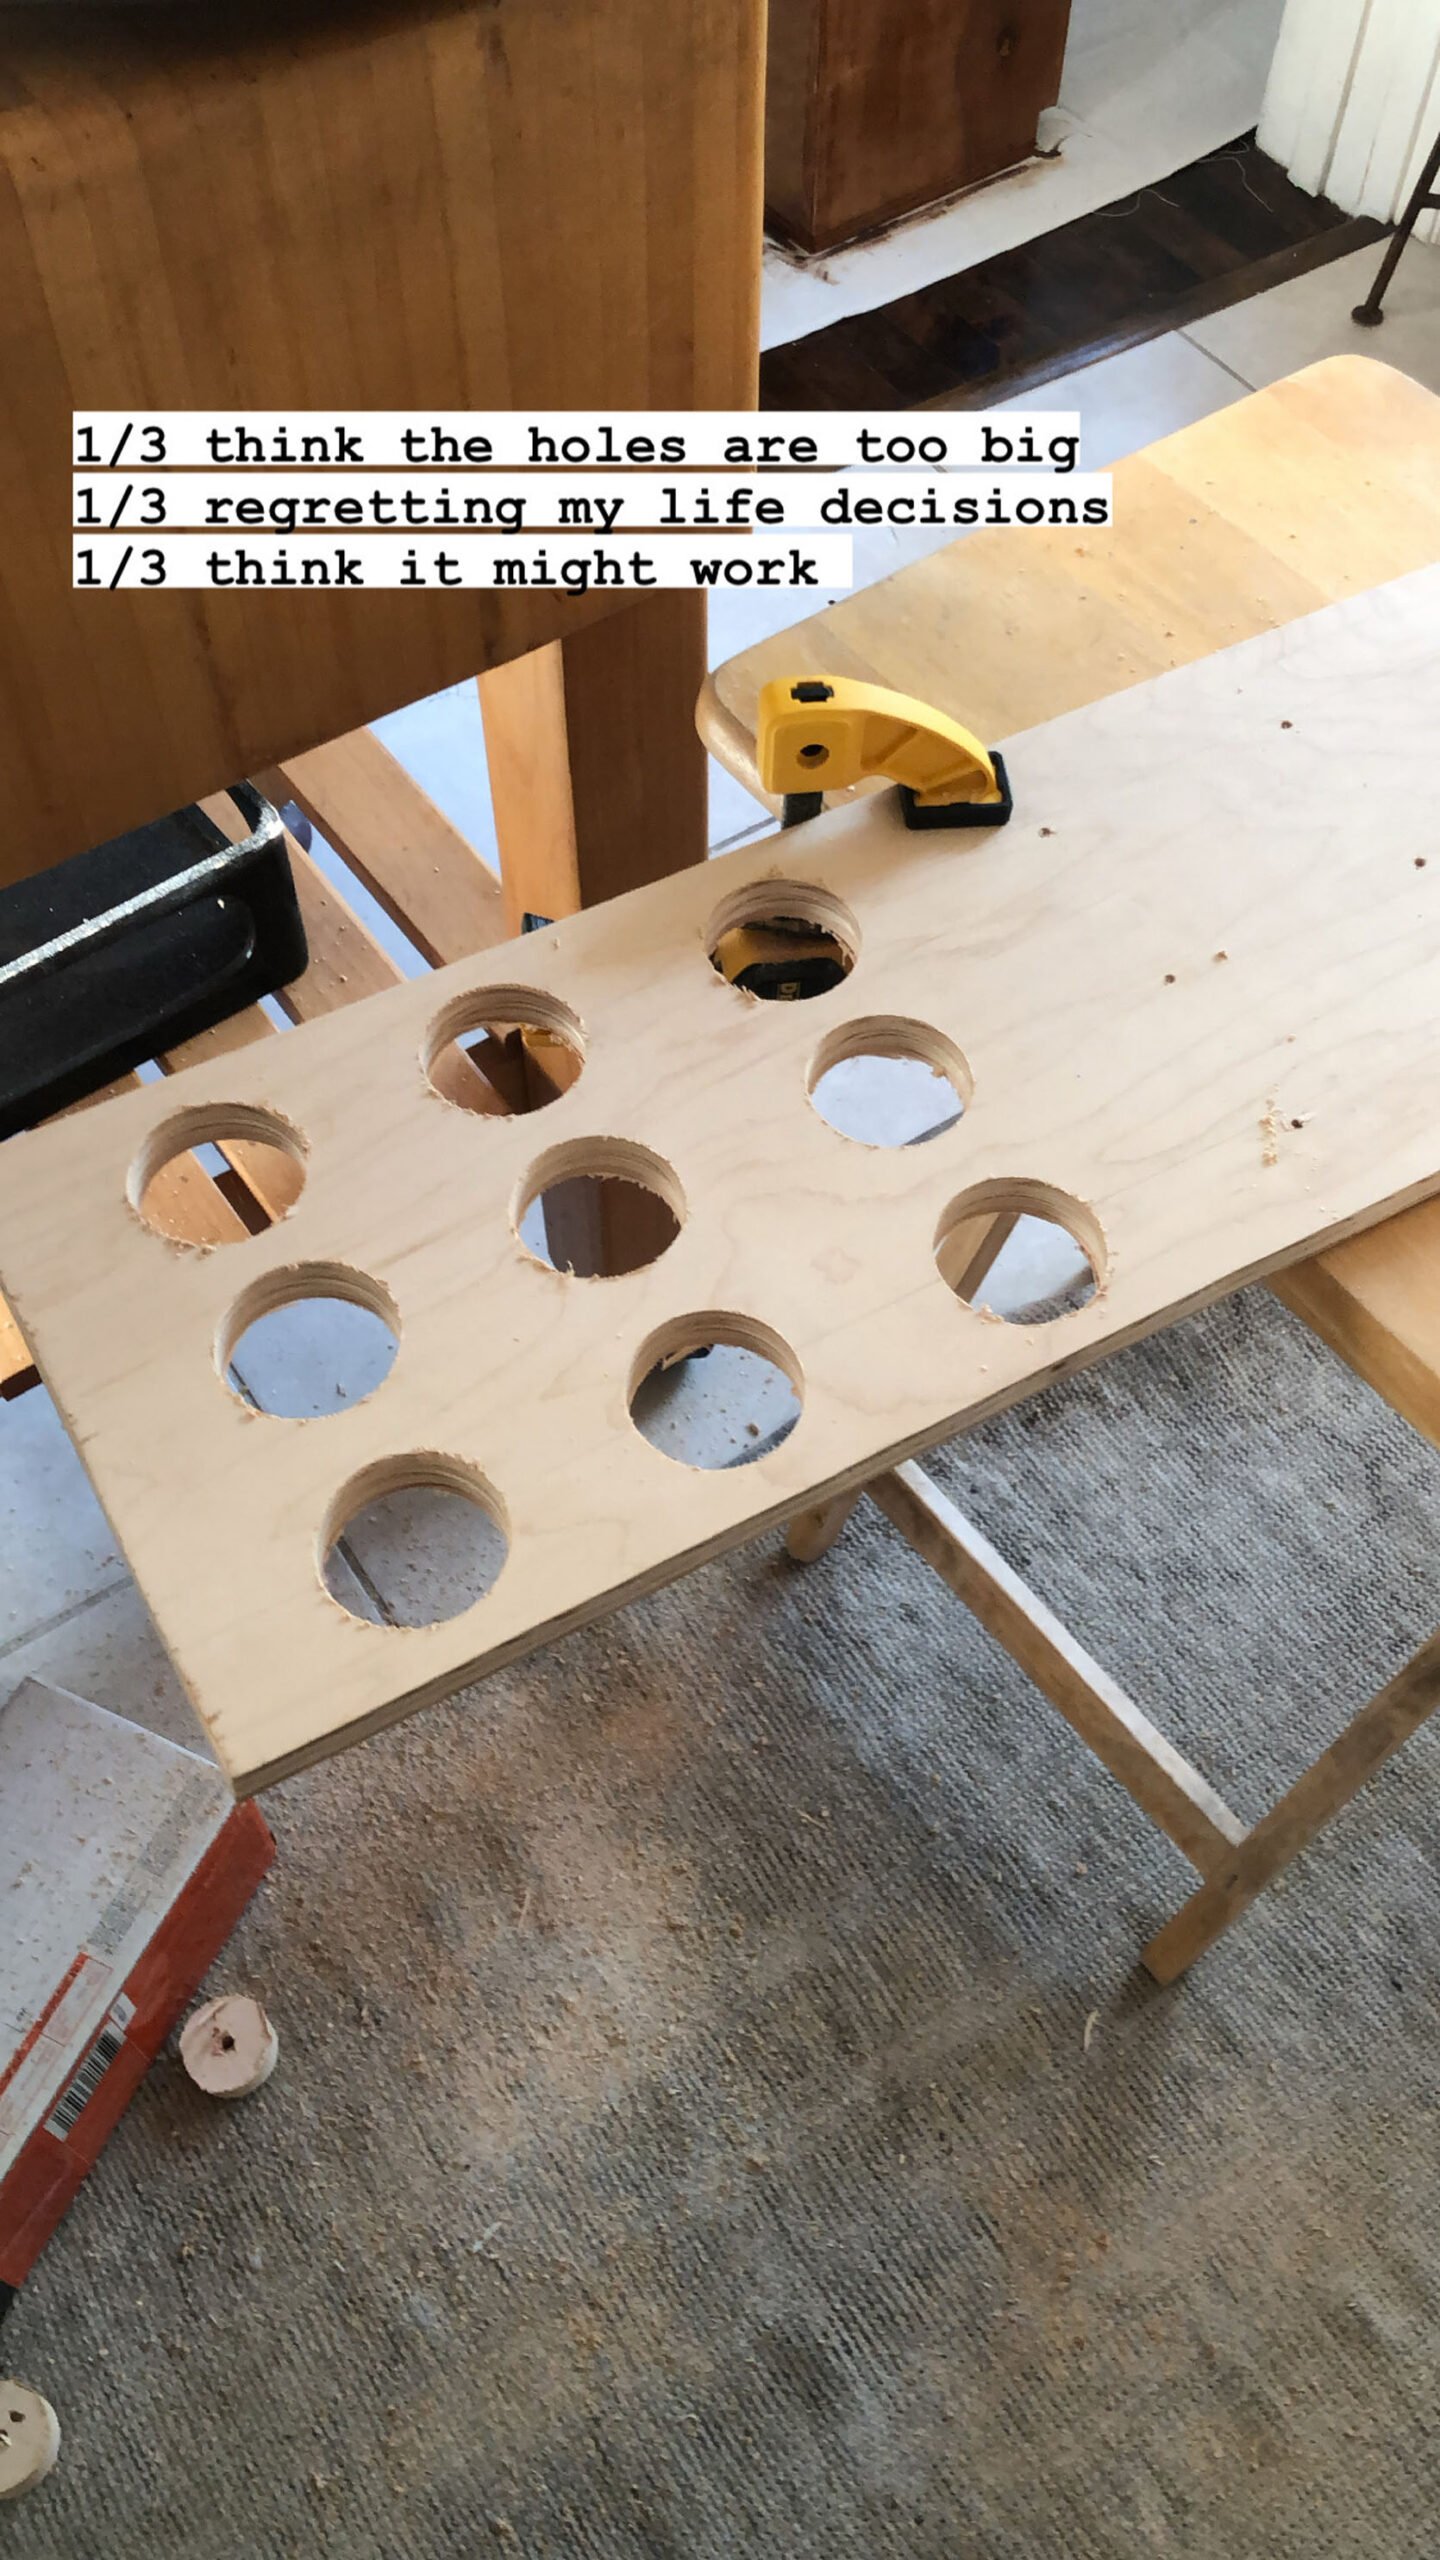

And these are actual photos I put on the internet during the process 3 years ago. Is it even a real Jess project if she doesn’t attempt a DIY that makes her question all of her life decisions?? Don’t worry, I have one for the bedroom too.
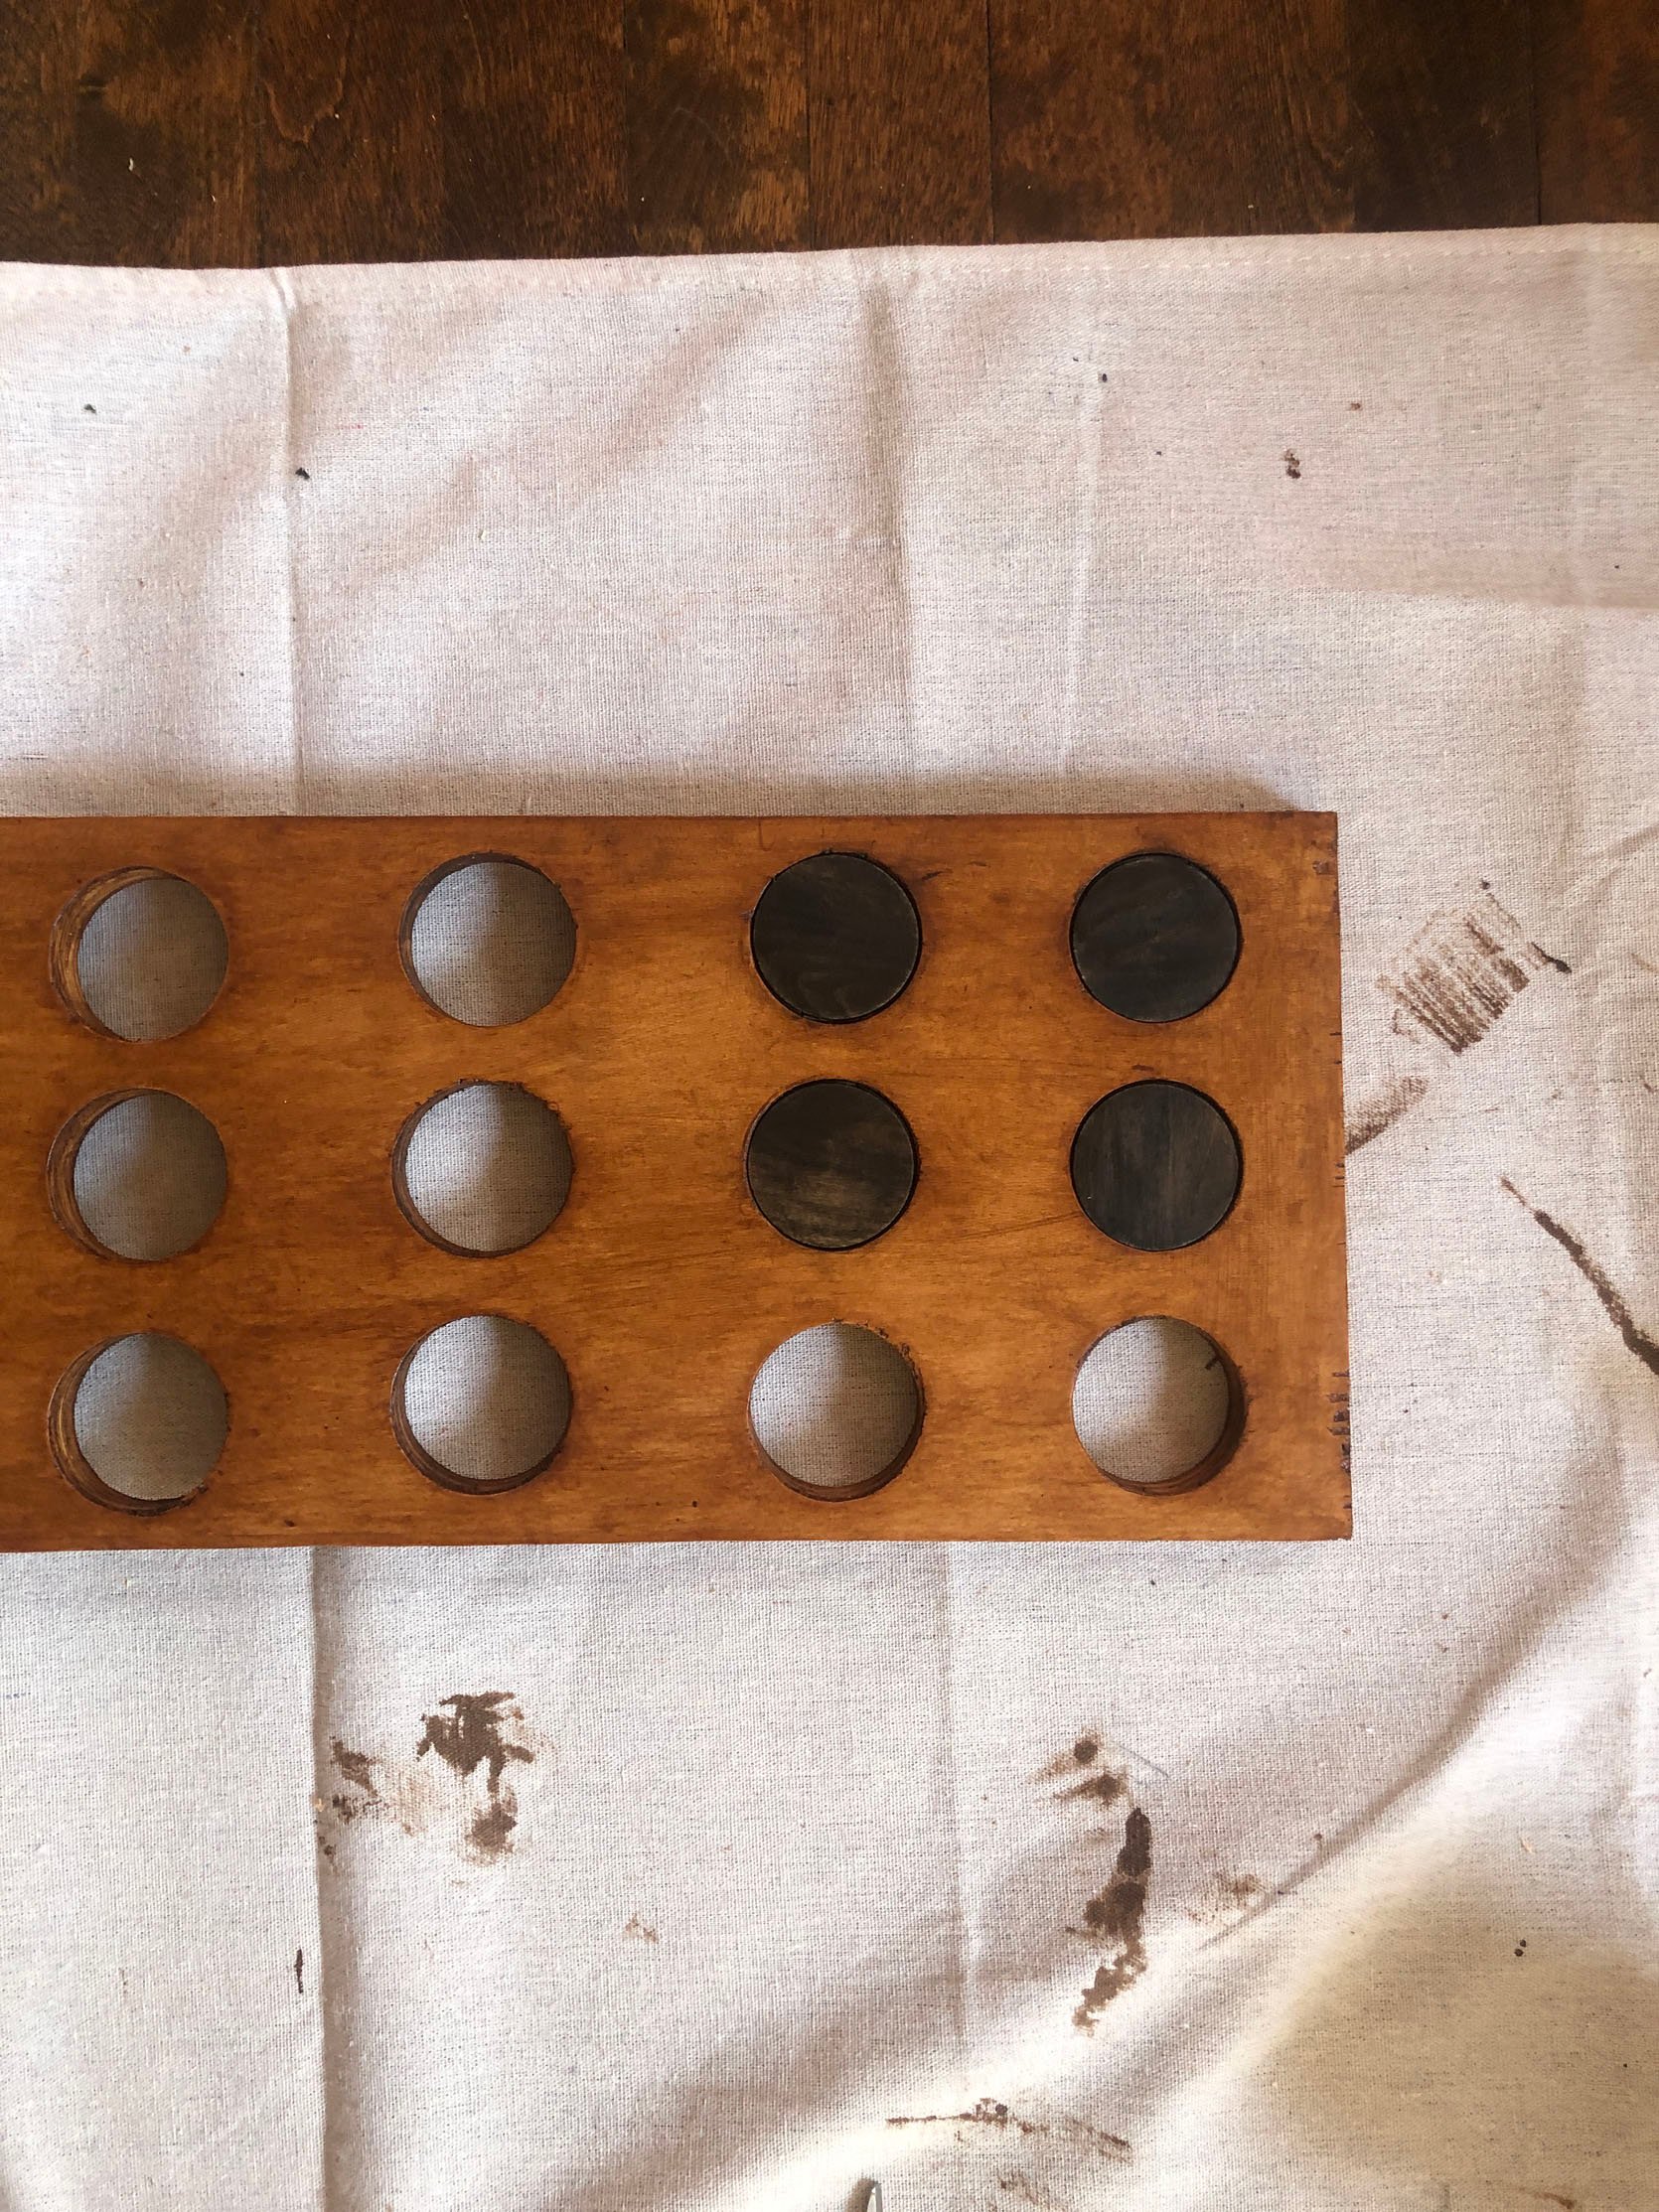
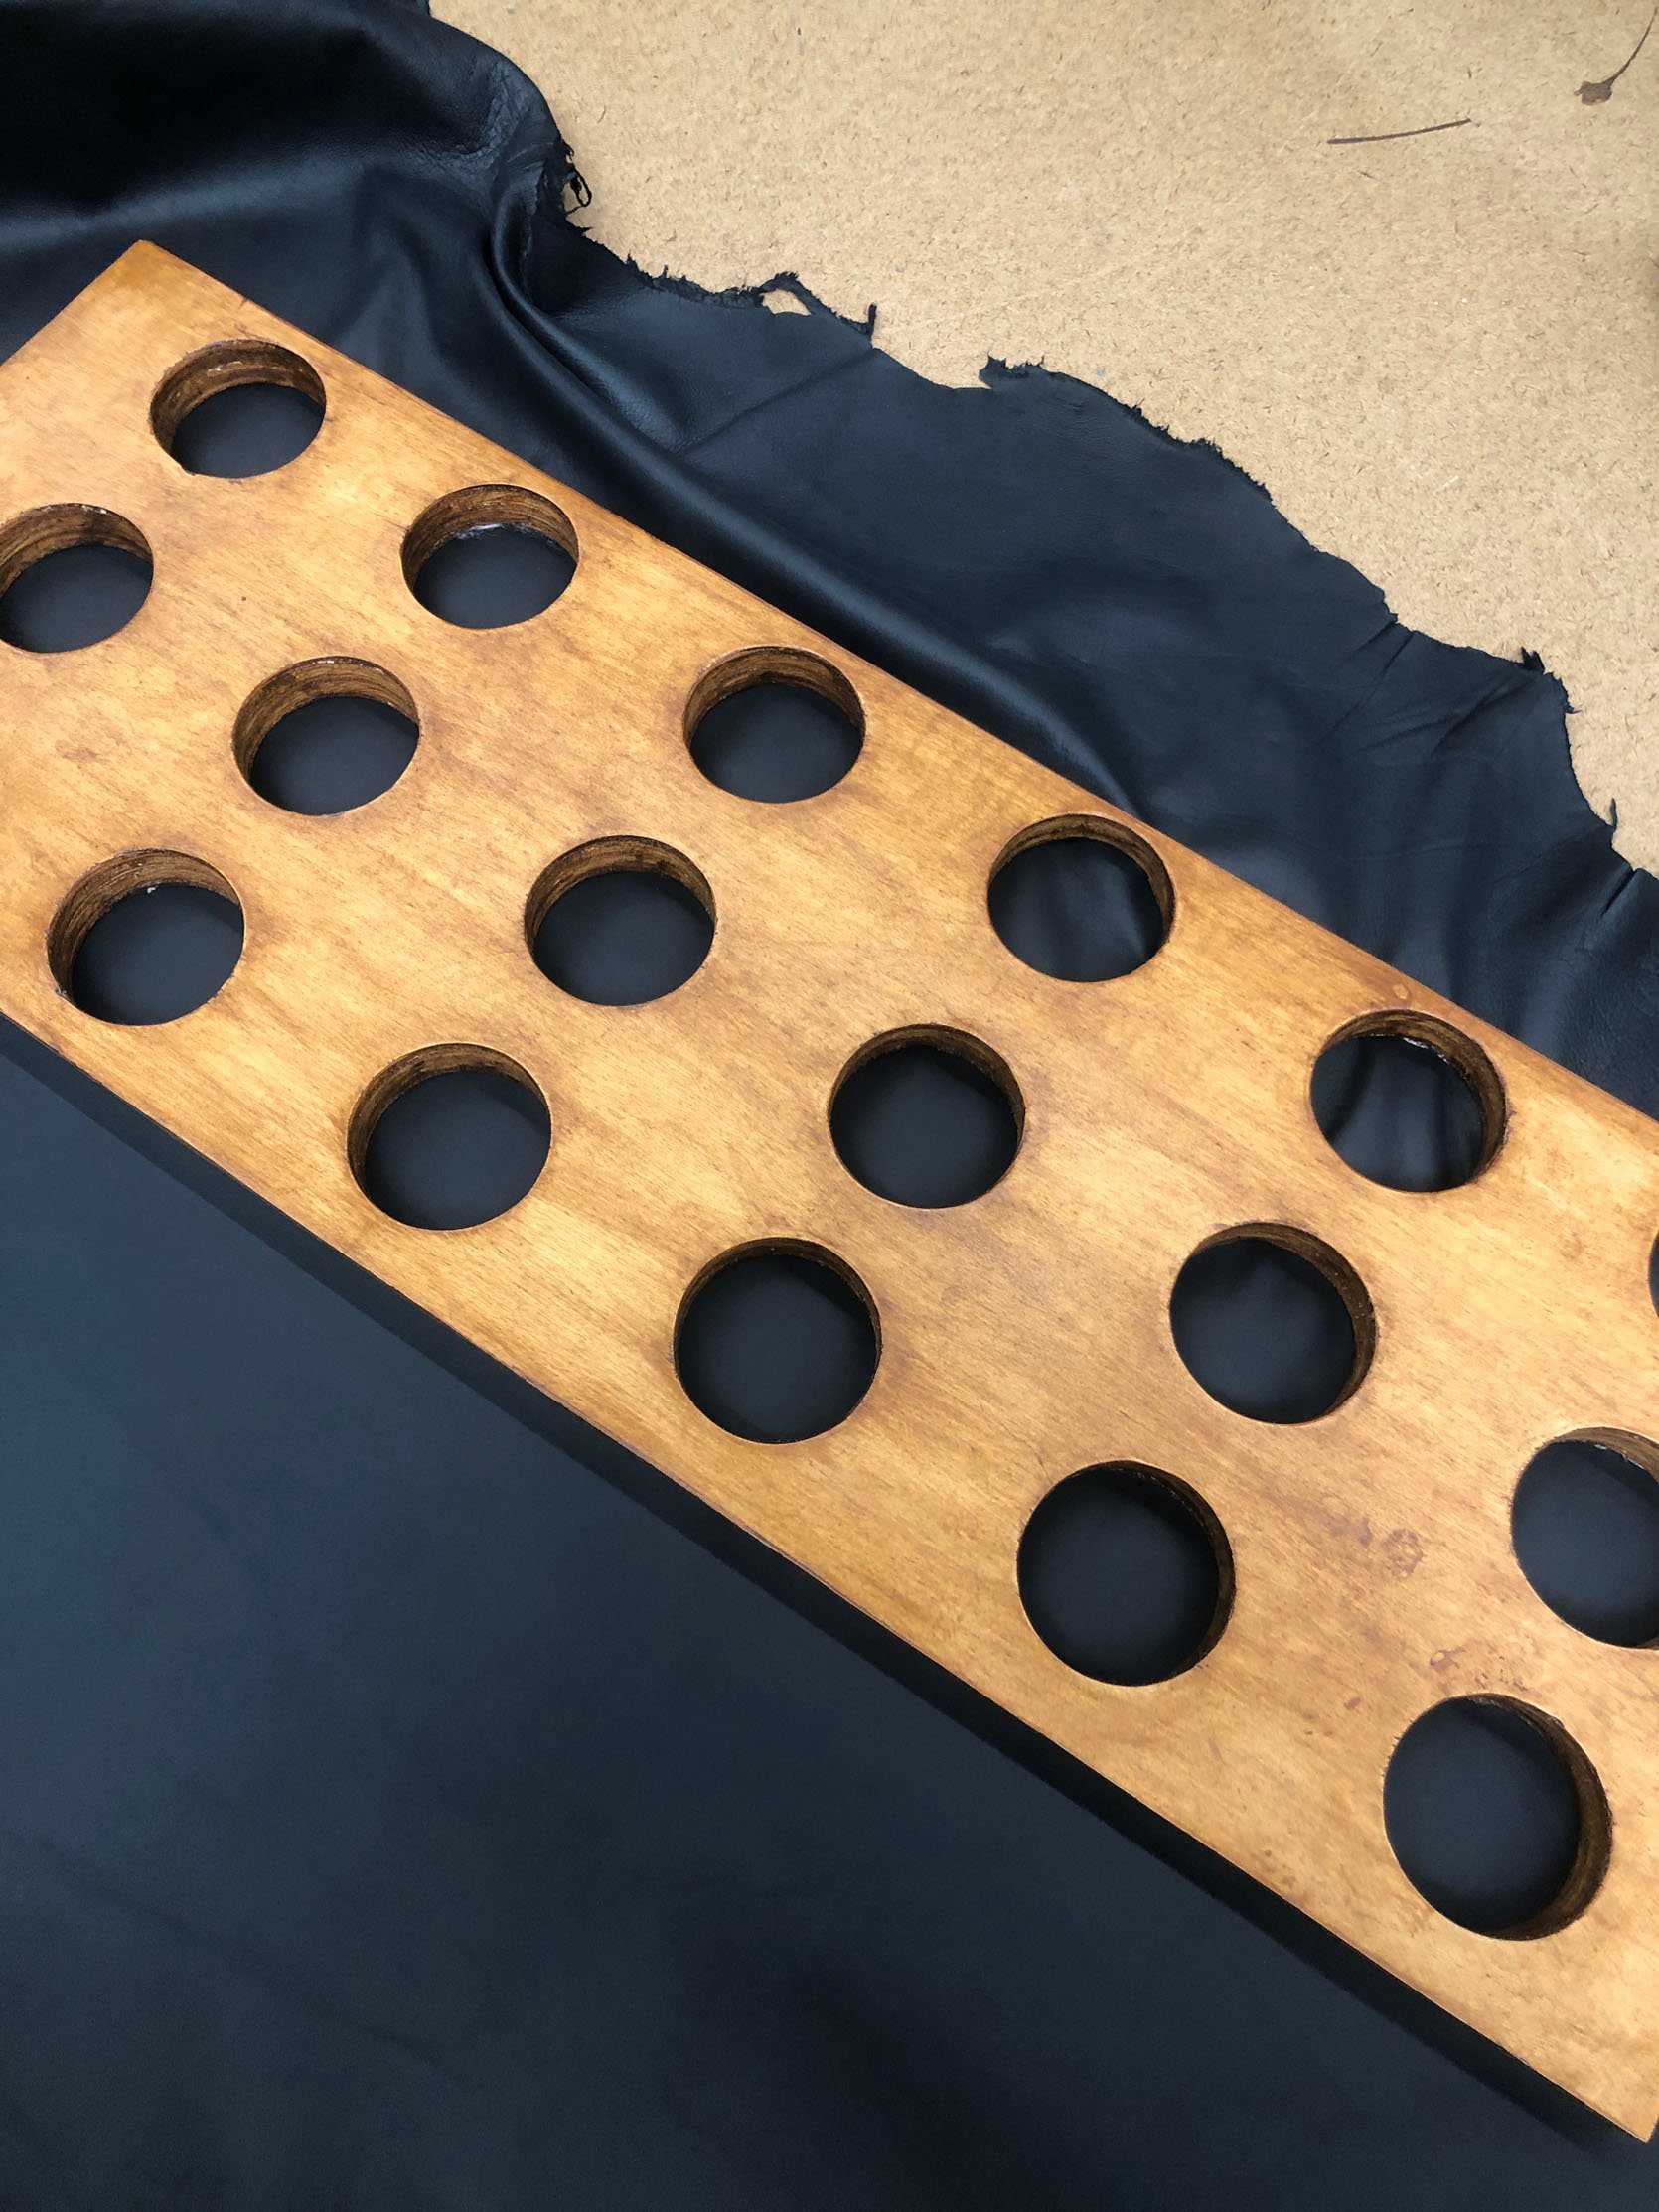
Then, after all of the holes were cut out and everything stained, I thought it would look better/more high-end if I stained wooden circle discs a darker color to have an inlayed look. It wasn’t a full success, so I pivoted and went to Mood Fabrics because I’m a millennial who grew up on Project Runway and bought a couple of pieces of black leather to stretch and then staple-gunned it to the back of the doors. I think I spent a little over $100 on the leather, which I was happy to do just to be done. Now I look at it every day and love it because I put so much into it, and it’s a piece that I did with my dad.
Look, I love a beautifully designed room regardless of whether it’s all new, all old, or a mix. But a space that has a lot of sentimental pieces and memories poured into it will always be my favorite. So without further ado (yes, we’re finally here), my living room…
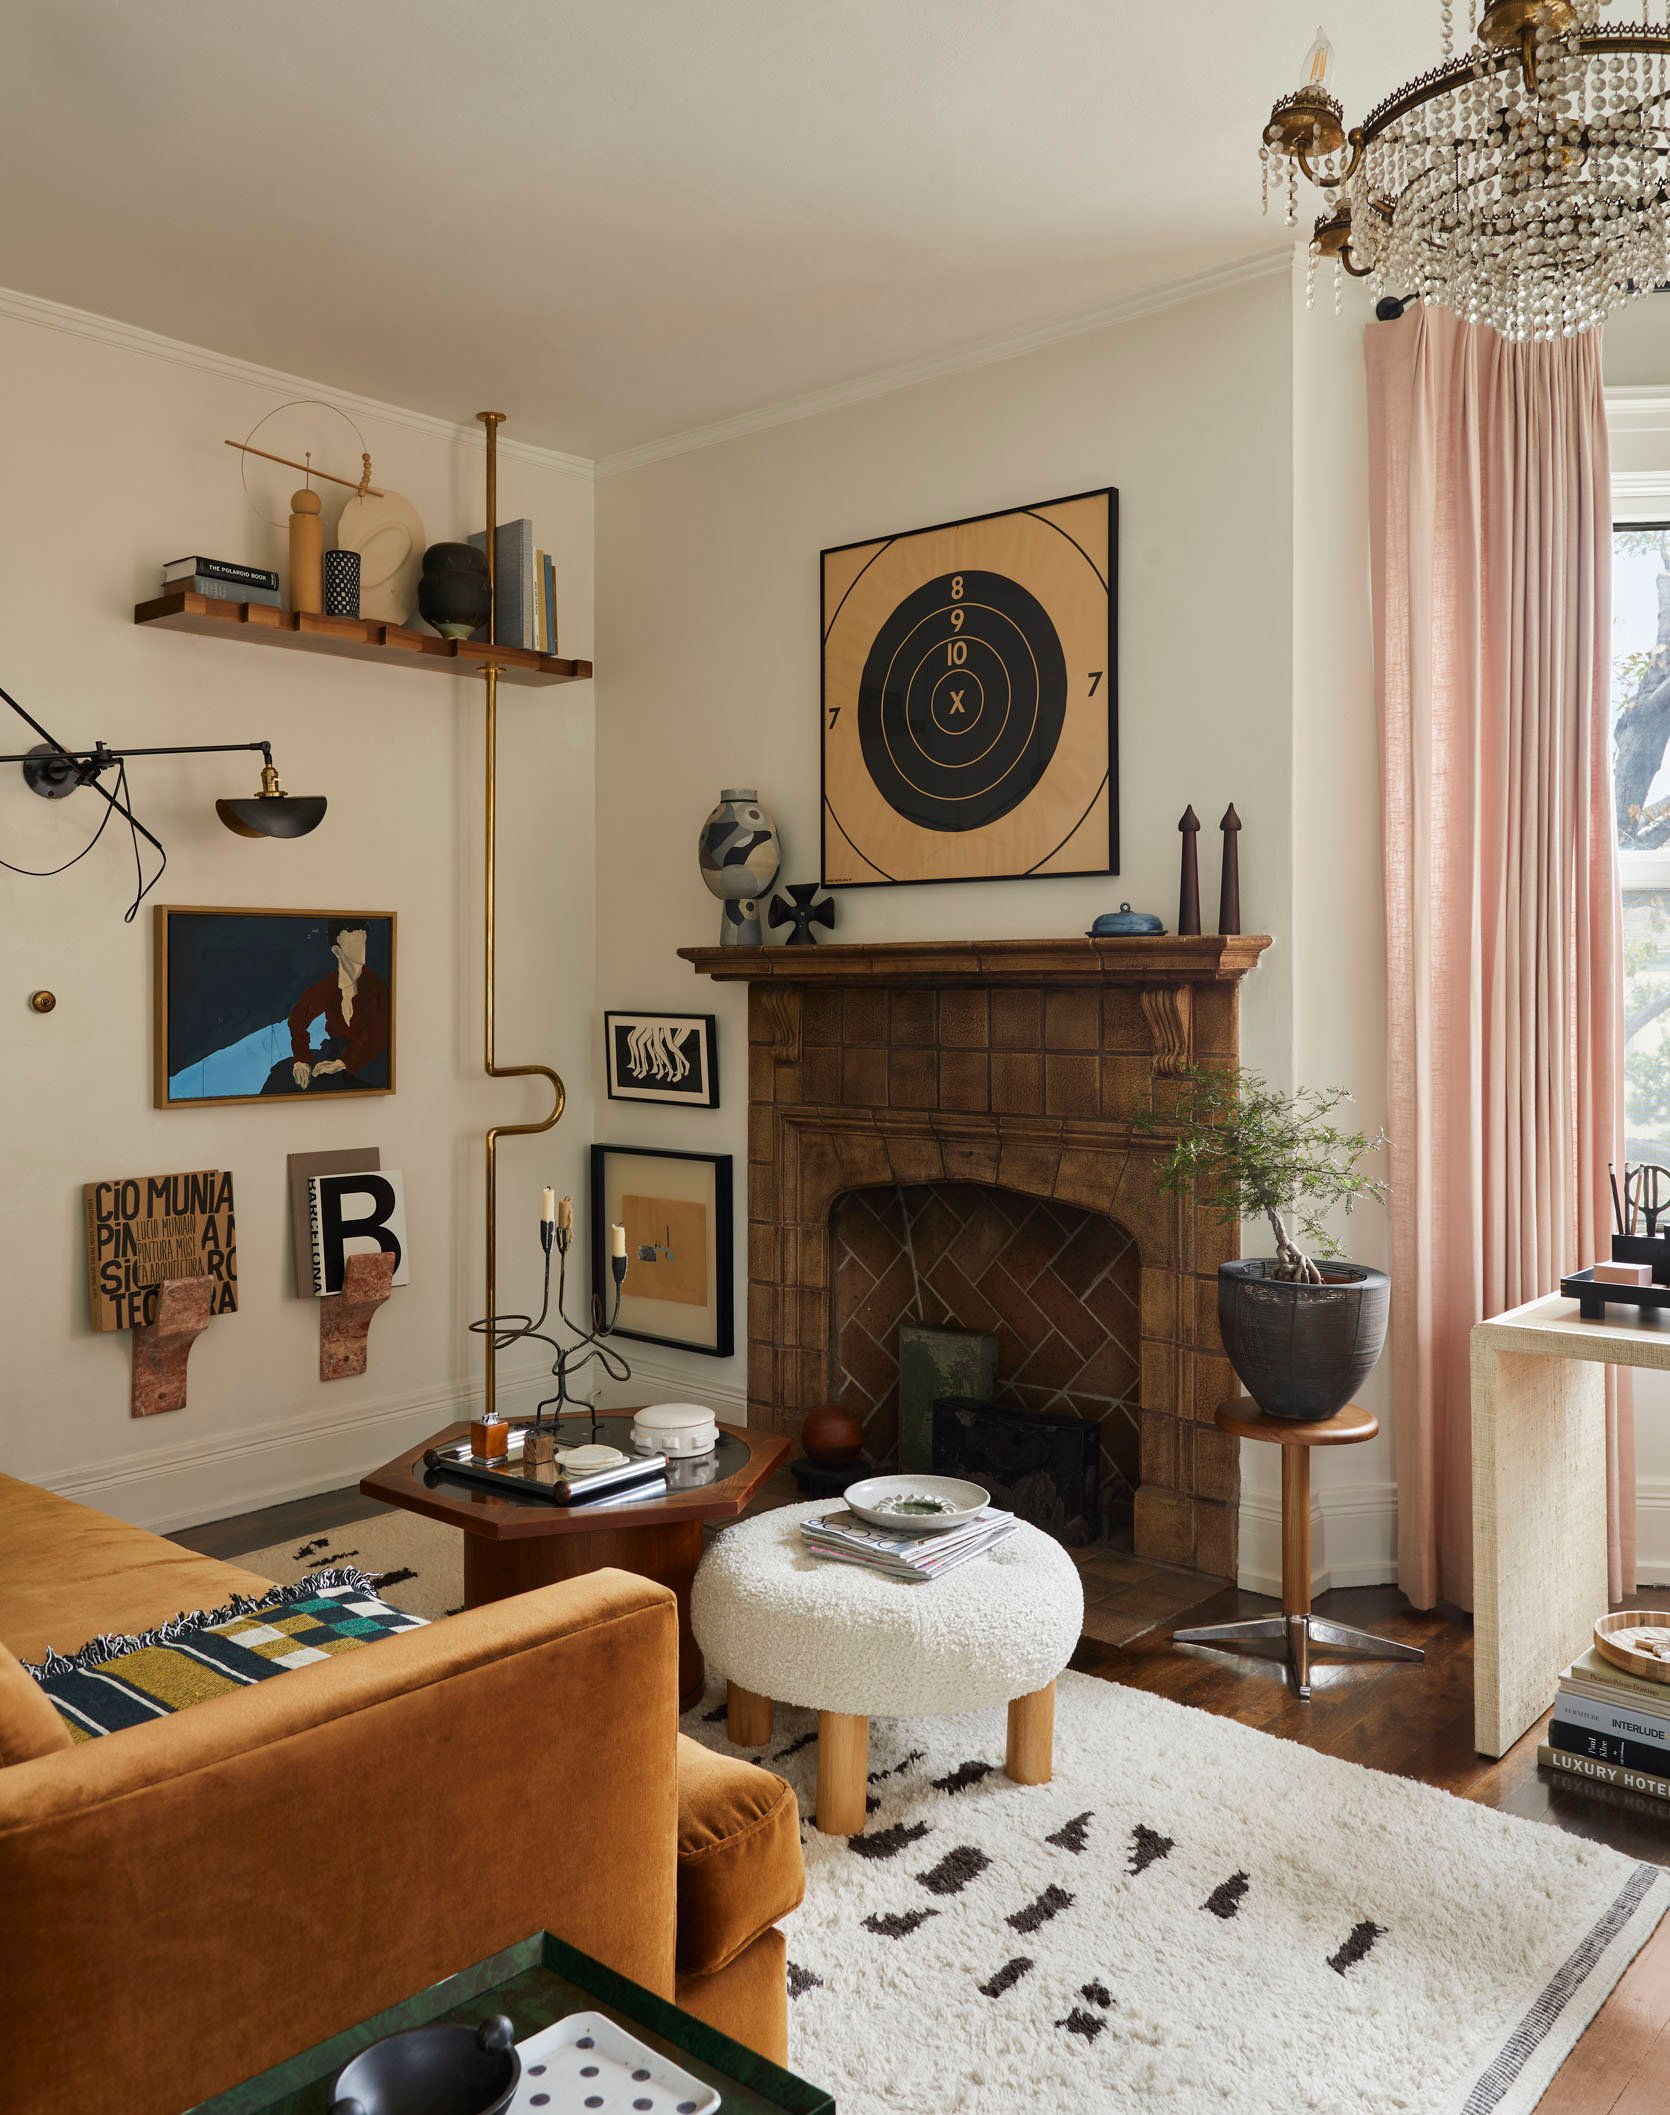
The Reveal
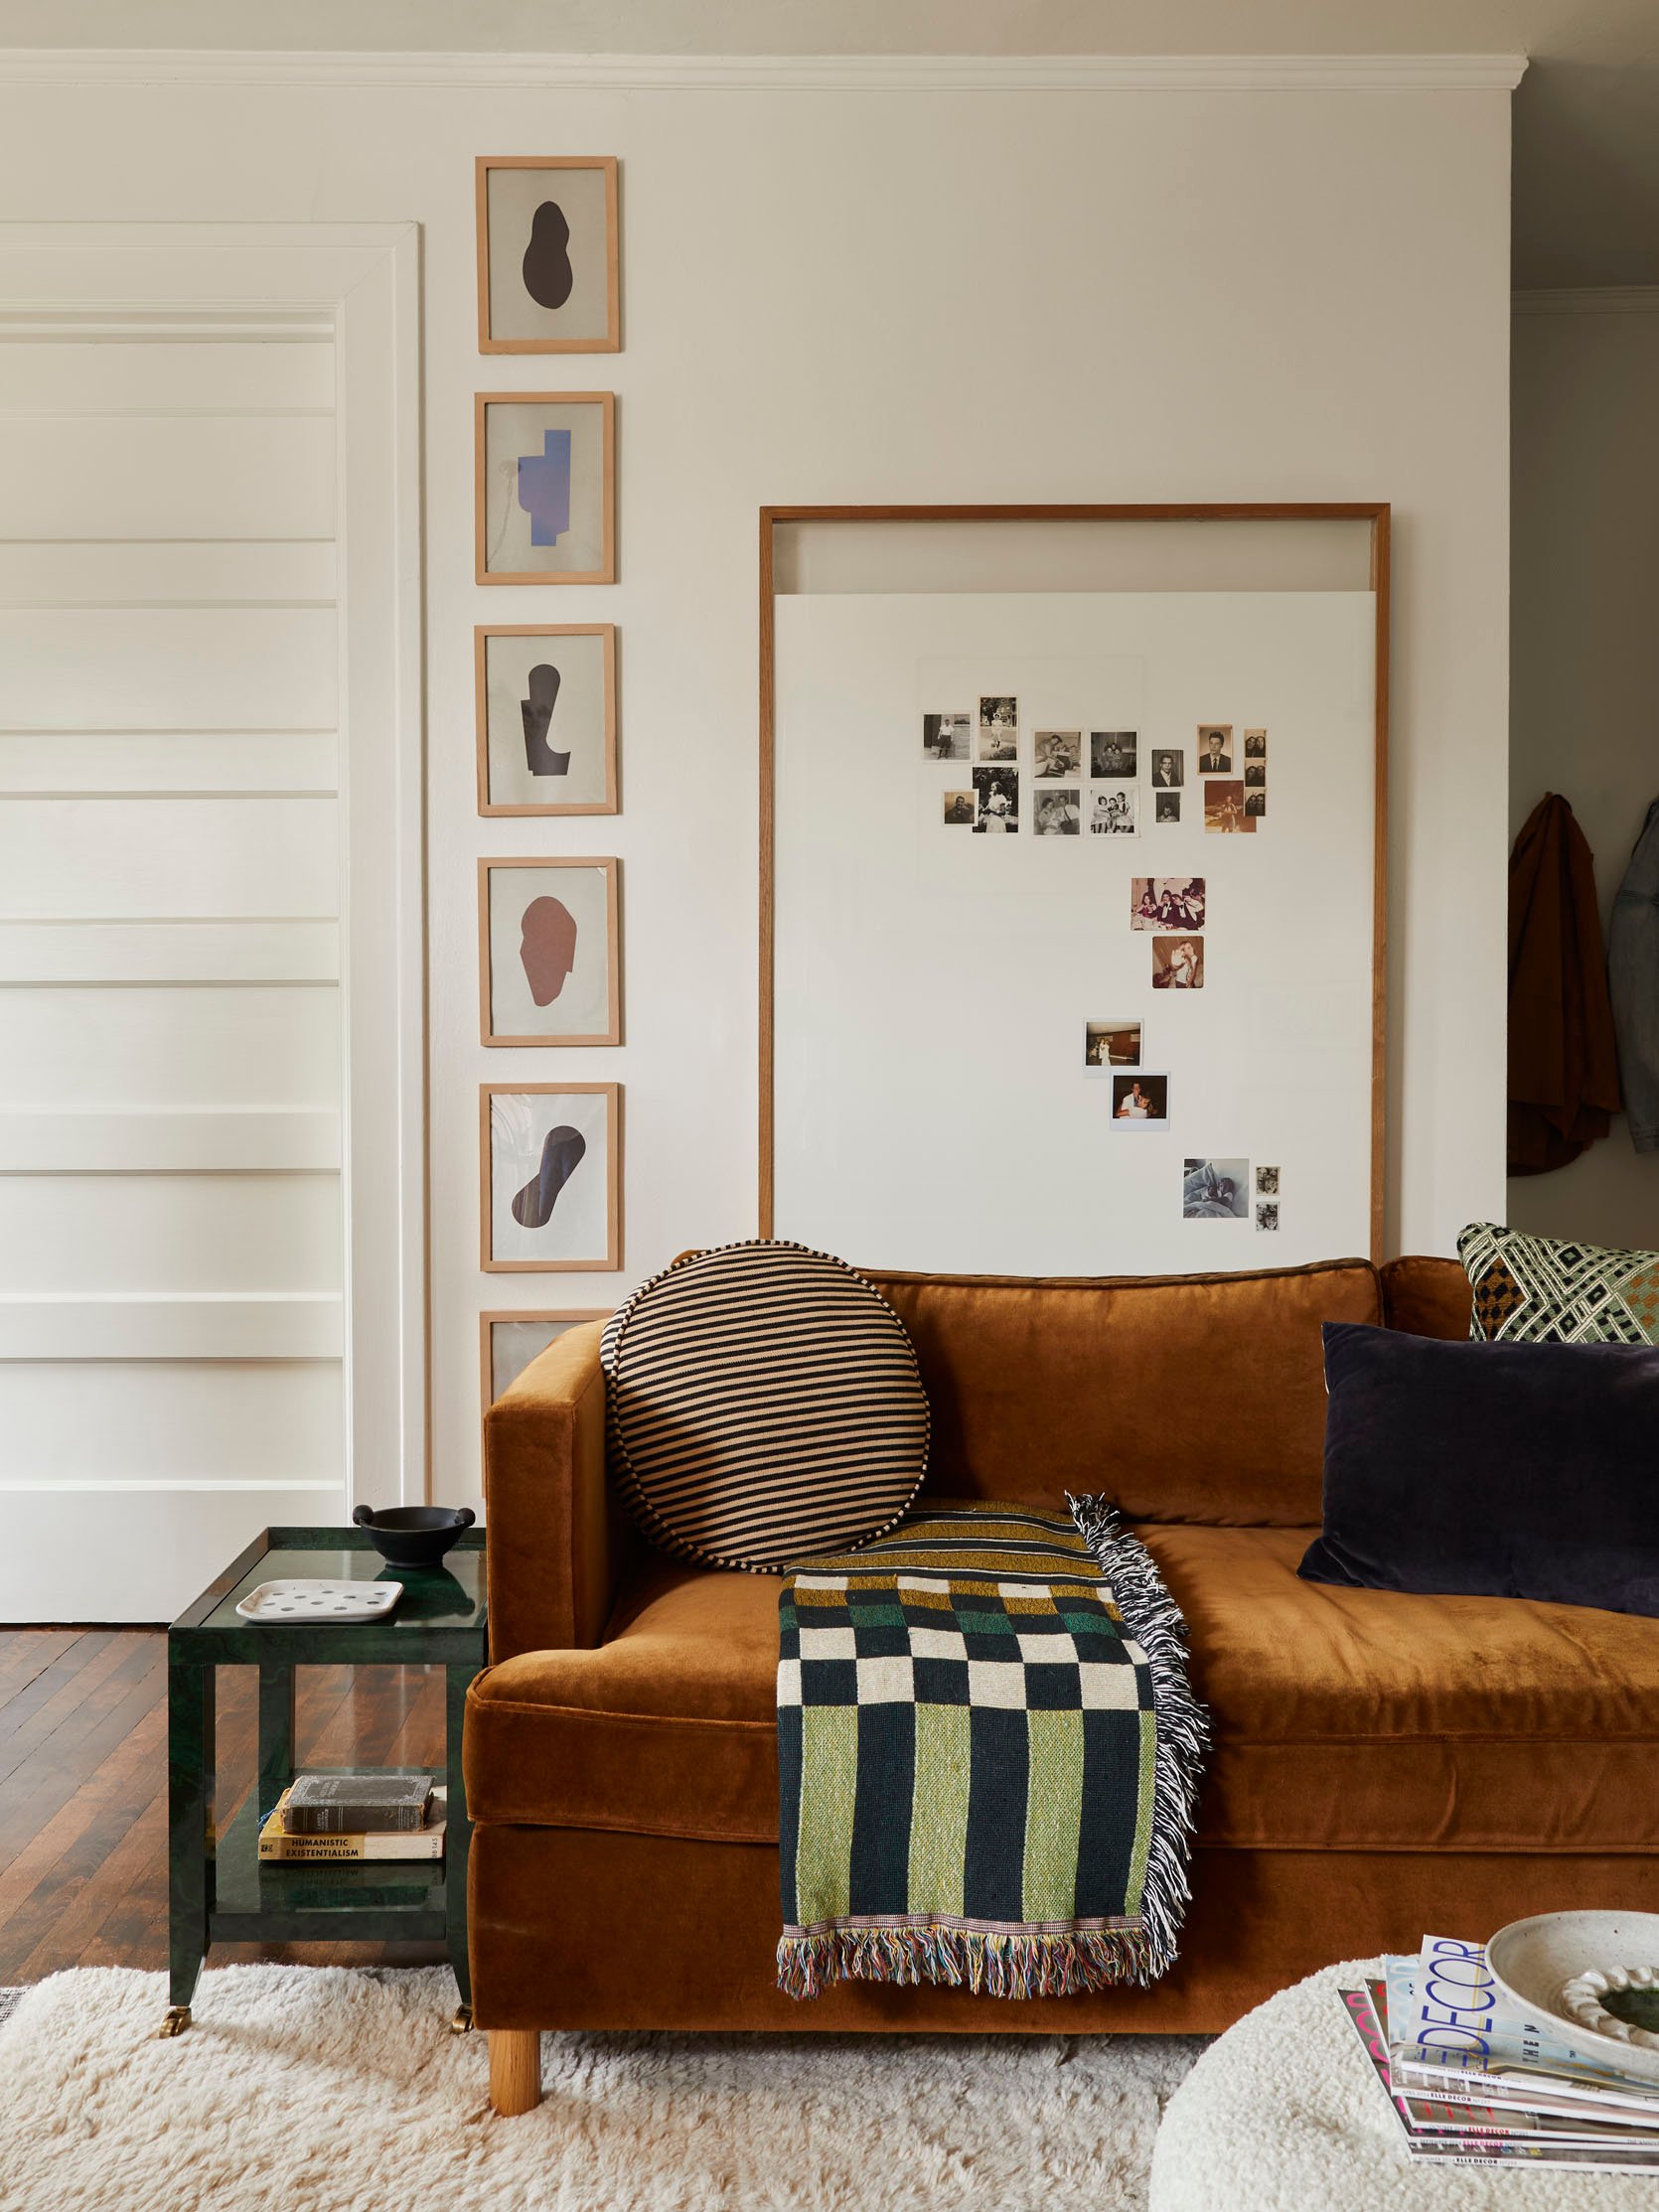
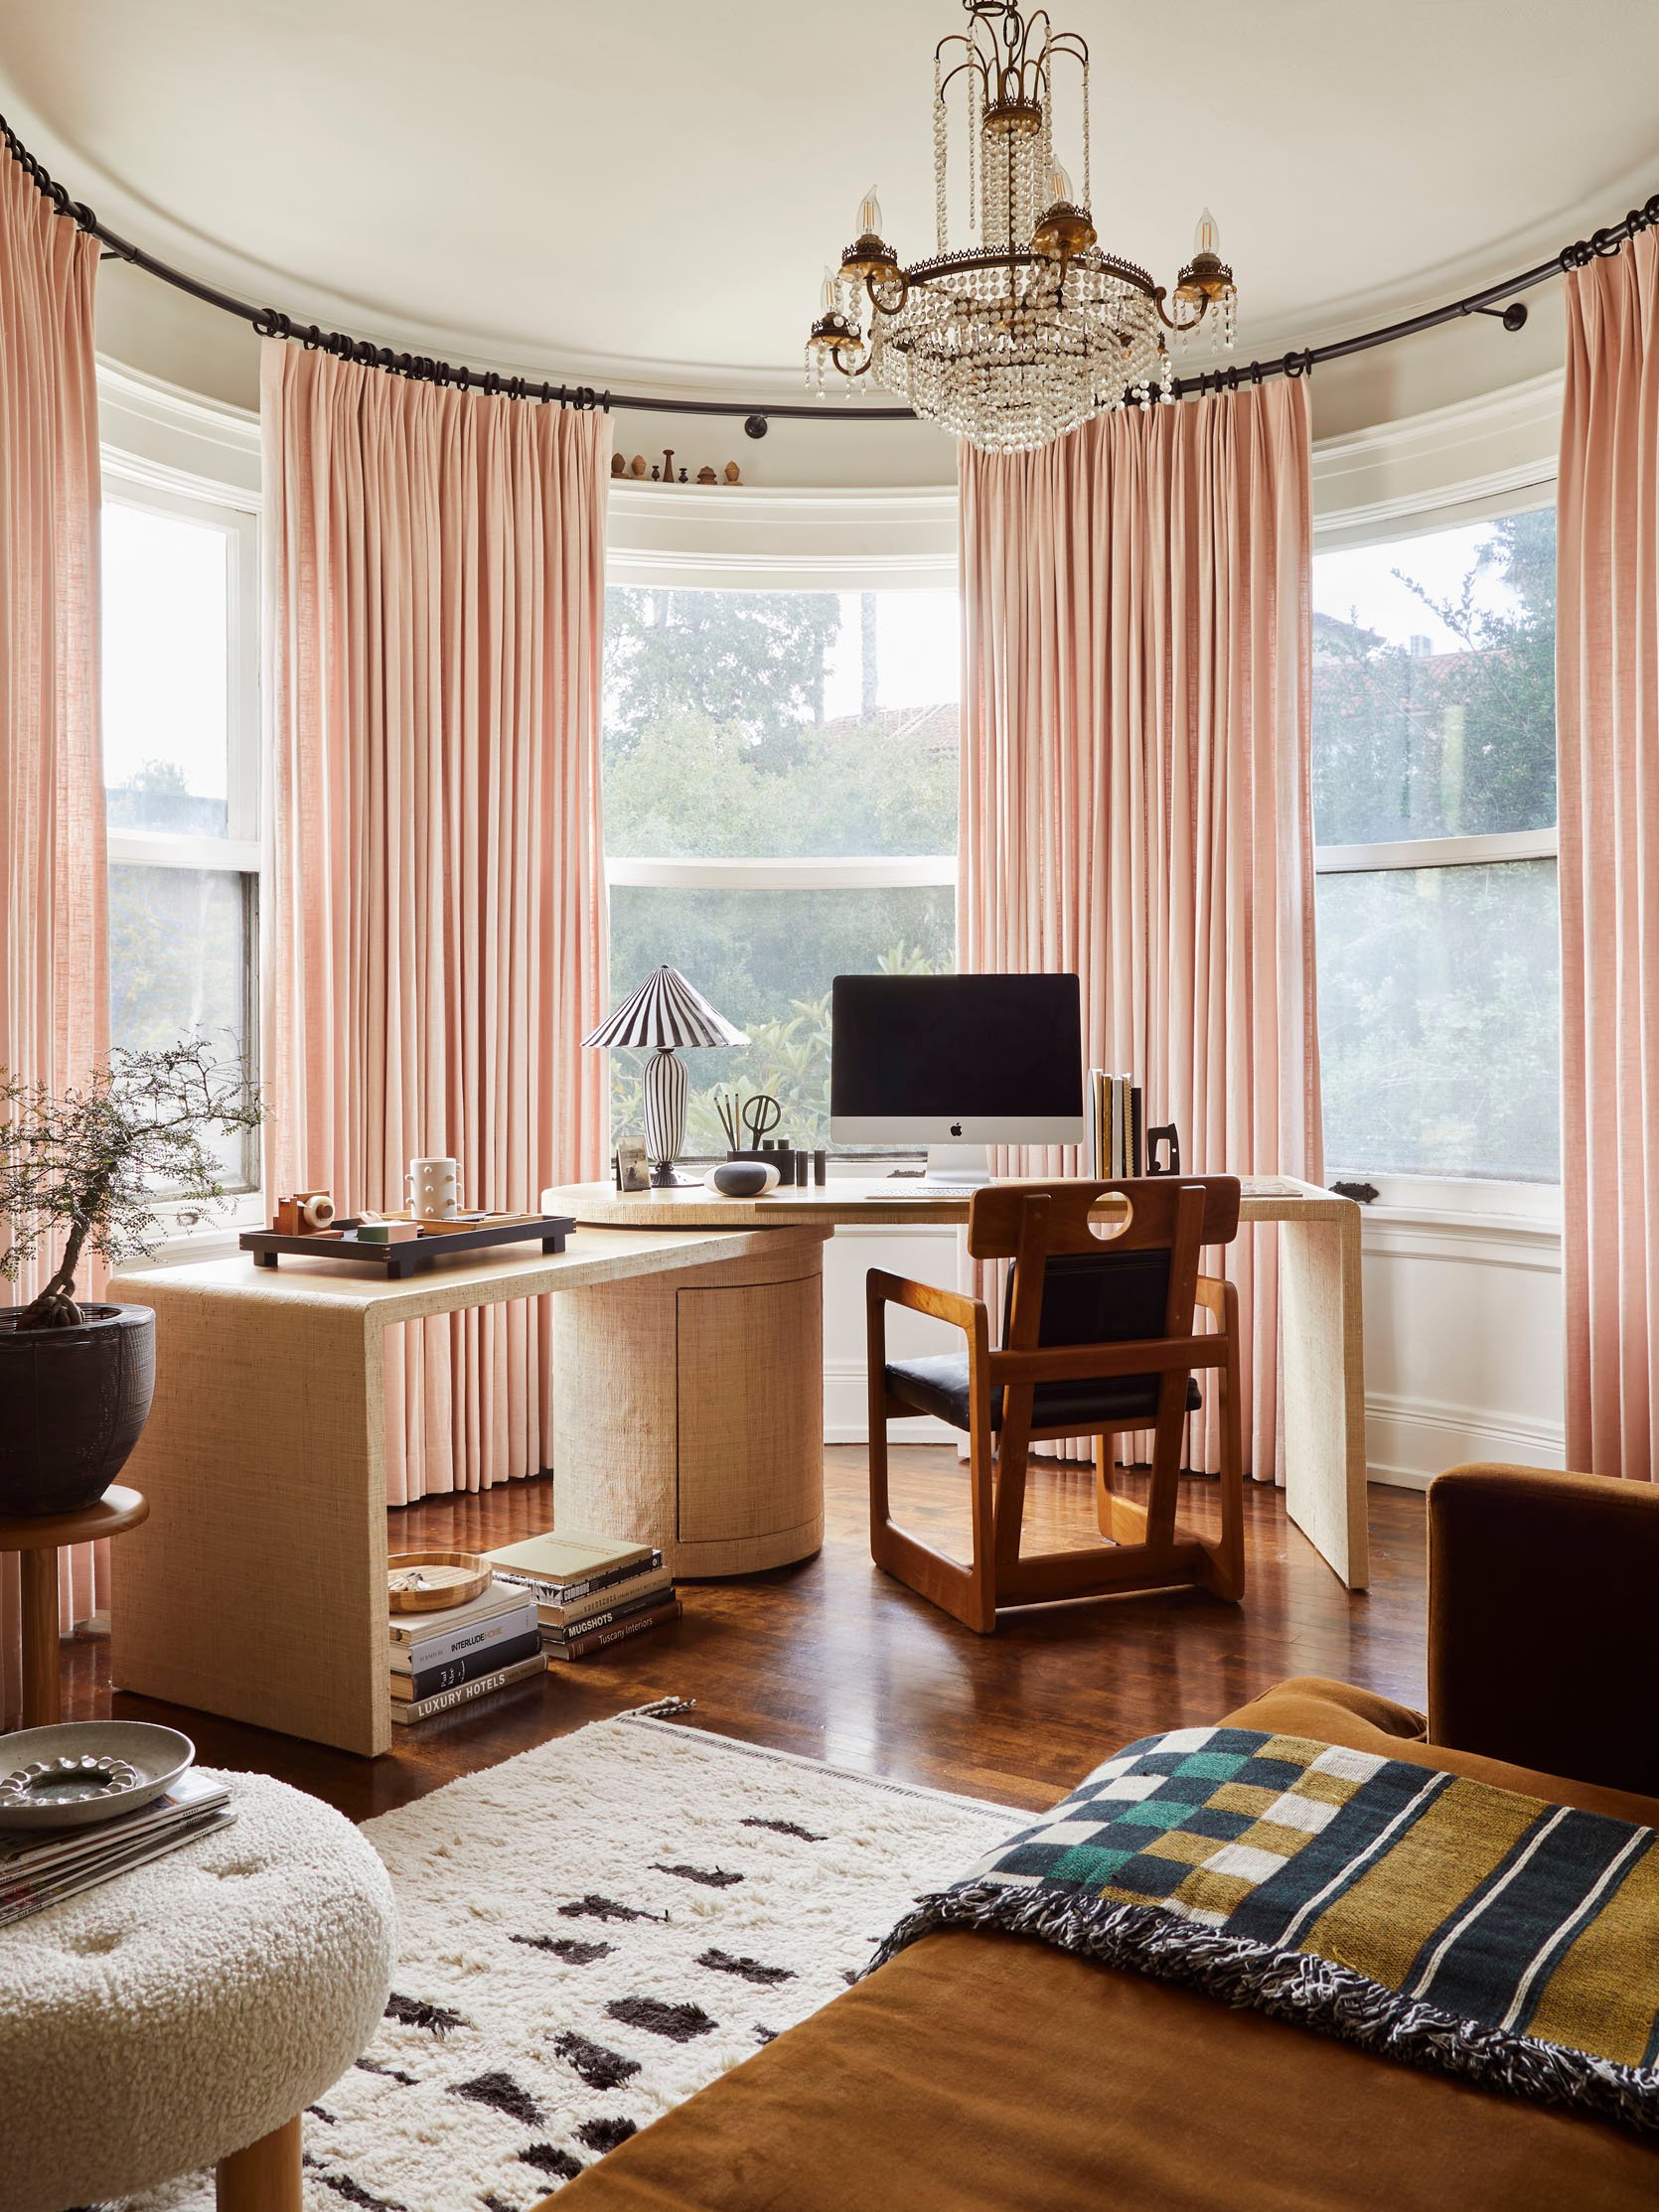
Shelves (custom) | Sconce | Sofa | Rug | Green Side Table (unavailble) | Wood Side Table (vintage)
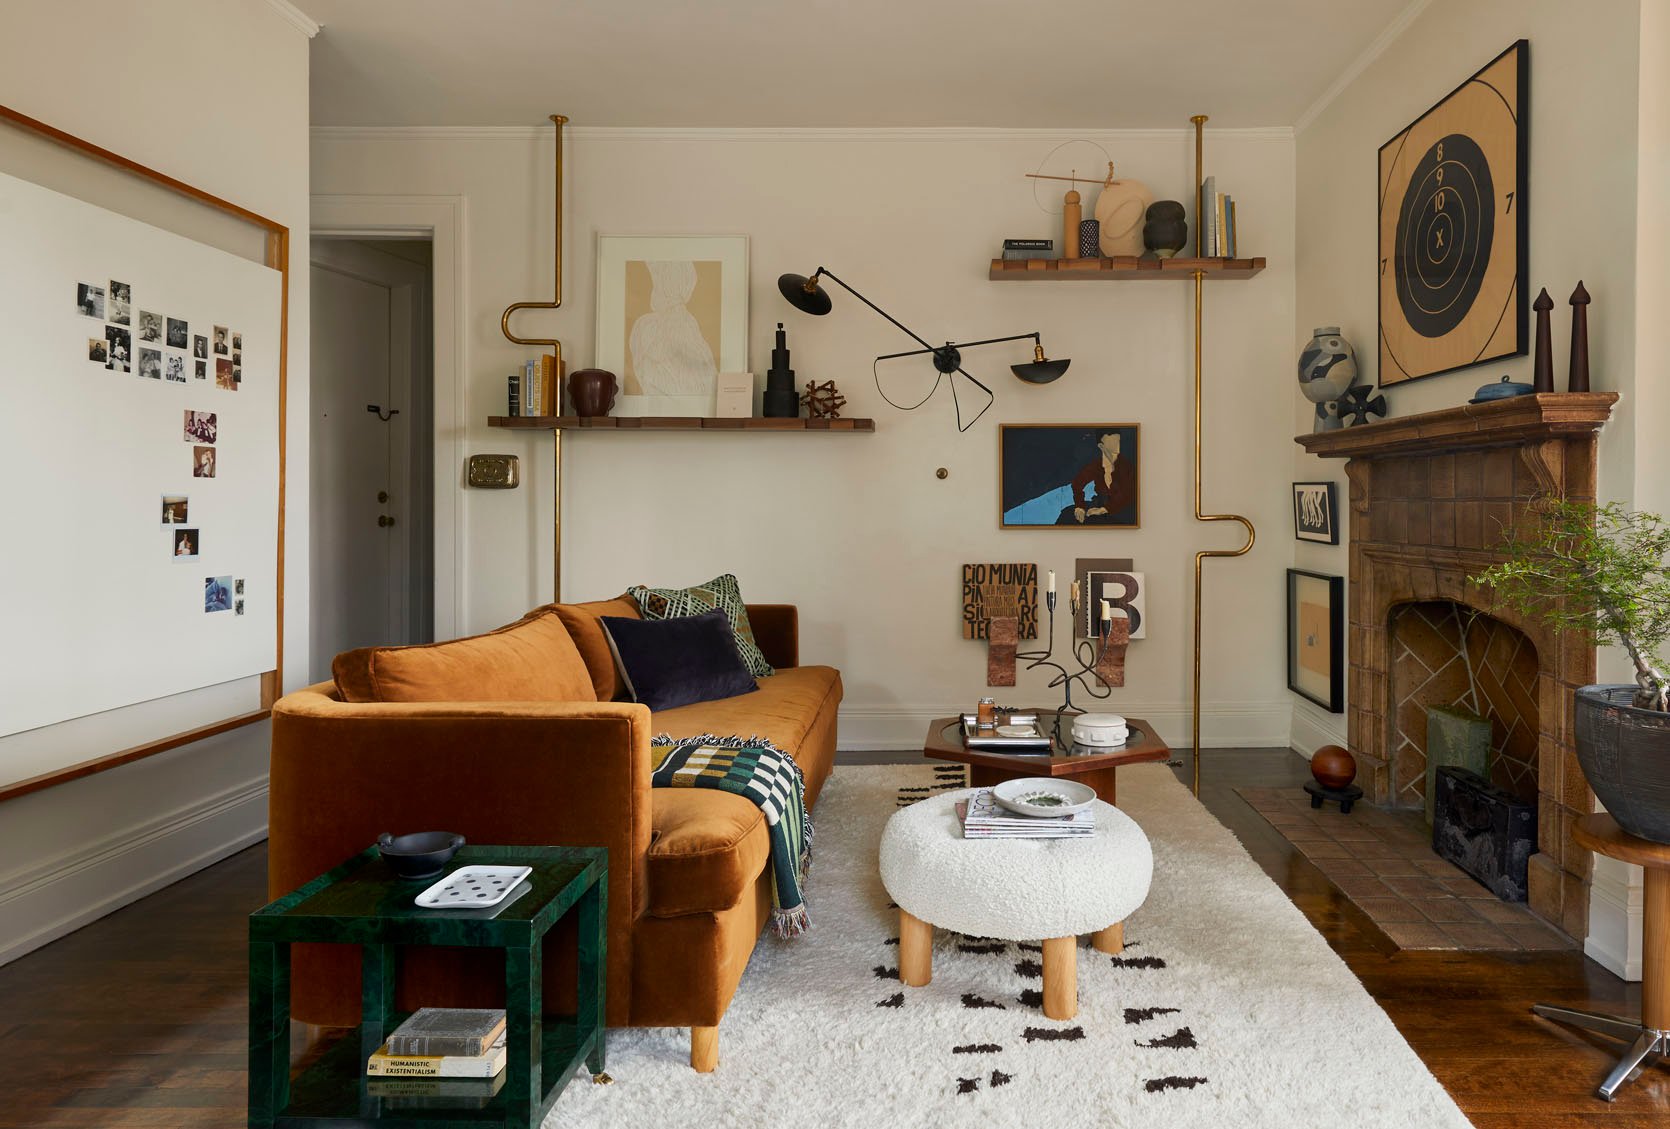
Here she is in all of her glory. I love the rich textures, I love the little pops of color, I LOVE my shelves, and I love that I actually have family photos up (not something I’ve always done:)). I also am so appreciative that after looking at this space for far too long, I love that Emily Bowser came to style it exactly how I was hoping it would look.
Rust Vase | Neutral Vertical Art | White Frame | Ceramic Art | Black Stash Box Tower (unavailable) | Wood Sculpture (vintage) | Vintage Light Switch (similar) | Painting (unavailable) | The Polaroid Book | Wood Sculpture (vintage) | Checkered Vase (unavailable) | Cream Plate Sculpture | Dark Blue Vase (unavailable)
Blanket | Blue Pillow | Green Pillow | Wall Mounted Book Holders (unavailable) | Lucio Muniain: Painting, Music, Architecture Book | Barcelona B. Book | All Coffee Table and Ottoman Items (vintage)
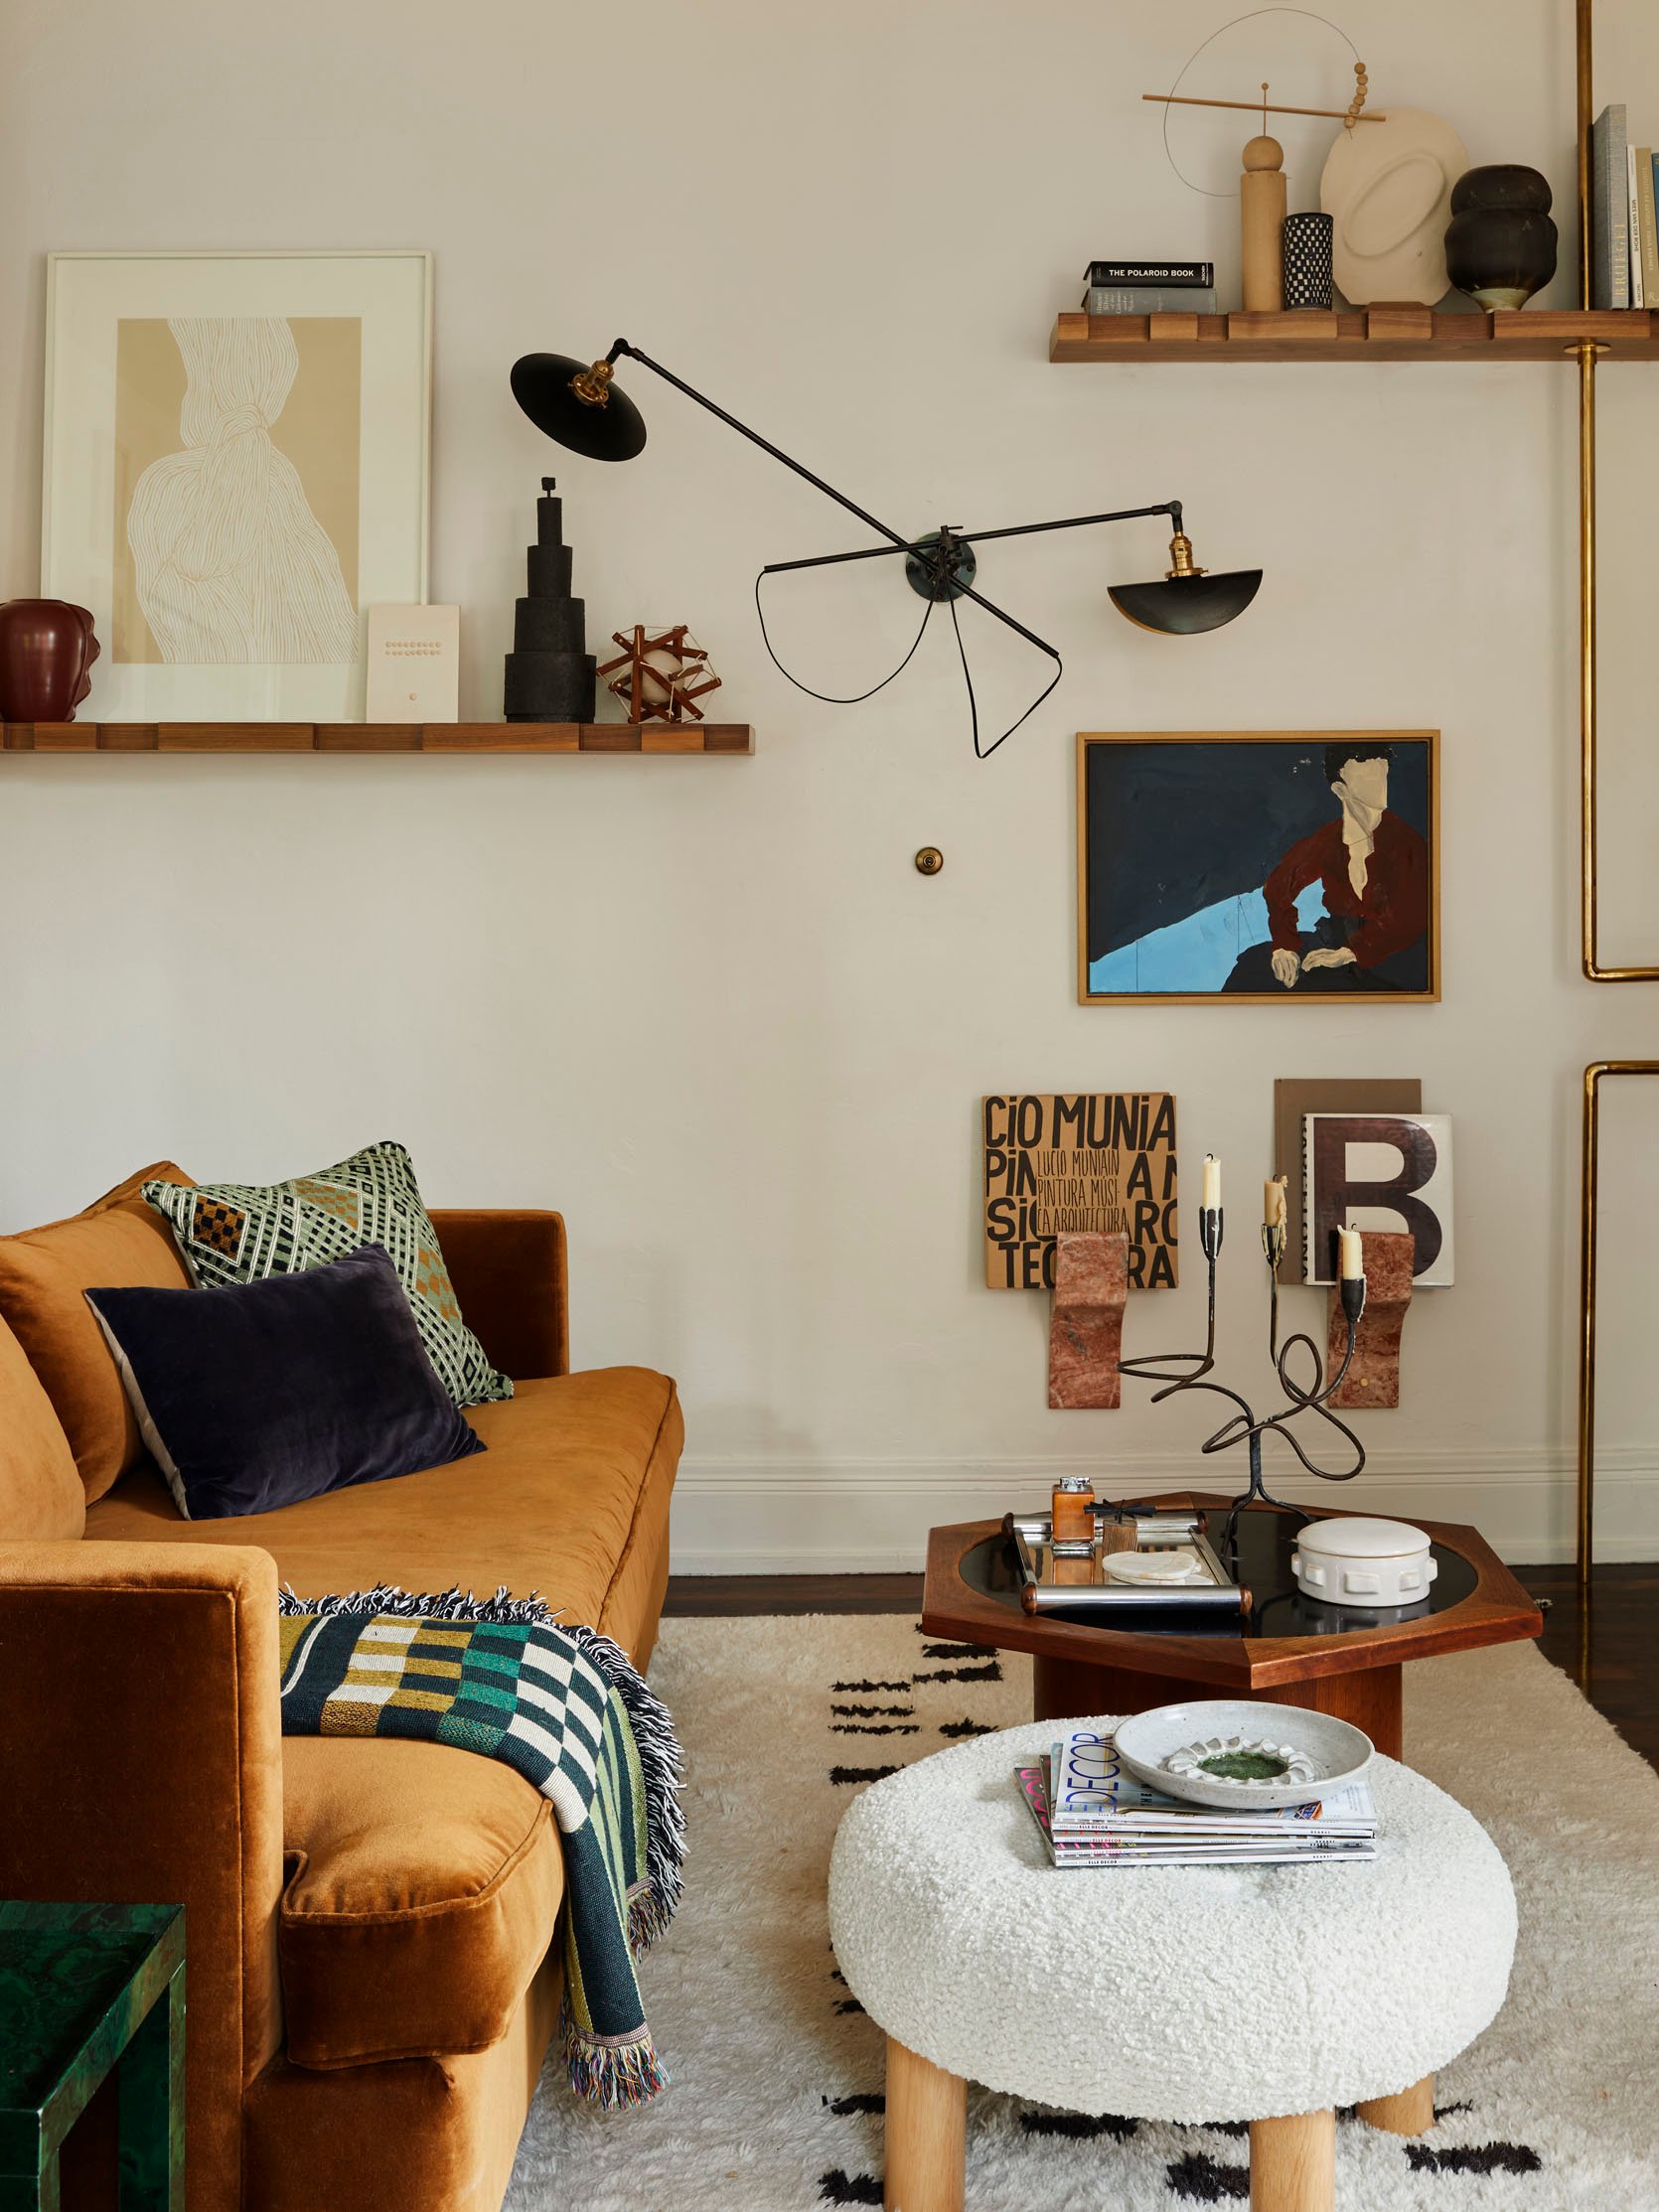
Ah, it’s hard to know where to start, but since I promised to talk about the sconce, let’s begin there. I have a love affair with lighting, and at the top of my “non-vintage” wishlist was a wall light by WO&WÉ. I feel like I first saw their work when I started working here almost 10 years ago. To me, they are modern classics. Knowing how in love I was with the light, my dad offered to get it for me as a wildly generous Christmas gift (I DO NOT deserve him). They are not inexpensive lamps, but given that they are all handmade in France, if they are within your budget, the quality and beauty are phenomenal. I would have absolutely saved up had I not been given this wonderful surprise. What is also a sweet addition to this company is that the designer, Oliver, has been joined by his daughter, Juliette, making it a father-daughter family business. Makes me love it even more. I was able to customize as well. In the standard design, the arm that extends from the wall came out further than I ideally wanted. Since everything is handmade, they were easily able to shorten it. Now it extends just a few inches beyond the depth of the shelves. It’s perfect.
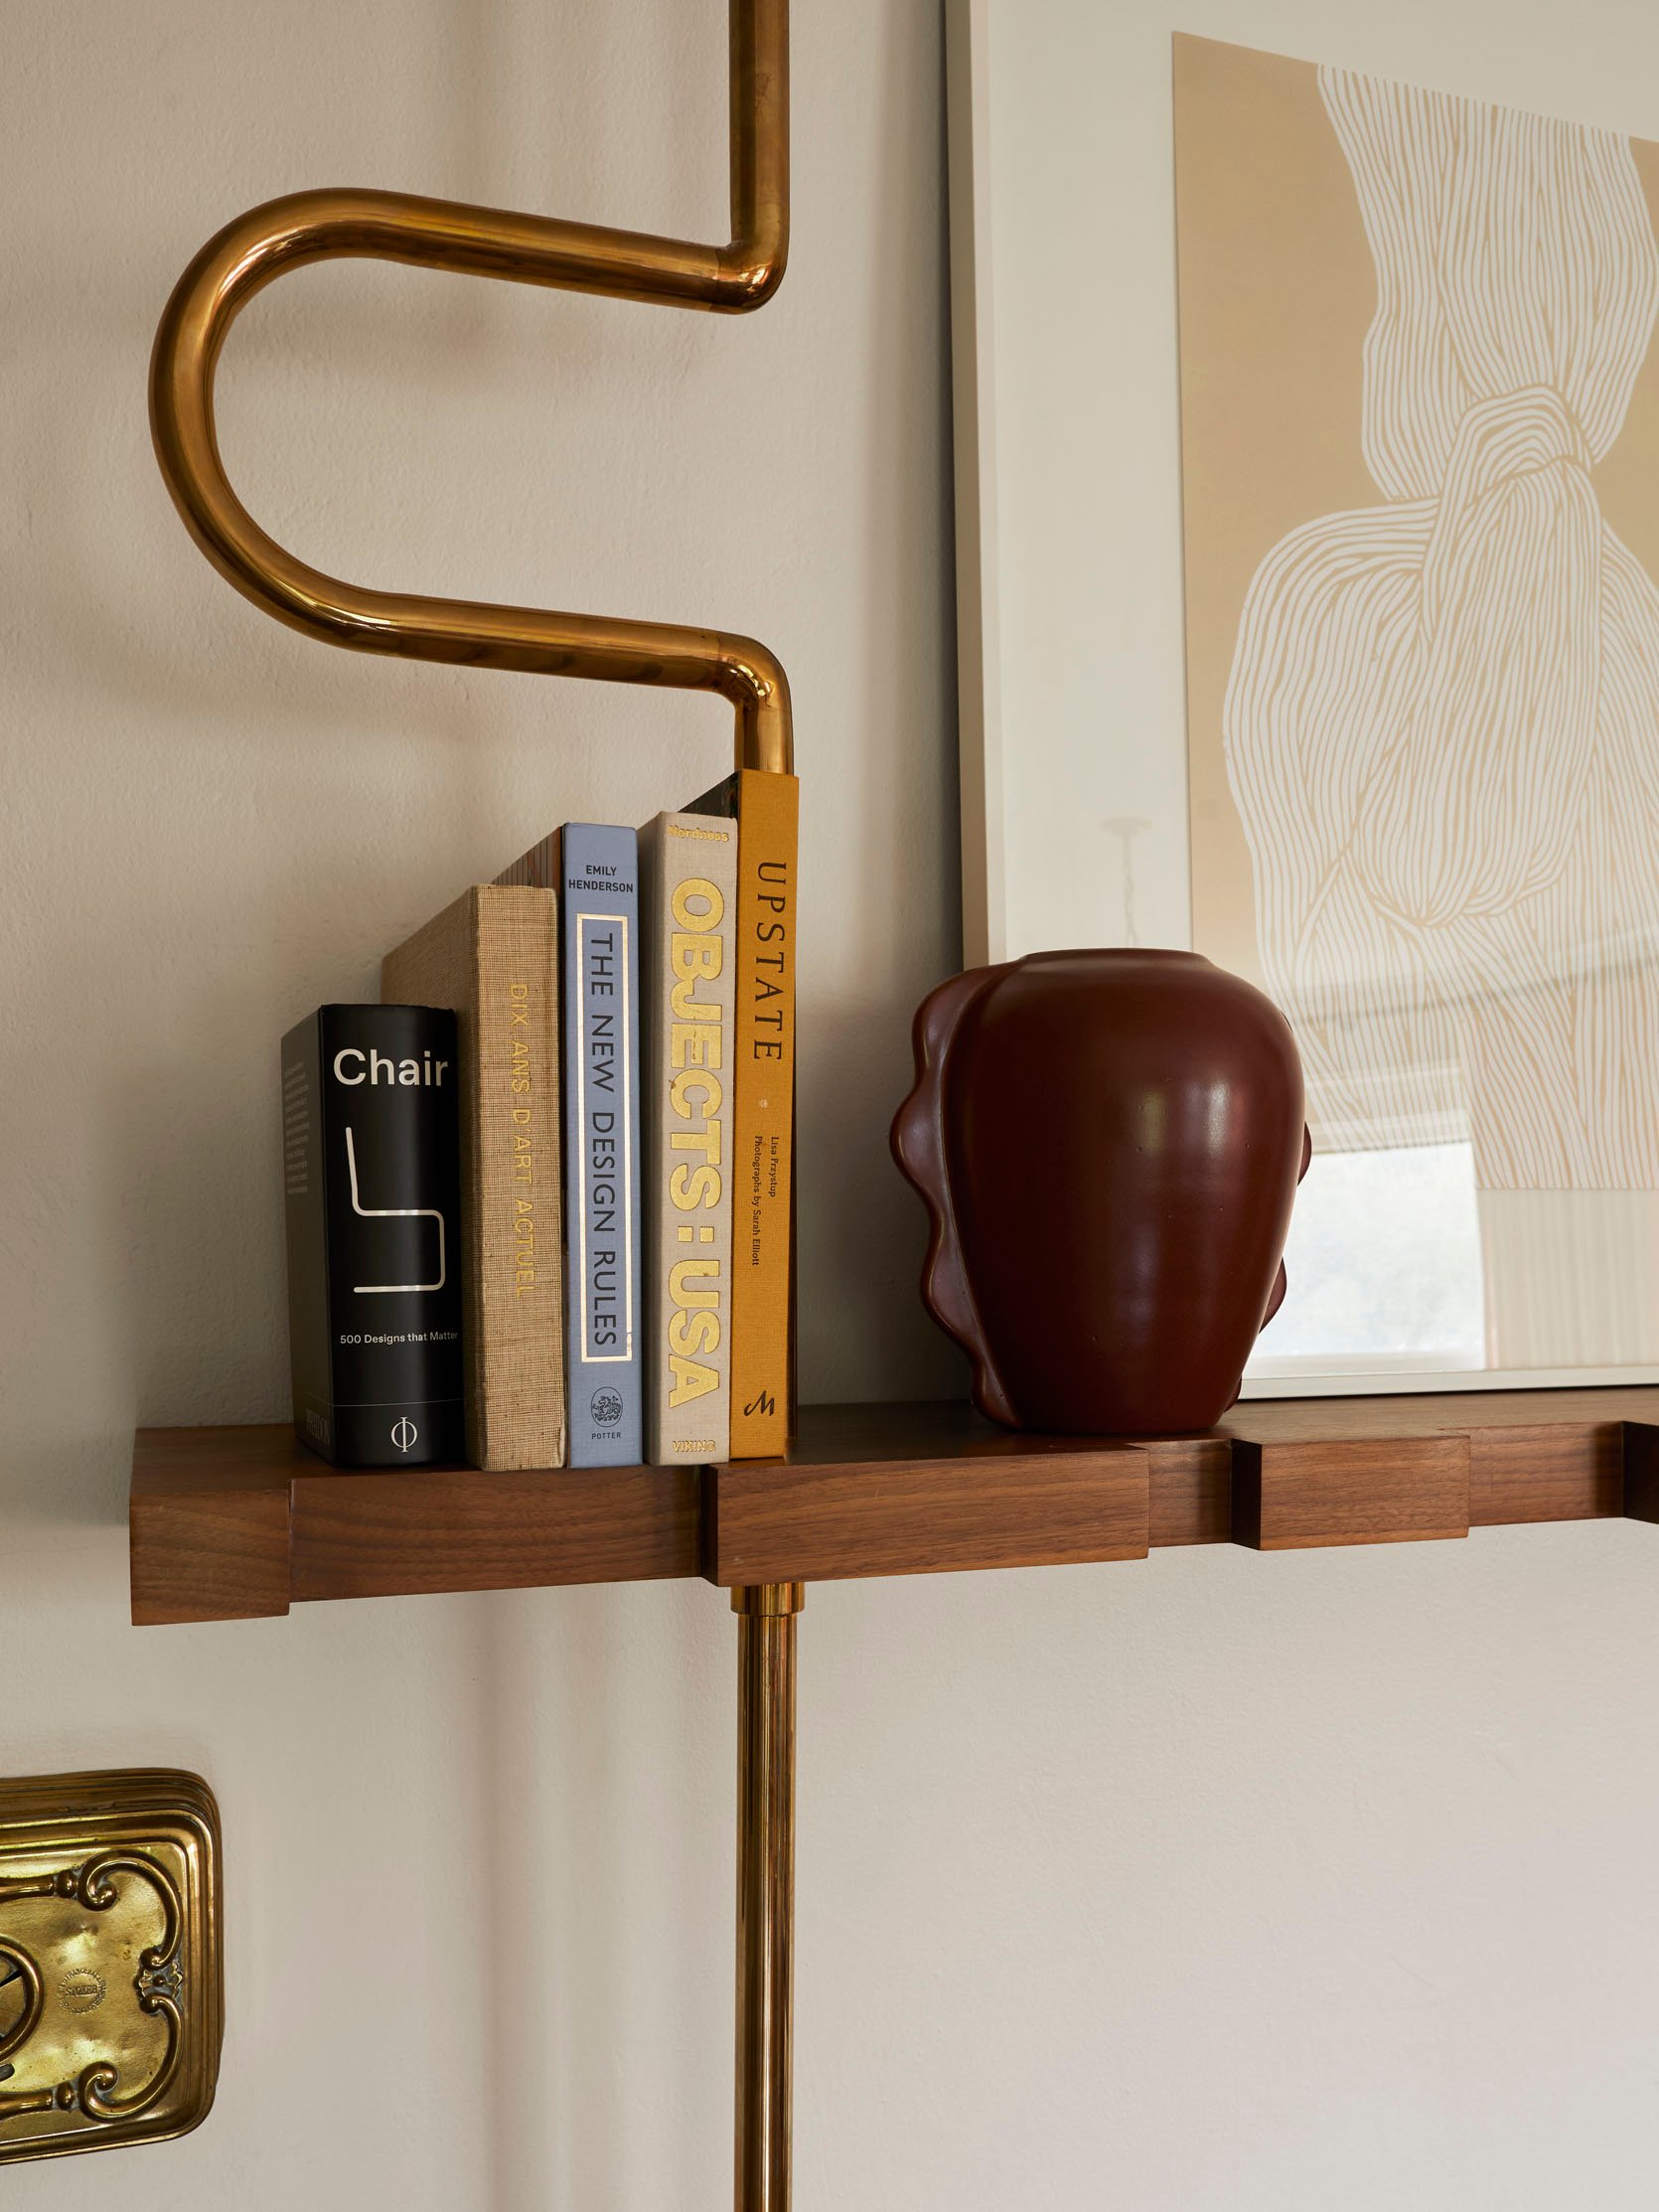
Antique Foot Warmer | Chair: 500 Designs That Matter Book | The New Design Rules Book | Upstate: Living Spaces with Space to Live Book | Rust Vase
Speaking of the shelves, take a look at the details. The unlaquared brass finish and the finish on the wood are perfect. The cutouts on the front were an idea I had from a bench I saw in a New York hotel lobby. The bench’s divits weren’t different widths, but I wanted to mix it up to give a more “organic brutalist” look. It wasn’t in the initial design, so I was so grateful that BuildLane was happy to edit that detail so easily. I mean, if you’re going custom, make it count, right?
And oh, what a beautiful blue book at the end of that shelf:)
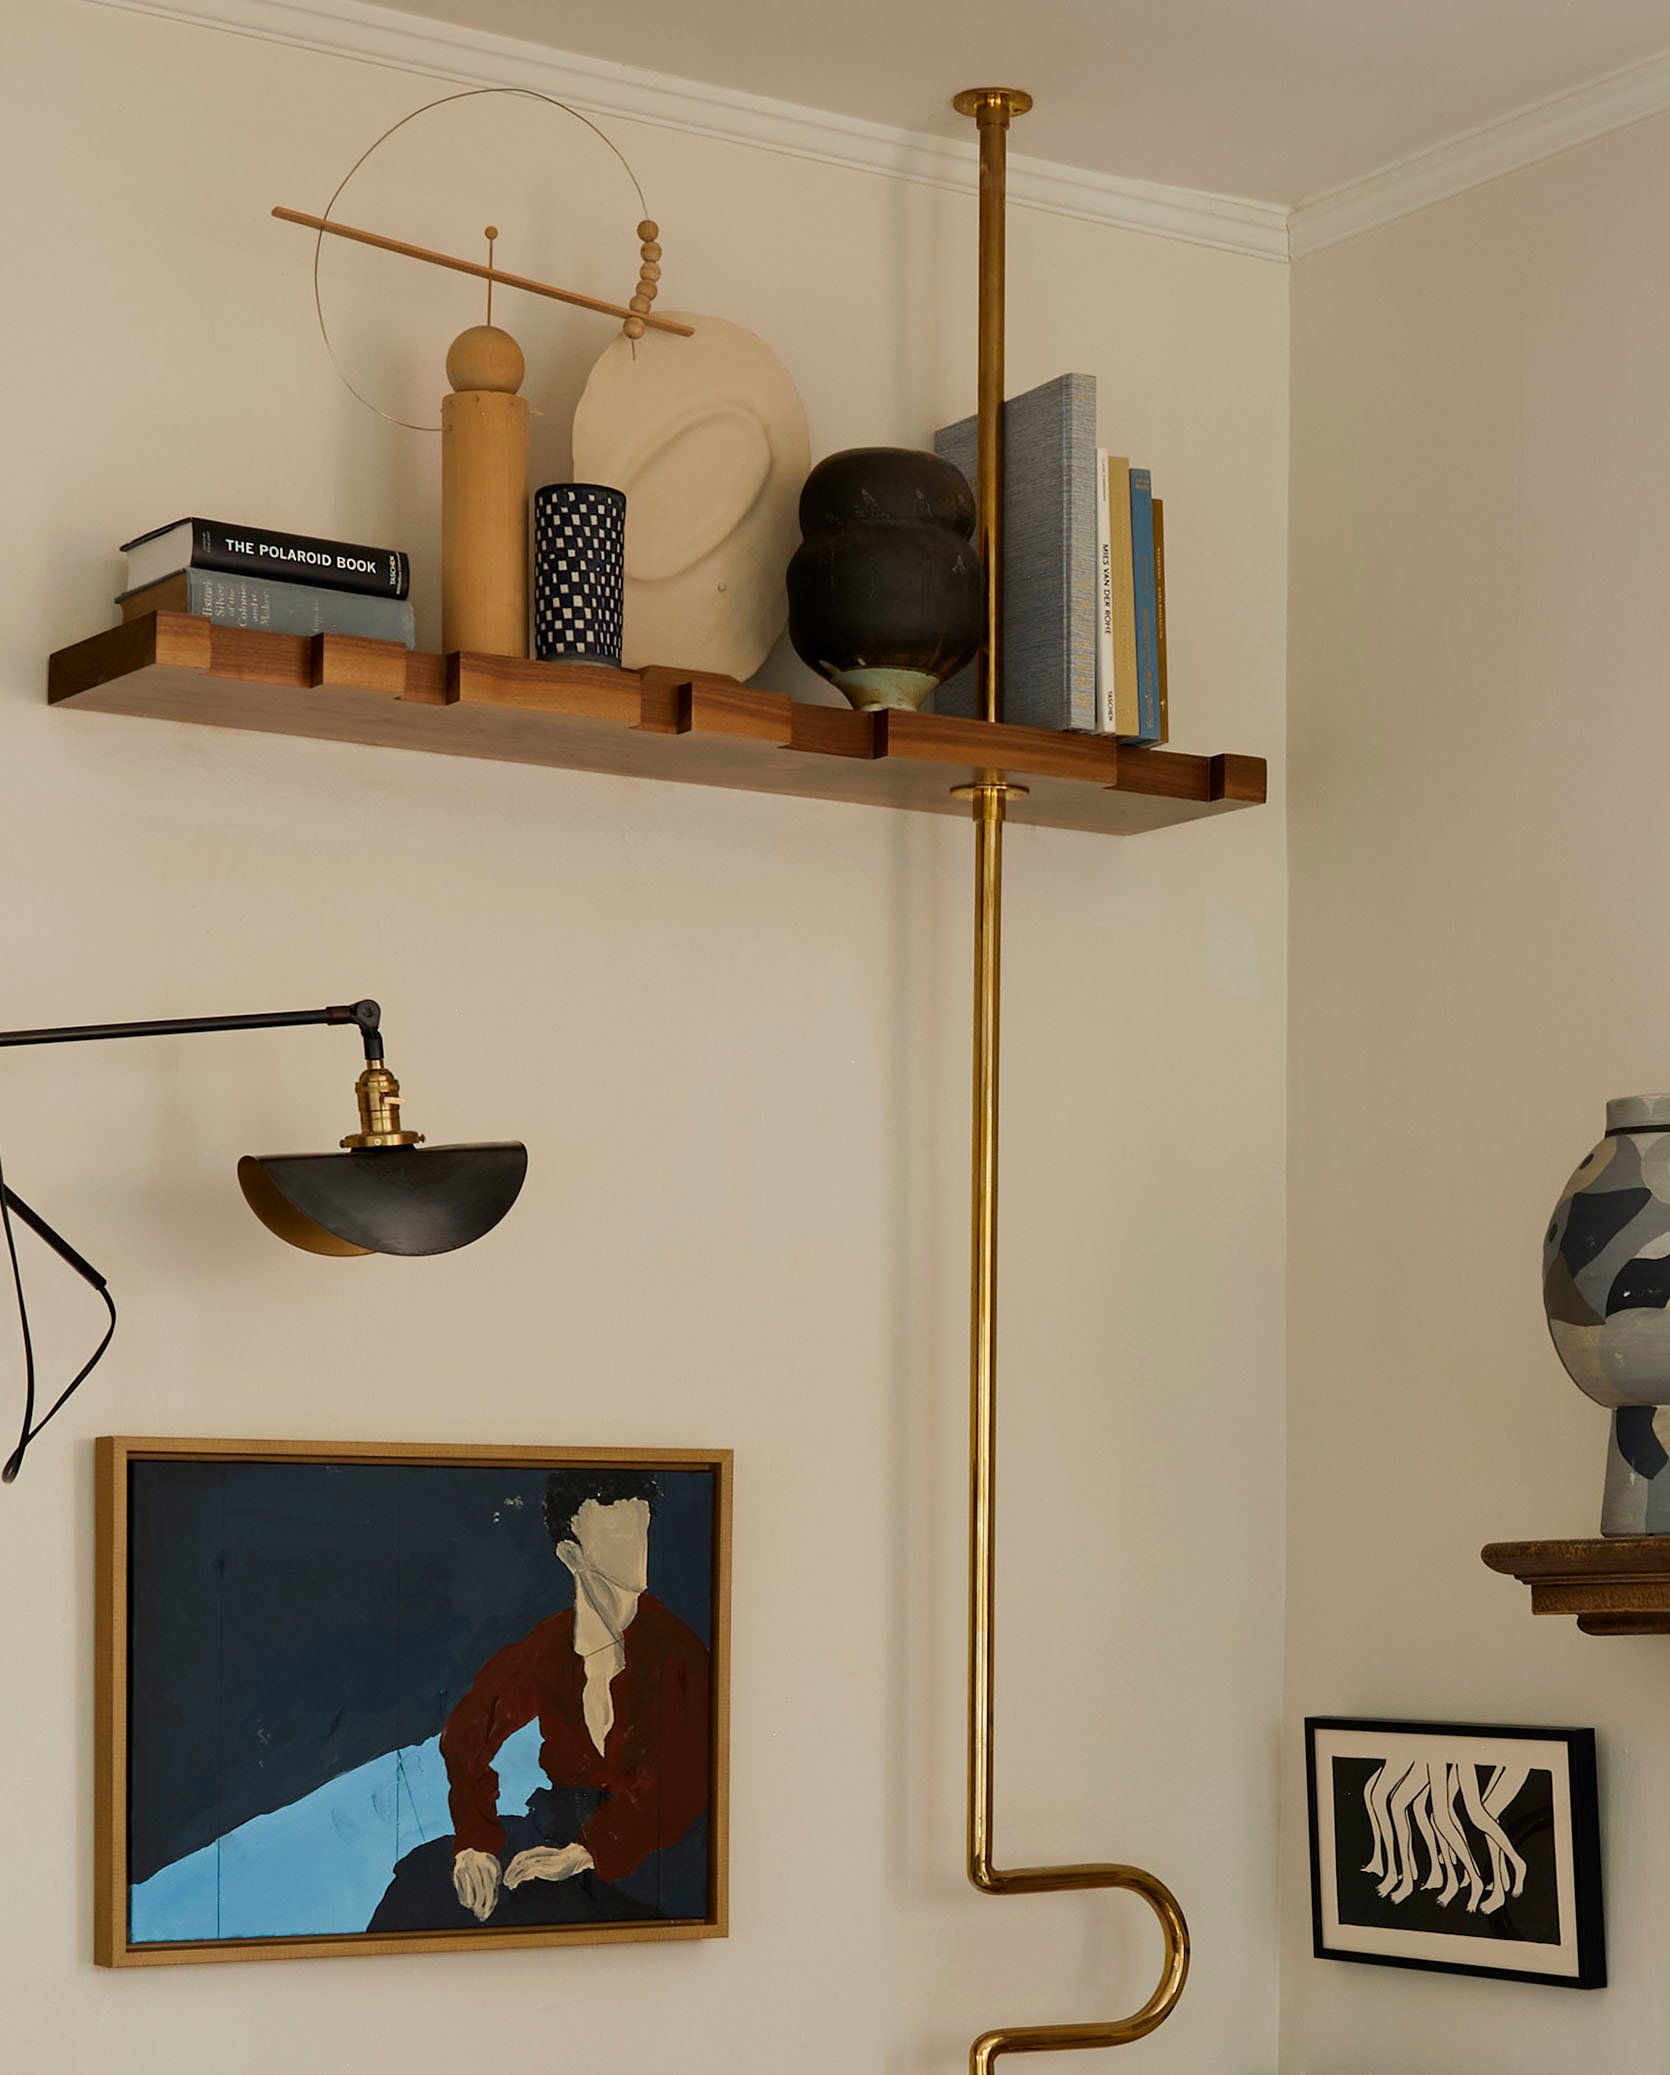
Let’s talk decor, shall we? The books on the top shelf are ones I’ve collected from flea markets, Emily, library sales, etc. The larger vase and cream ceramic sculpture are from the Downtown Modernism flea market. The sculpture is by an artist that Emily introduced us to, Melinda Forster, who is so talented and extremely kind. I love getting to see her booth each time I go, and every time I hope I don’t come off like a weird fan girl, ha. The little patterned vessel was from my first Mexico City trip, and I think it adds the perfect visual punch. It’s the “least interesting” shape-wise but the most interesting pattern-wise. A helpful little tip in mixing solids and patterns when you’re trying to style. But of course, all the styling credit goes to Bowser:) Oh, and that wooden sculpture used to be Emily’s, which I got in our LA prop garage shopping spree she let us do before moving to Portland. It may be a little beat up, but I think it’s so cool and interesting.
Ok, before we move on, I have to talk about that painting. I saw a version of it on Facebook Marketplace, and after a couple of weeks, while Bowser was over, I asked her for her thoughts, and she told me to get it. Done. I messaged the seller, and to my disappointment, the piece had already been sold. But then she told me she could make me another one, and in under a week! I was thrilled since I didn’t realize that she was the actual artist. Cut to my being in a rough headspace due to yet another horrible piece of government news, but heading over to pick it up. The artist was Utharaa Zacharias, who is half of the design studio Soft Geometry! In case you don’t know them, she and her partner, Palaash Chaudhary, design beautiful furniture, lighting, and objects. Initially, and not realizing who she/they were at first, I asked if she had any desire to be linked on a design site since the piece would be published in my room reveal. She asked which site, and when I said Emily Henderson, her response was “Wait, are you serious?” to which I smiled and said, “Yes.” It was then she told me that they were Soft Geometry. Then it was my turn to say, “Wait, are YOU serious?” I felt so silly not putting the pieces together before meeting in person. I am a big fan and now can’t believe that this wonderful painting that I loved and was excited to put on my wall, regardless of who painted it, has this really special story attached to it. So while Utharaa paints more for fun than anything else, the texture, colors, and details are more than I could have asked for. Not that anything I was upset about was fixed that day, but I was quickly reminded that connecting with people will always help to fill you up.

This might be one of my favorite shots. I have to fight the urge to tell the story of each individual piece. But I’m of course going to call out a few. You might remember that green, patterned pillow from a bedroom mood board post I recently did. Well, once I got the main bedspread, it was an “Oh, no.” It simply did not work. I did a little pivot, and as you can see, she lives happily in the living room.
The pink wall-mounted book holders I first saw 4 years ago, and knew I needed them in my home. So once the shelf idea was in the works, I reached out to the company to see if I could order them. The brand is &Jacob, out of Mexico City, and they are the best people. Back to that first trip I mentioned earlier, I thought they had a store, so my friend and I made the walk over. Well, it was definitely a private showroom (good one, Jess), but they welcomed us in anyway, we got to see some of their production process, and were even able to buy a few things. I didn’t buy them that day, but I was able to easily reach out to one of the people we met. When I look at them, they remind me of that trip, of that fun experience, and of one of my favorite places. Plus, they call to the pink curtains on the other side of the room for balance.
This shot is just a little more pulled back, so you can see how the “office” and the living room talk to each other. Oh, and that stool was a Zara Home find! But the plant and wire planter are from the Rose Bowl. Bowser was kind enough to help me pick the right plants. And y’all, you’d be so proud of how well I’m taking care of it. We were told it’s 20 years old, and you bet I’m doing everything I can to keep it healthy.
That book with the big “B” was a gift from Em years ago, and it’s kinda perfect there, huh? In this house, B is for Barcelona and for Bunge:)
Going Places Print | Collage Art | Vase | Oaxacan Wedding Bell (vintage) | Target Print (vinatage) | Blue Dish (vintage) | Wood Scultpures (vintage) | Green Candle | Black Candle | Stool (unavailable) | Wire Planter (similar)
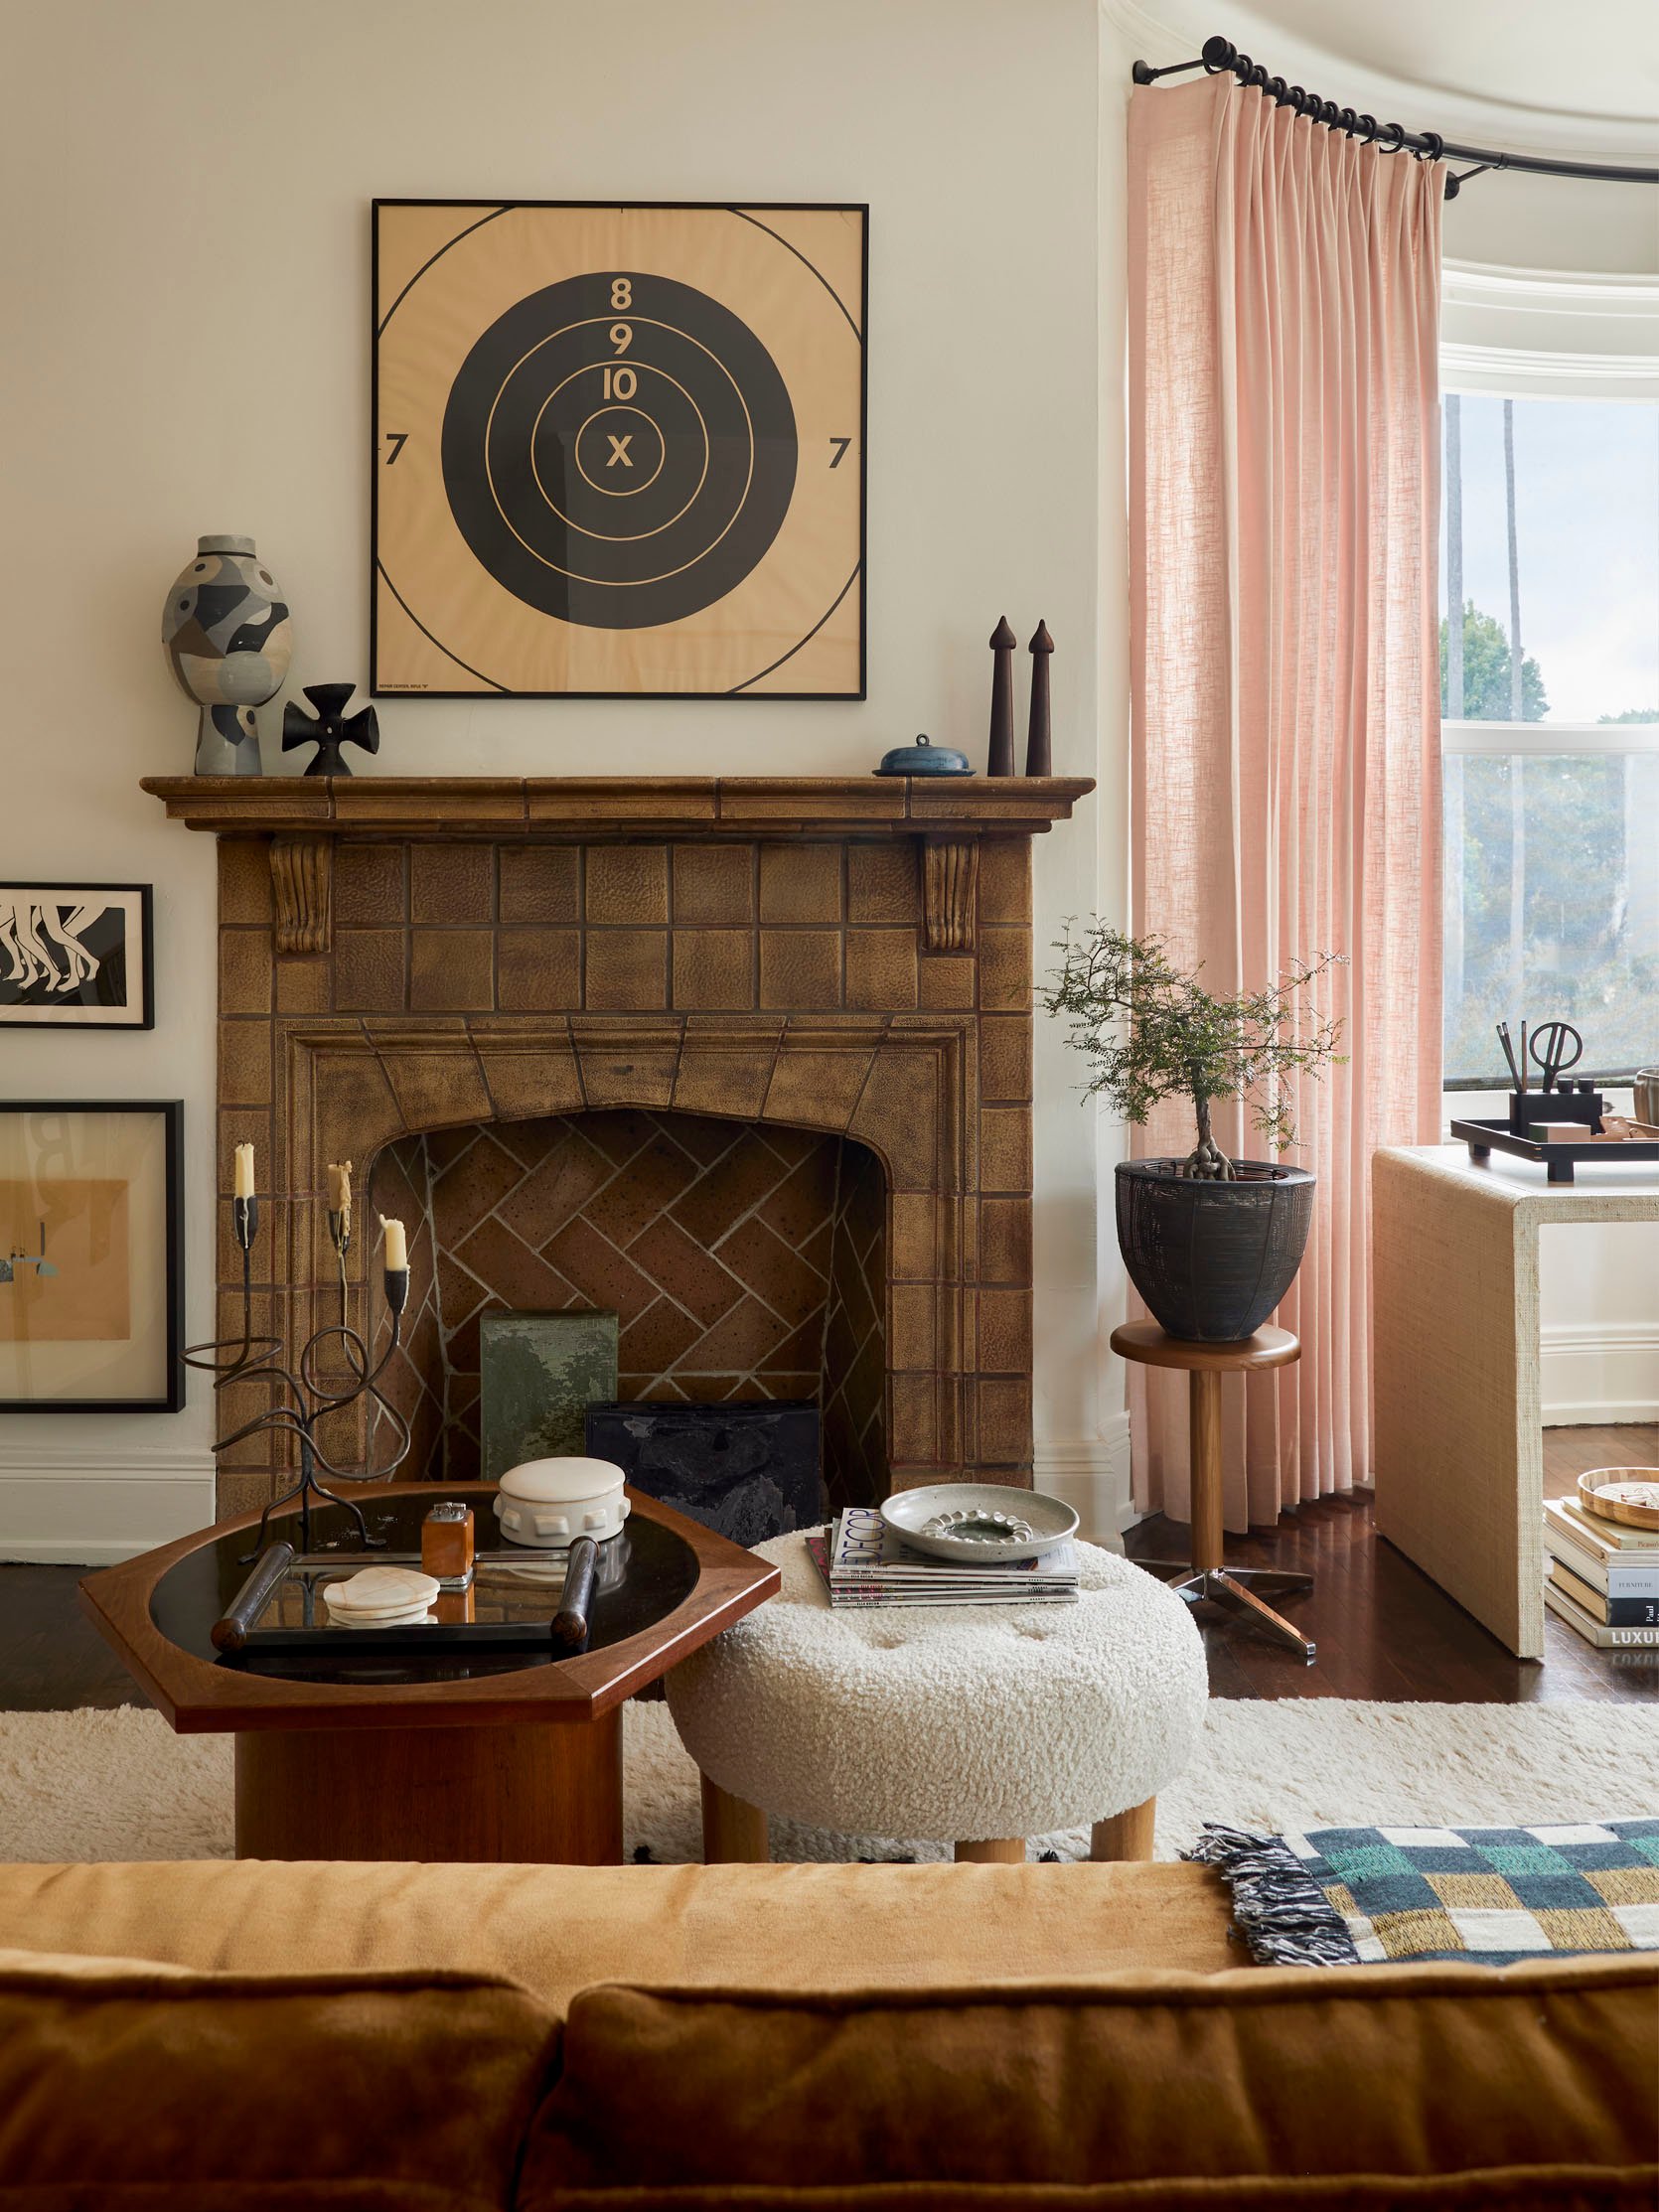
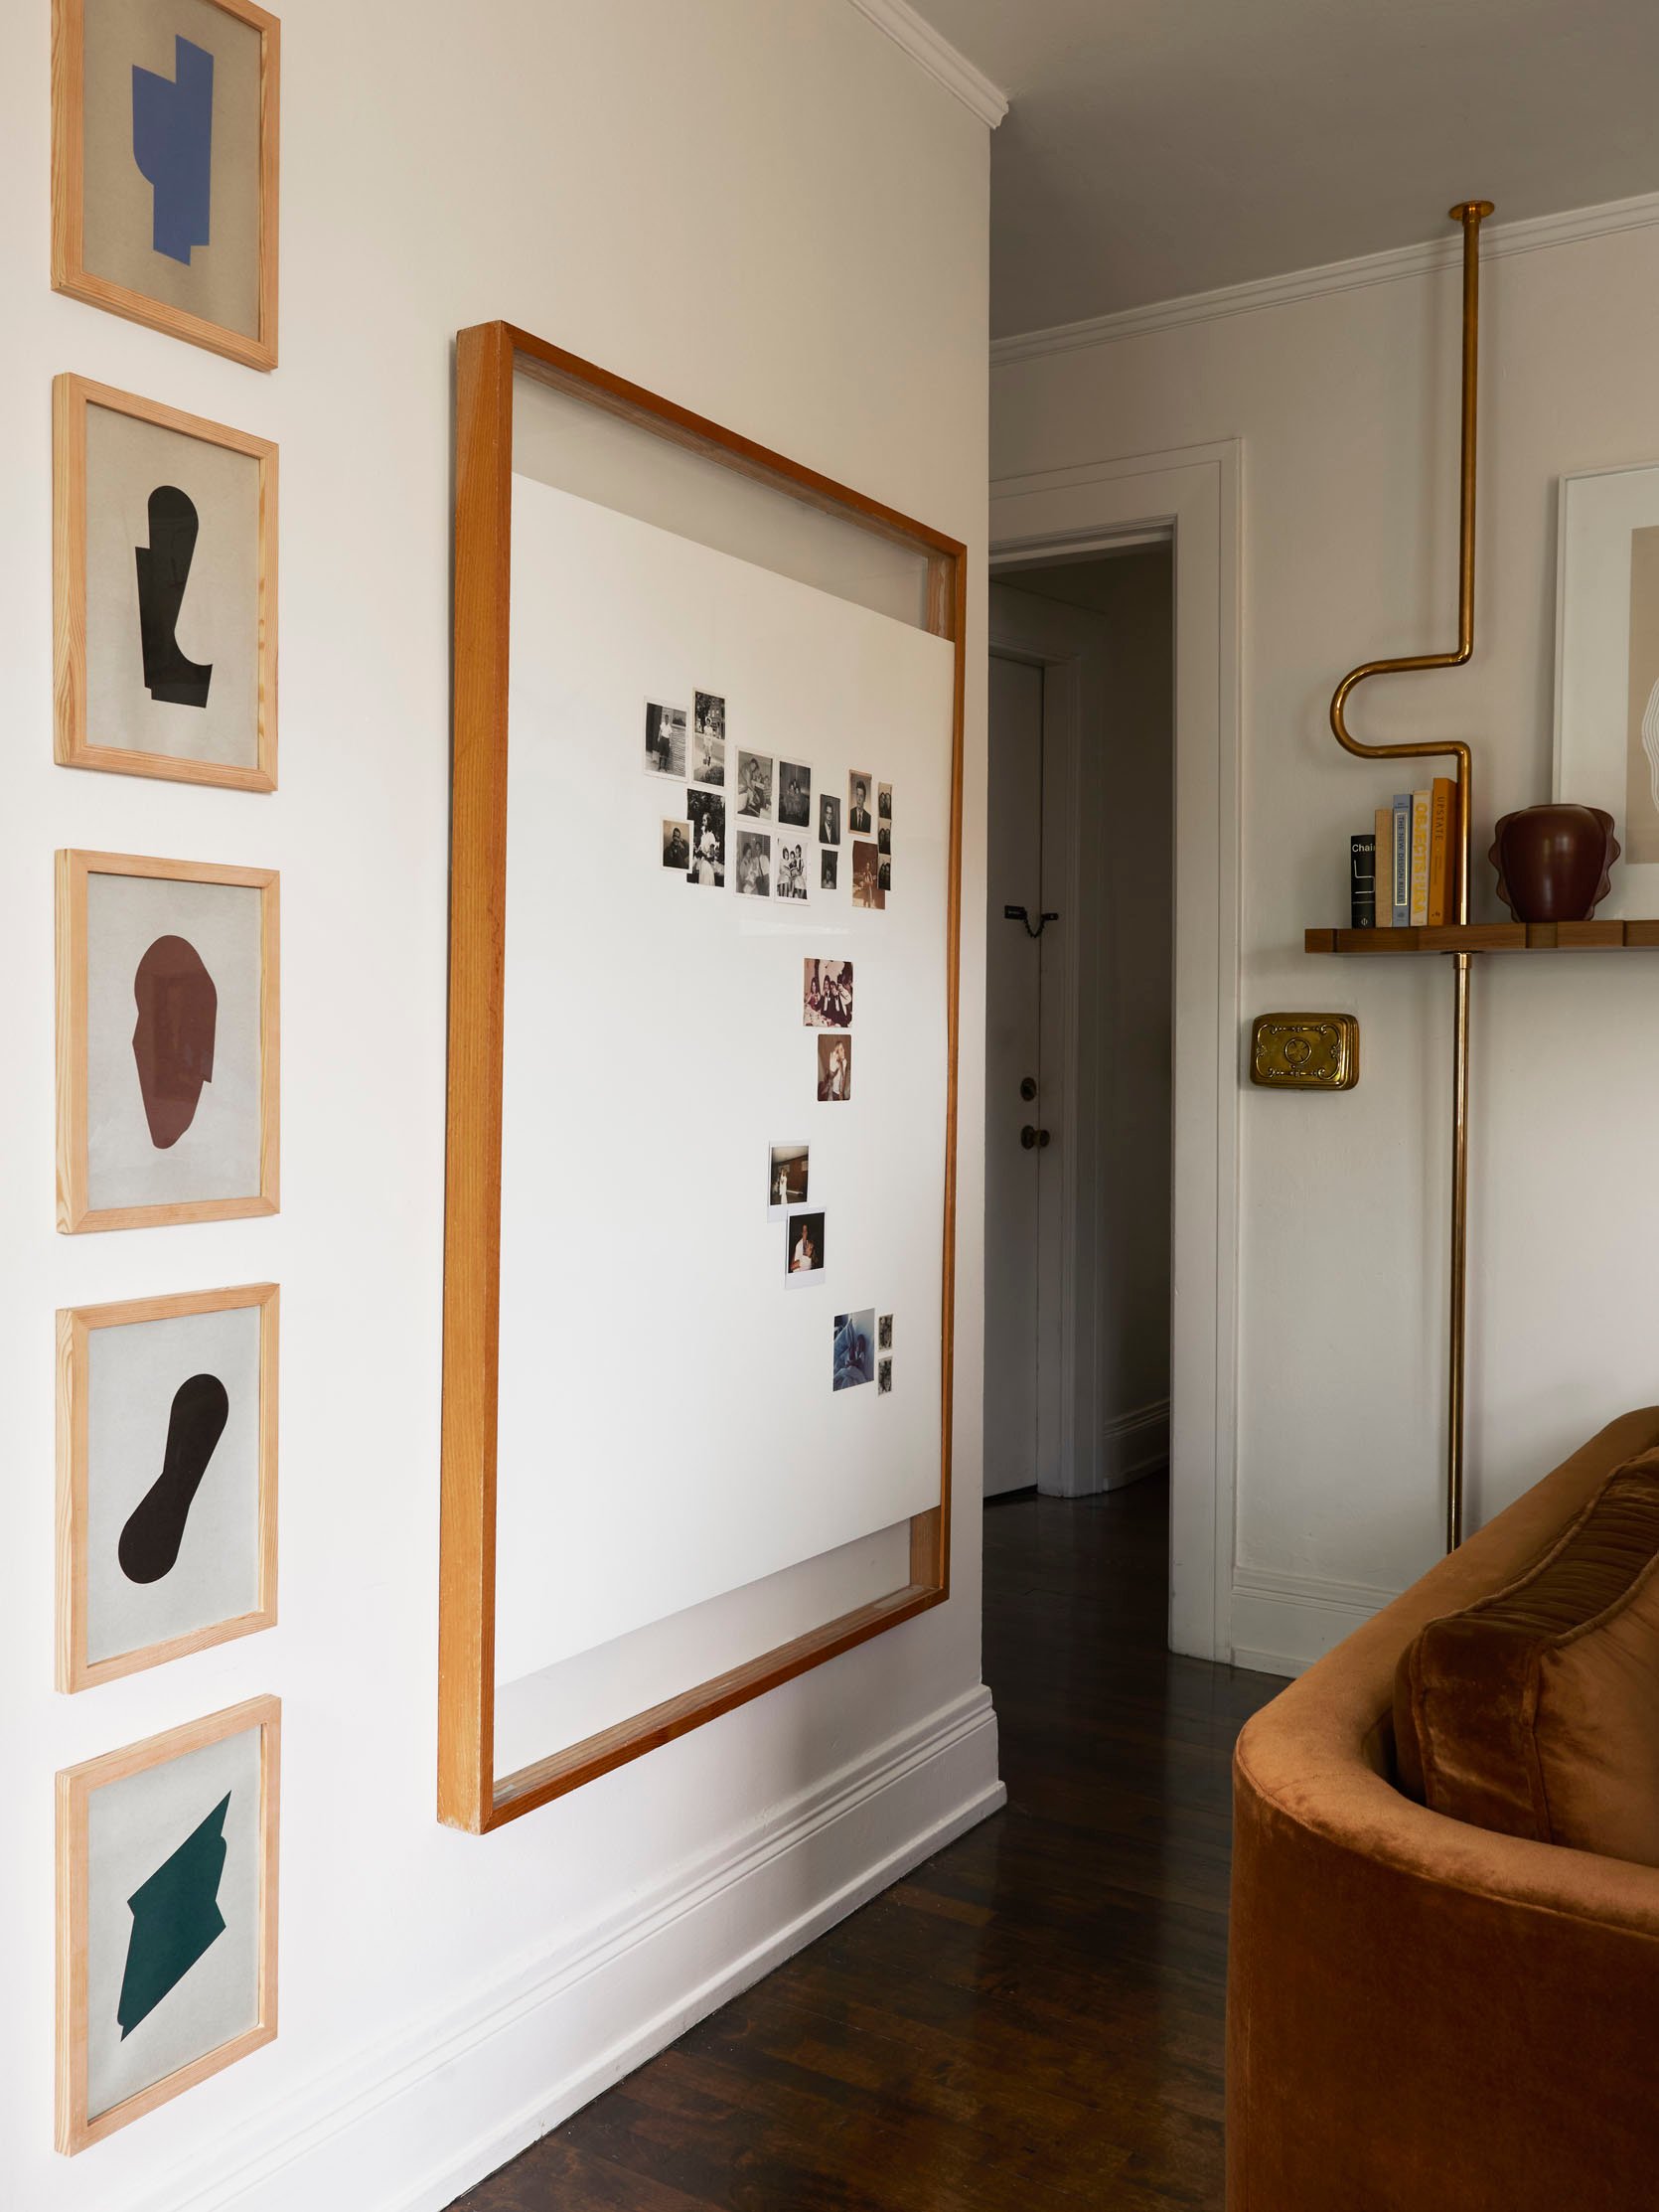
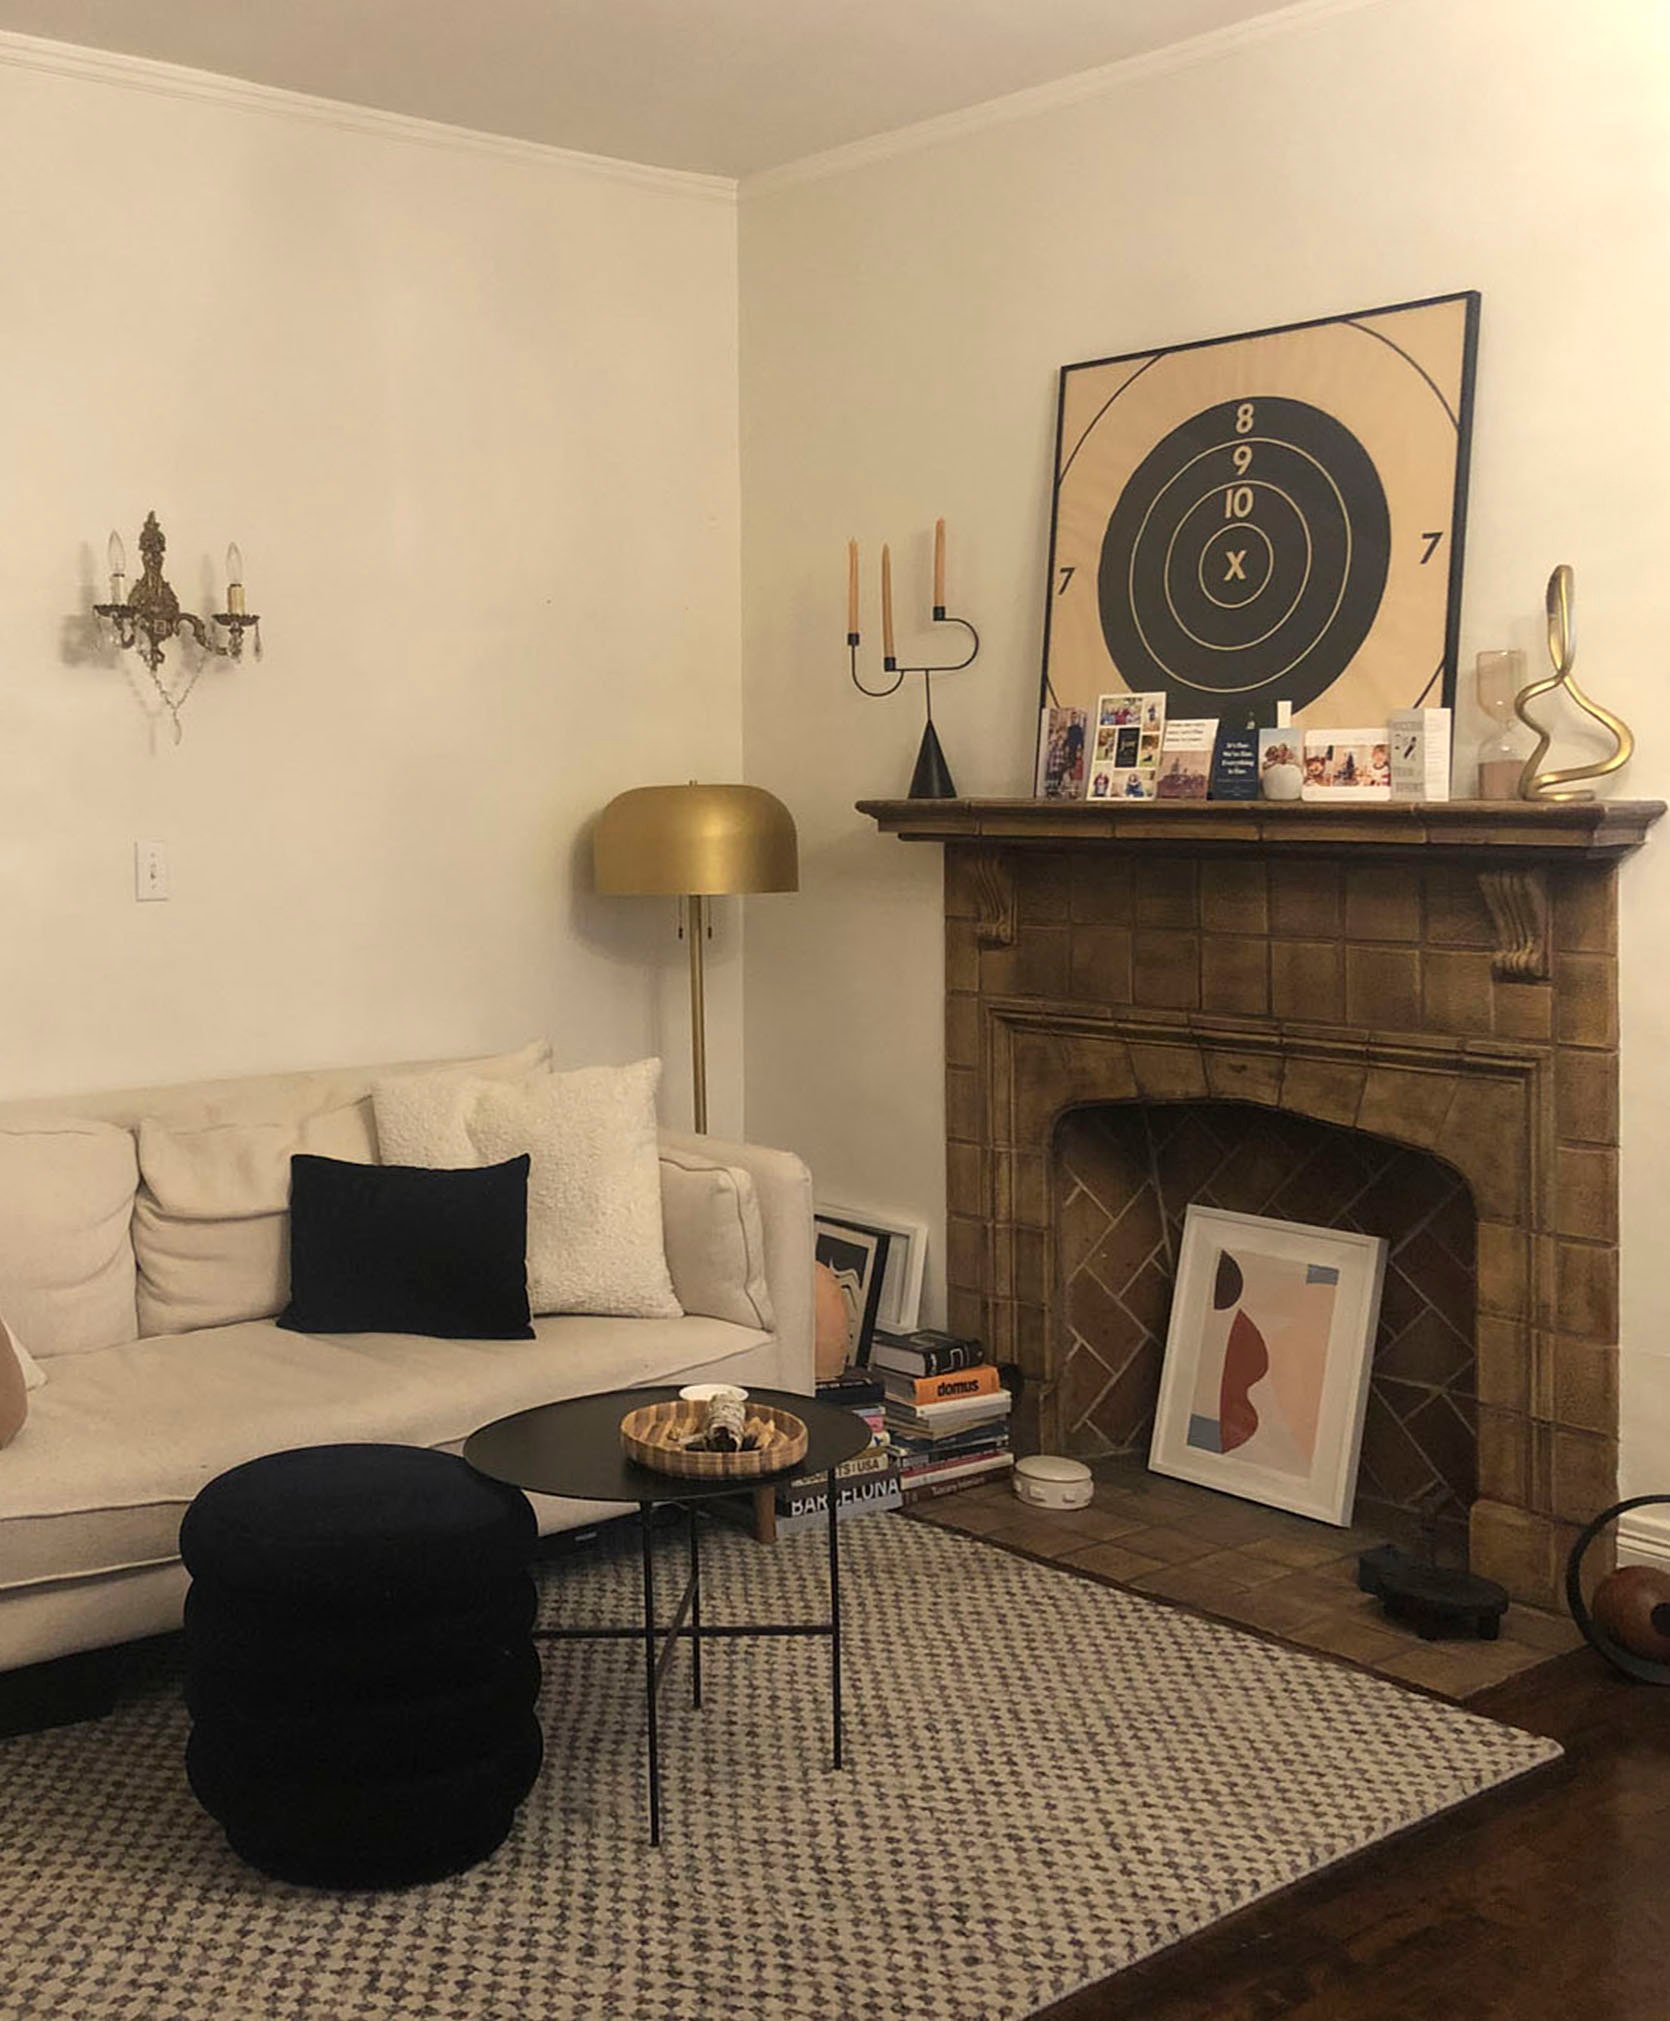
Oh, my dear, dear fireplace. Those candles were such a good find because non-working fireplaces are not easy to style well. There are lots of ideas out there, but none of them really felt right for this room. As you can see, I have a lot of little things everywhere. So if I had added a bunch of small candles, it would have been A LOT. I needed something larger. Scale is so important. I then found these big guys, and I knew they were much more of what I was looking for.
A fun little tidbit about that target art. I found it on Chairish for my last place for $30, but it was in a spot that didn’t get photographed. I then saw the same one in a room in an Elle Decor magazine, which oddly felt very validating. I even clipped it out and added it to my vision board that year as a “Jess, you’ve got this. Stop doubting yourself so much. You have chosen art that was good enough for Elle Decor” reminder lol. And look, do I love it’s a rifle target? Not even a little. But it has such a different meaning to me that I’ve gotten over it.
The tray was from my Paris trip with my dad, the candelabra was $6 at a consignment shop in Chicago, and is something I would save in a fire. All of the art was also in my last place!
Polka Dot Tray (similar) | Black Wood Dish (similar) | Round Pillow
Another favorite shot! And see how good the sofa looks after a few years of use?? I do have to admit that the round pillow and blanket are Bowser’s, but the pillow is still available, so naturally, I bought it as soon as she left. The green table was also in my last place and was a crazy Les Bunge thrift store find! He bought it for $60, and then shortly after, I saw the same one online for $600!! He gifted it to me because I loved it so much, and I promise it was before I knew the real value.
For the art, those prints were also from Zara Home a while back, and the frames were from Amazon. I put them up pretty early on and instantly loved how they looked. But it took me much longer to decide what to put next to them. I didn’t want to leave the space empty, but I also didn’t want a visually overwhelming gallery wall. So I figured out a DIY piece I didn’t fail at!
I had been seeing these types of photo collages on Pinterest and was absolutely obsessed. And since I had so many old photos of my parents and extended family, I decided to create my own piece. I found this frame for $20 on Craigslist with no glass or back. But for $20, I was willing to take the risk, and I’m happy to say it paid off.
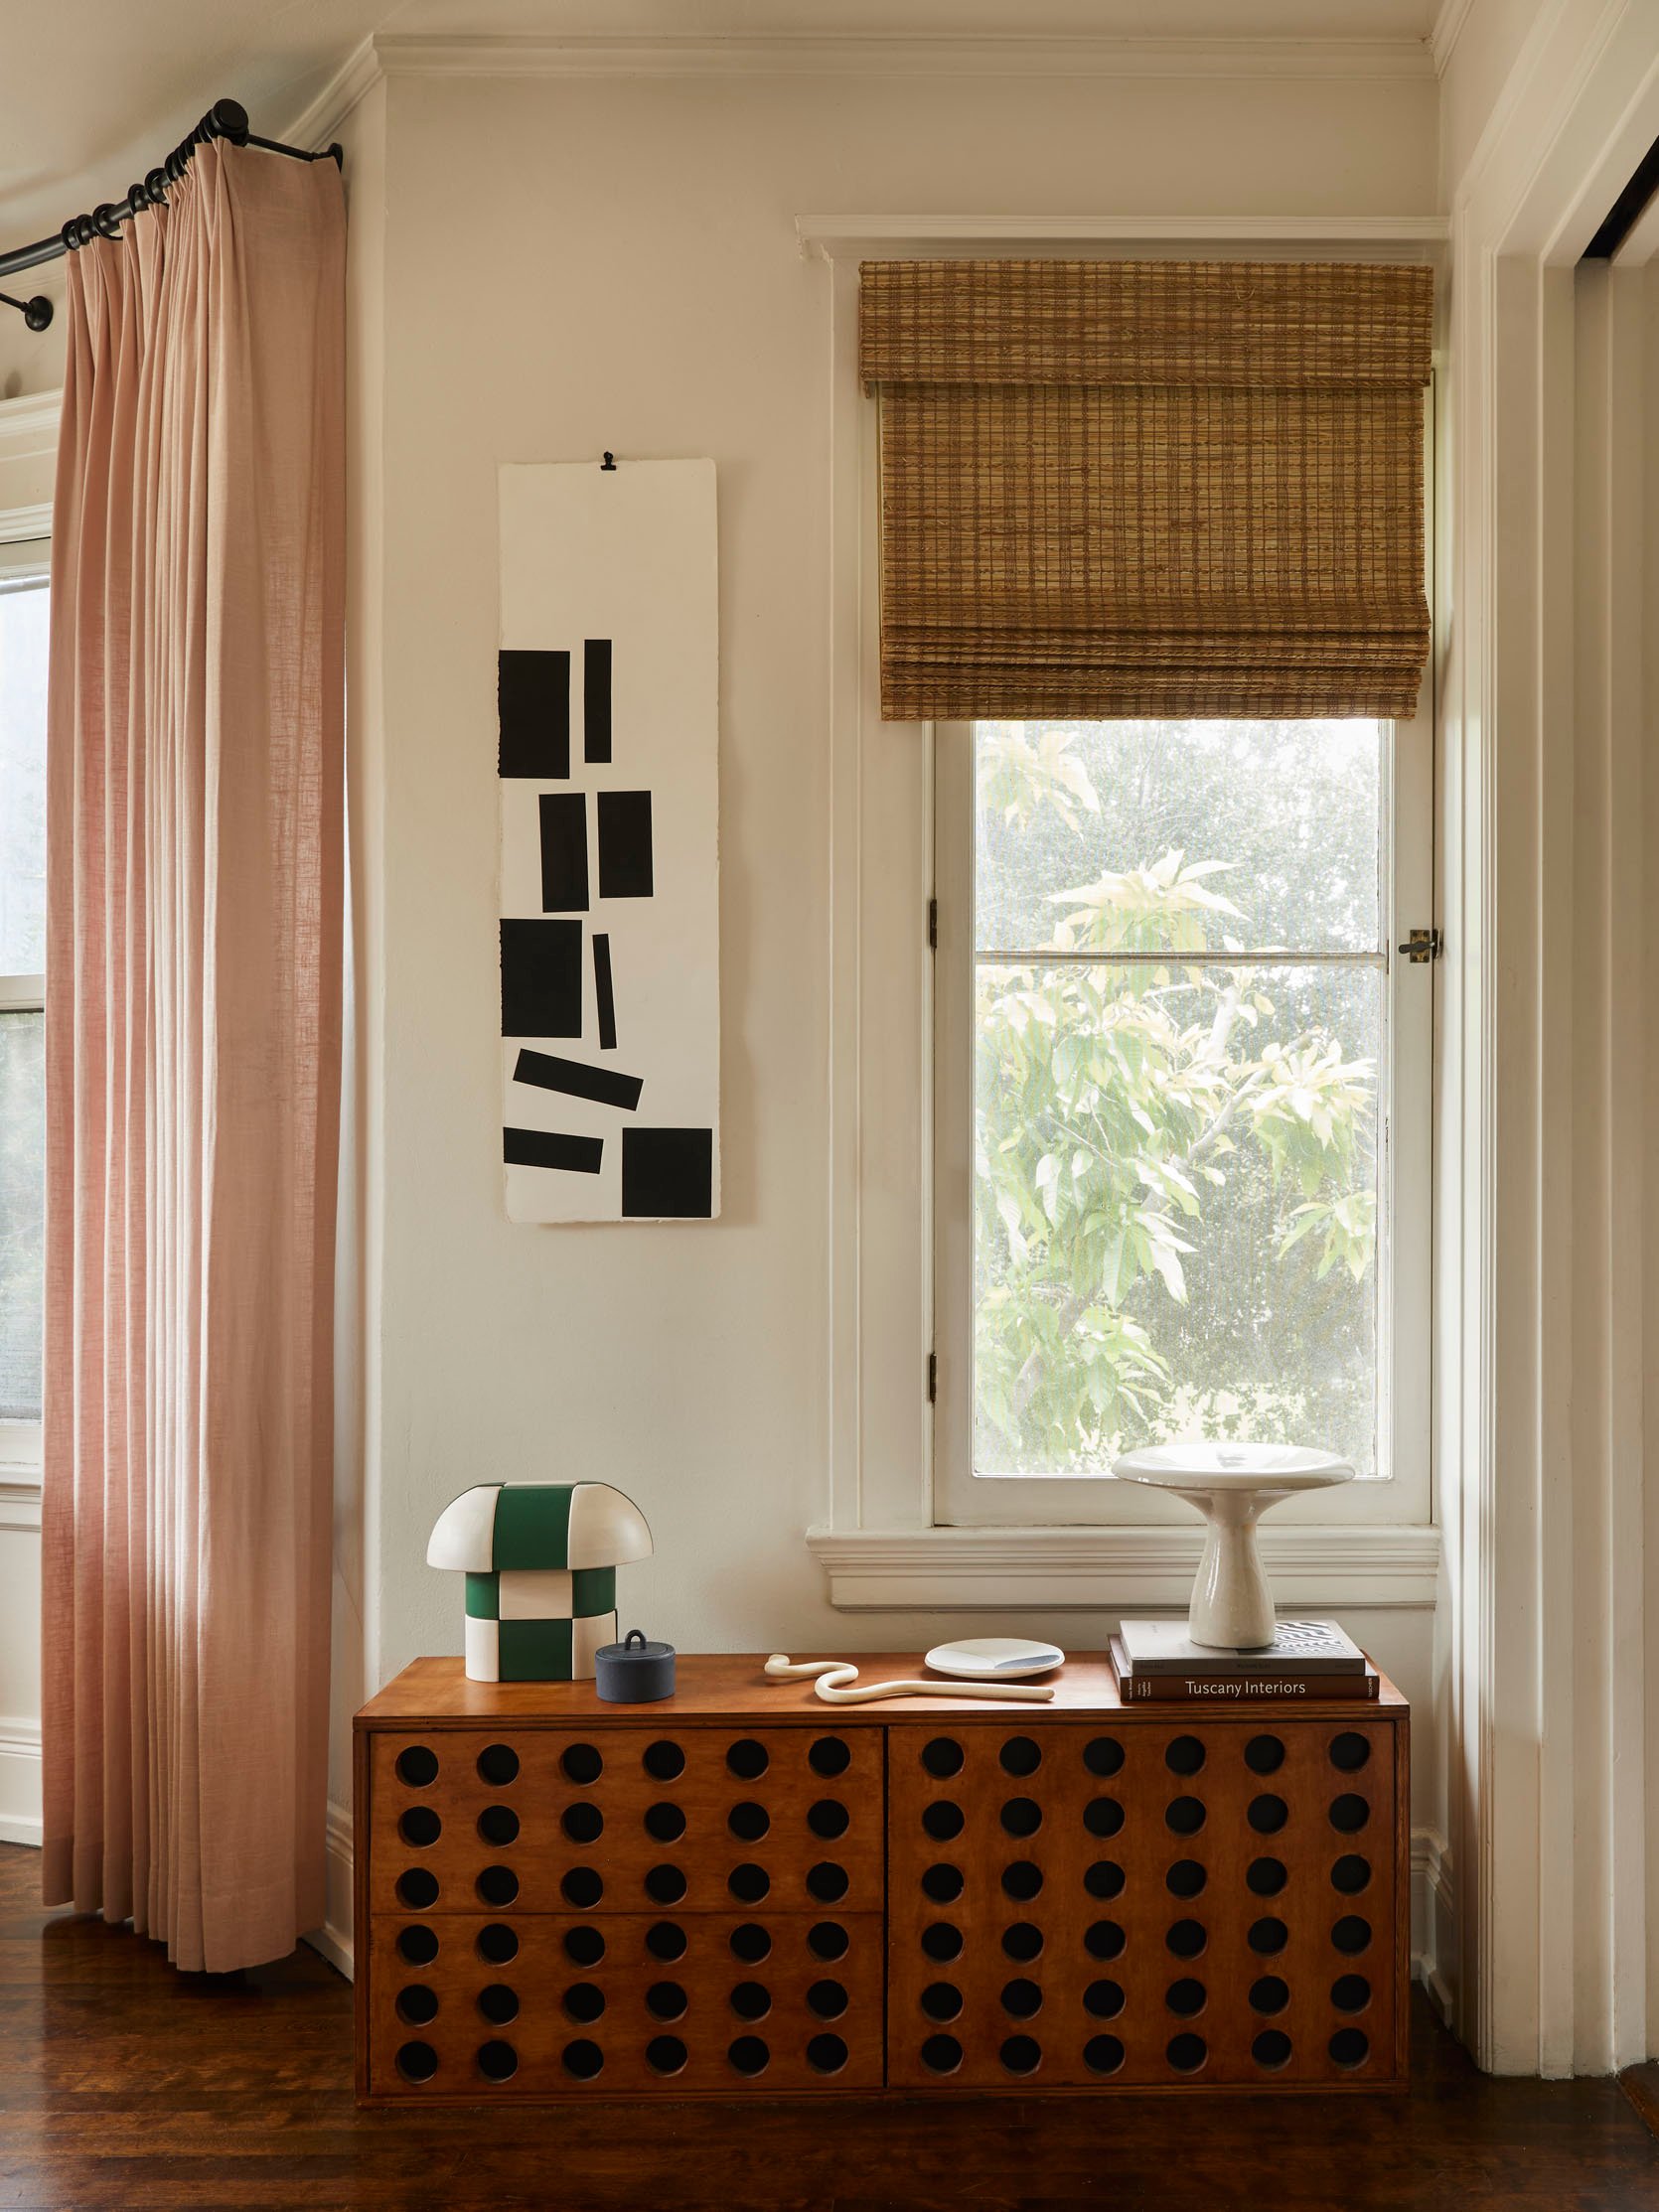
Oh, and that gold box on the wall is also from Paris and is an antique footwarmer. It’s covering my not-so-beautiful thermostat and a nonworking light switch, but don’t worry, it’s very easy to remove when I need to use the heat:)
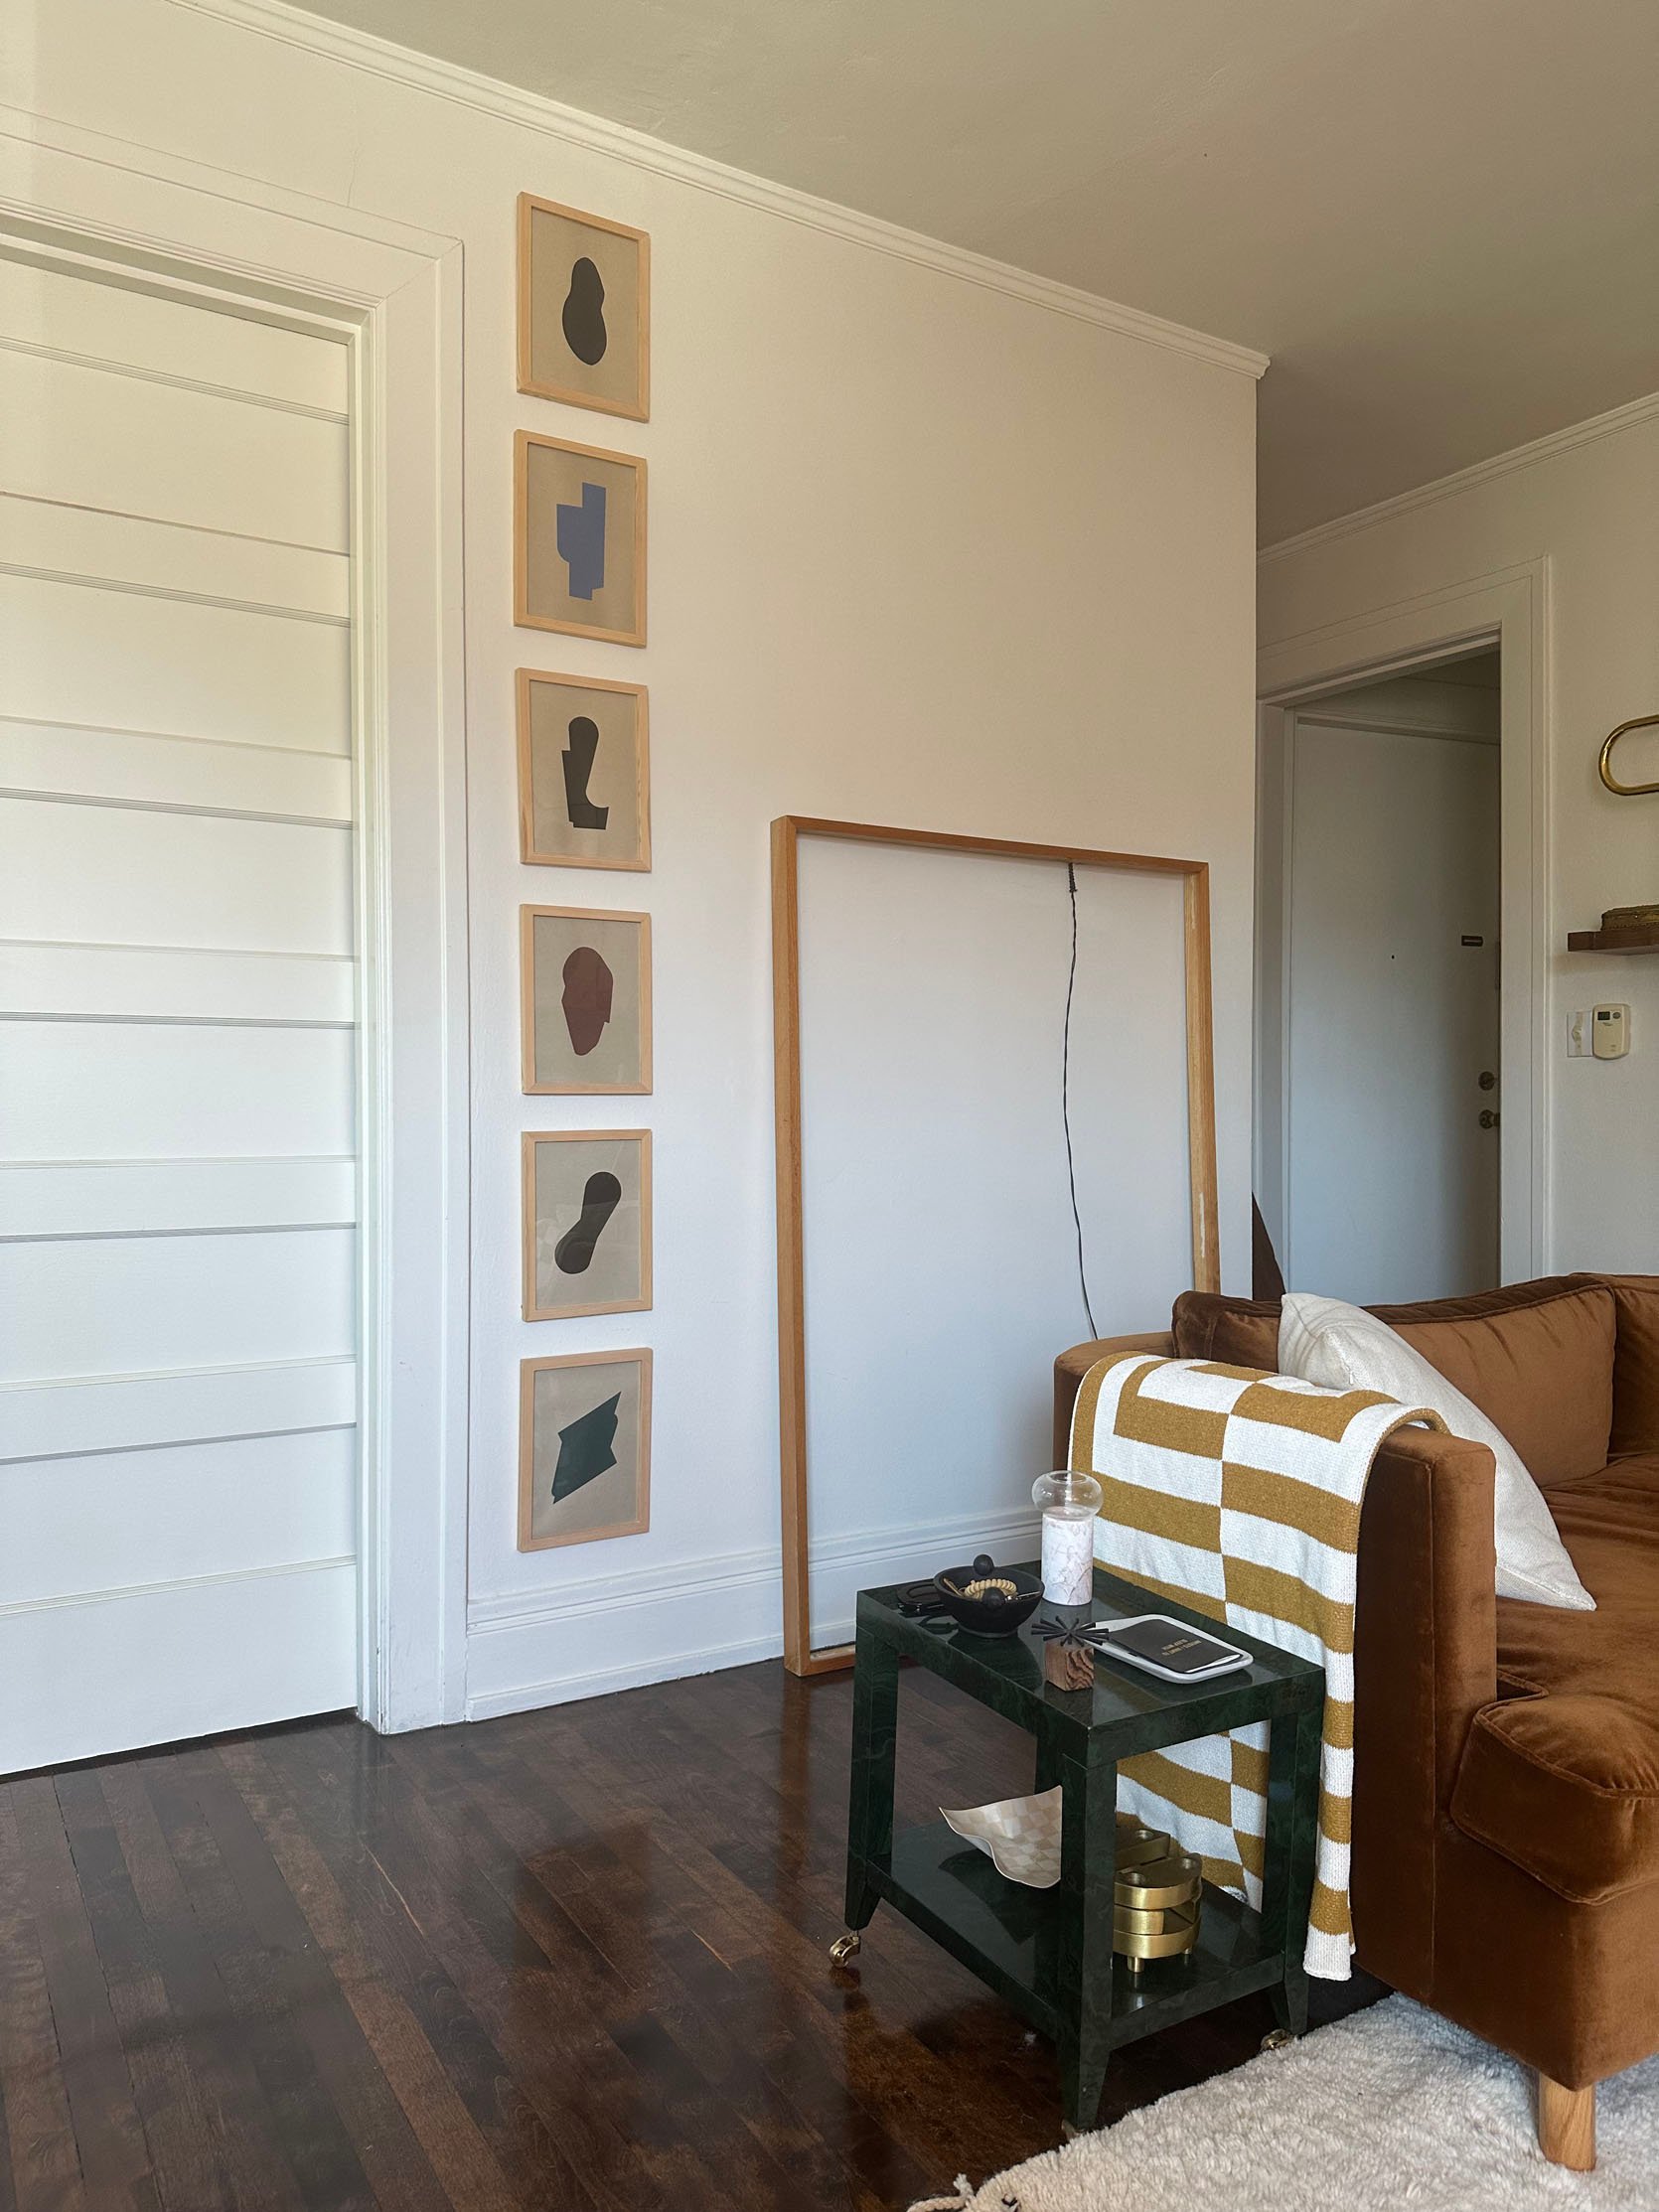
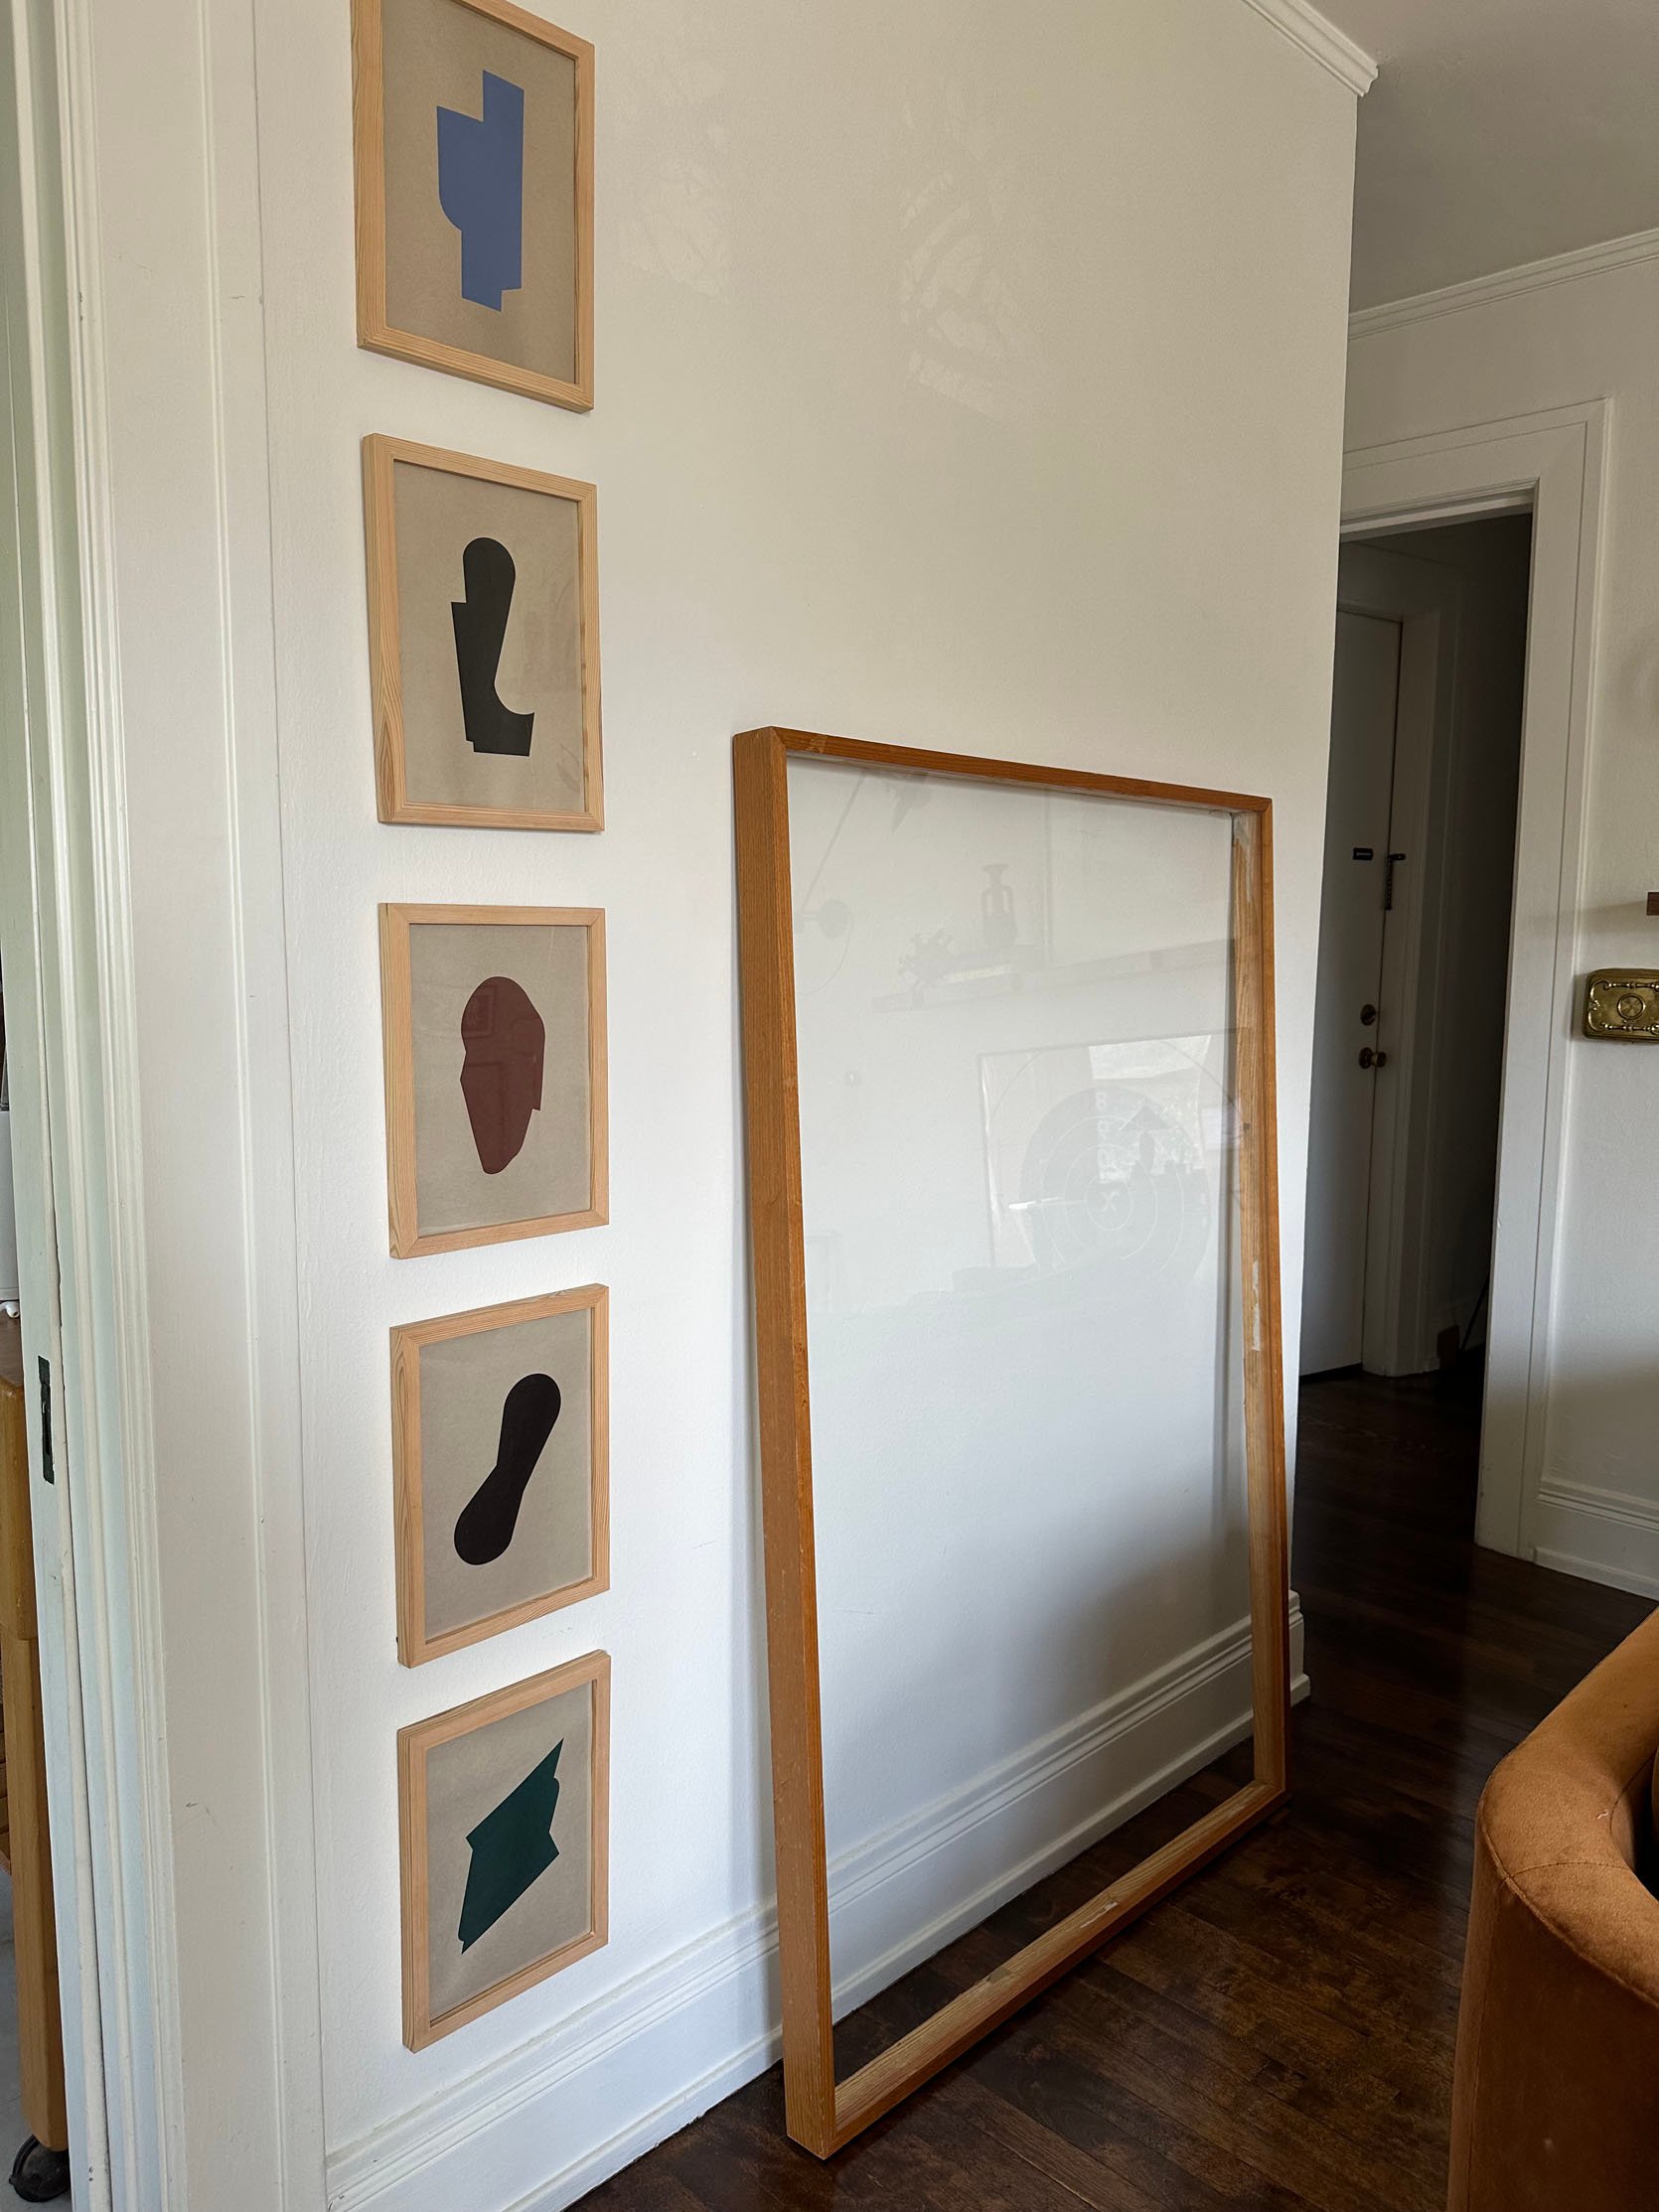
I then went to a local glass place after calling a few other places for quotes and was able to get the glass and installation for $90. The trickier piece to find in the size I wanted was the mat. The largest piece I could find that didn’t need to be custom was 40″x50″, which I got from a local framer for maybe $50? Thank you, Quick Frames! While I didn’t exactly have a choice without spending an unnecessary amount of money on a custom size, I really love that the mat almost looks like it’s floating with the open space on the top and bottom.
There were just a few more things I needed, like a few wood pieces, tape, and a Kreg Pocket Hole Jig. All in, I spent under $200 for a giant piece of very meaningful art.
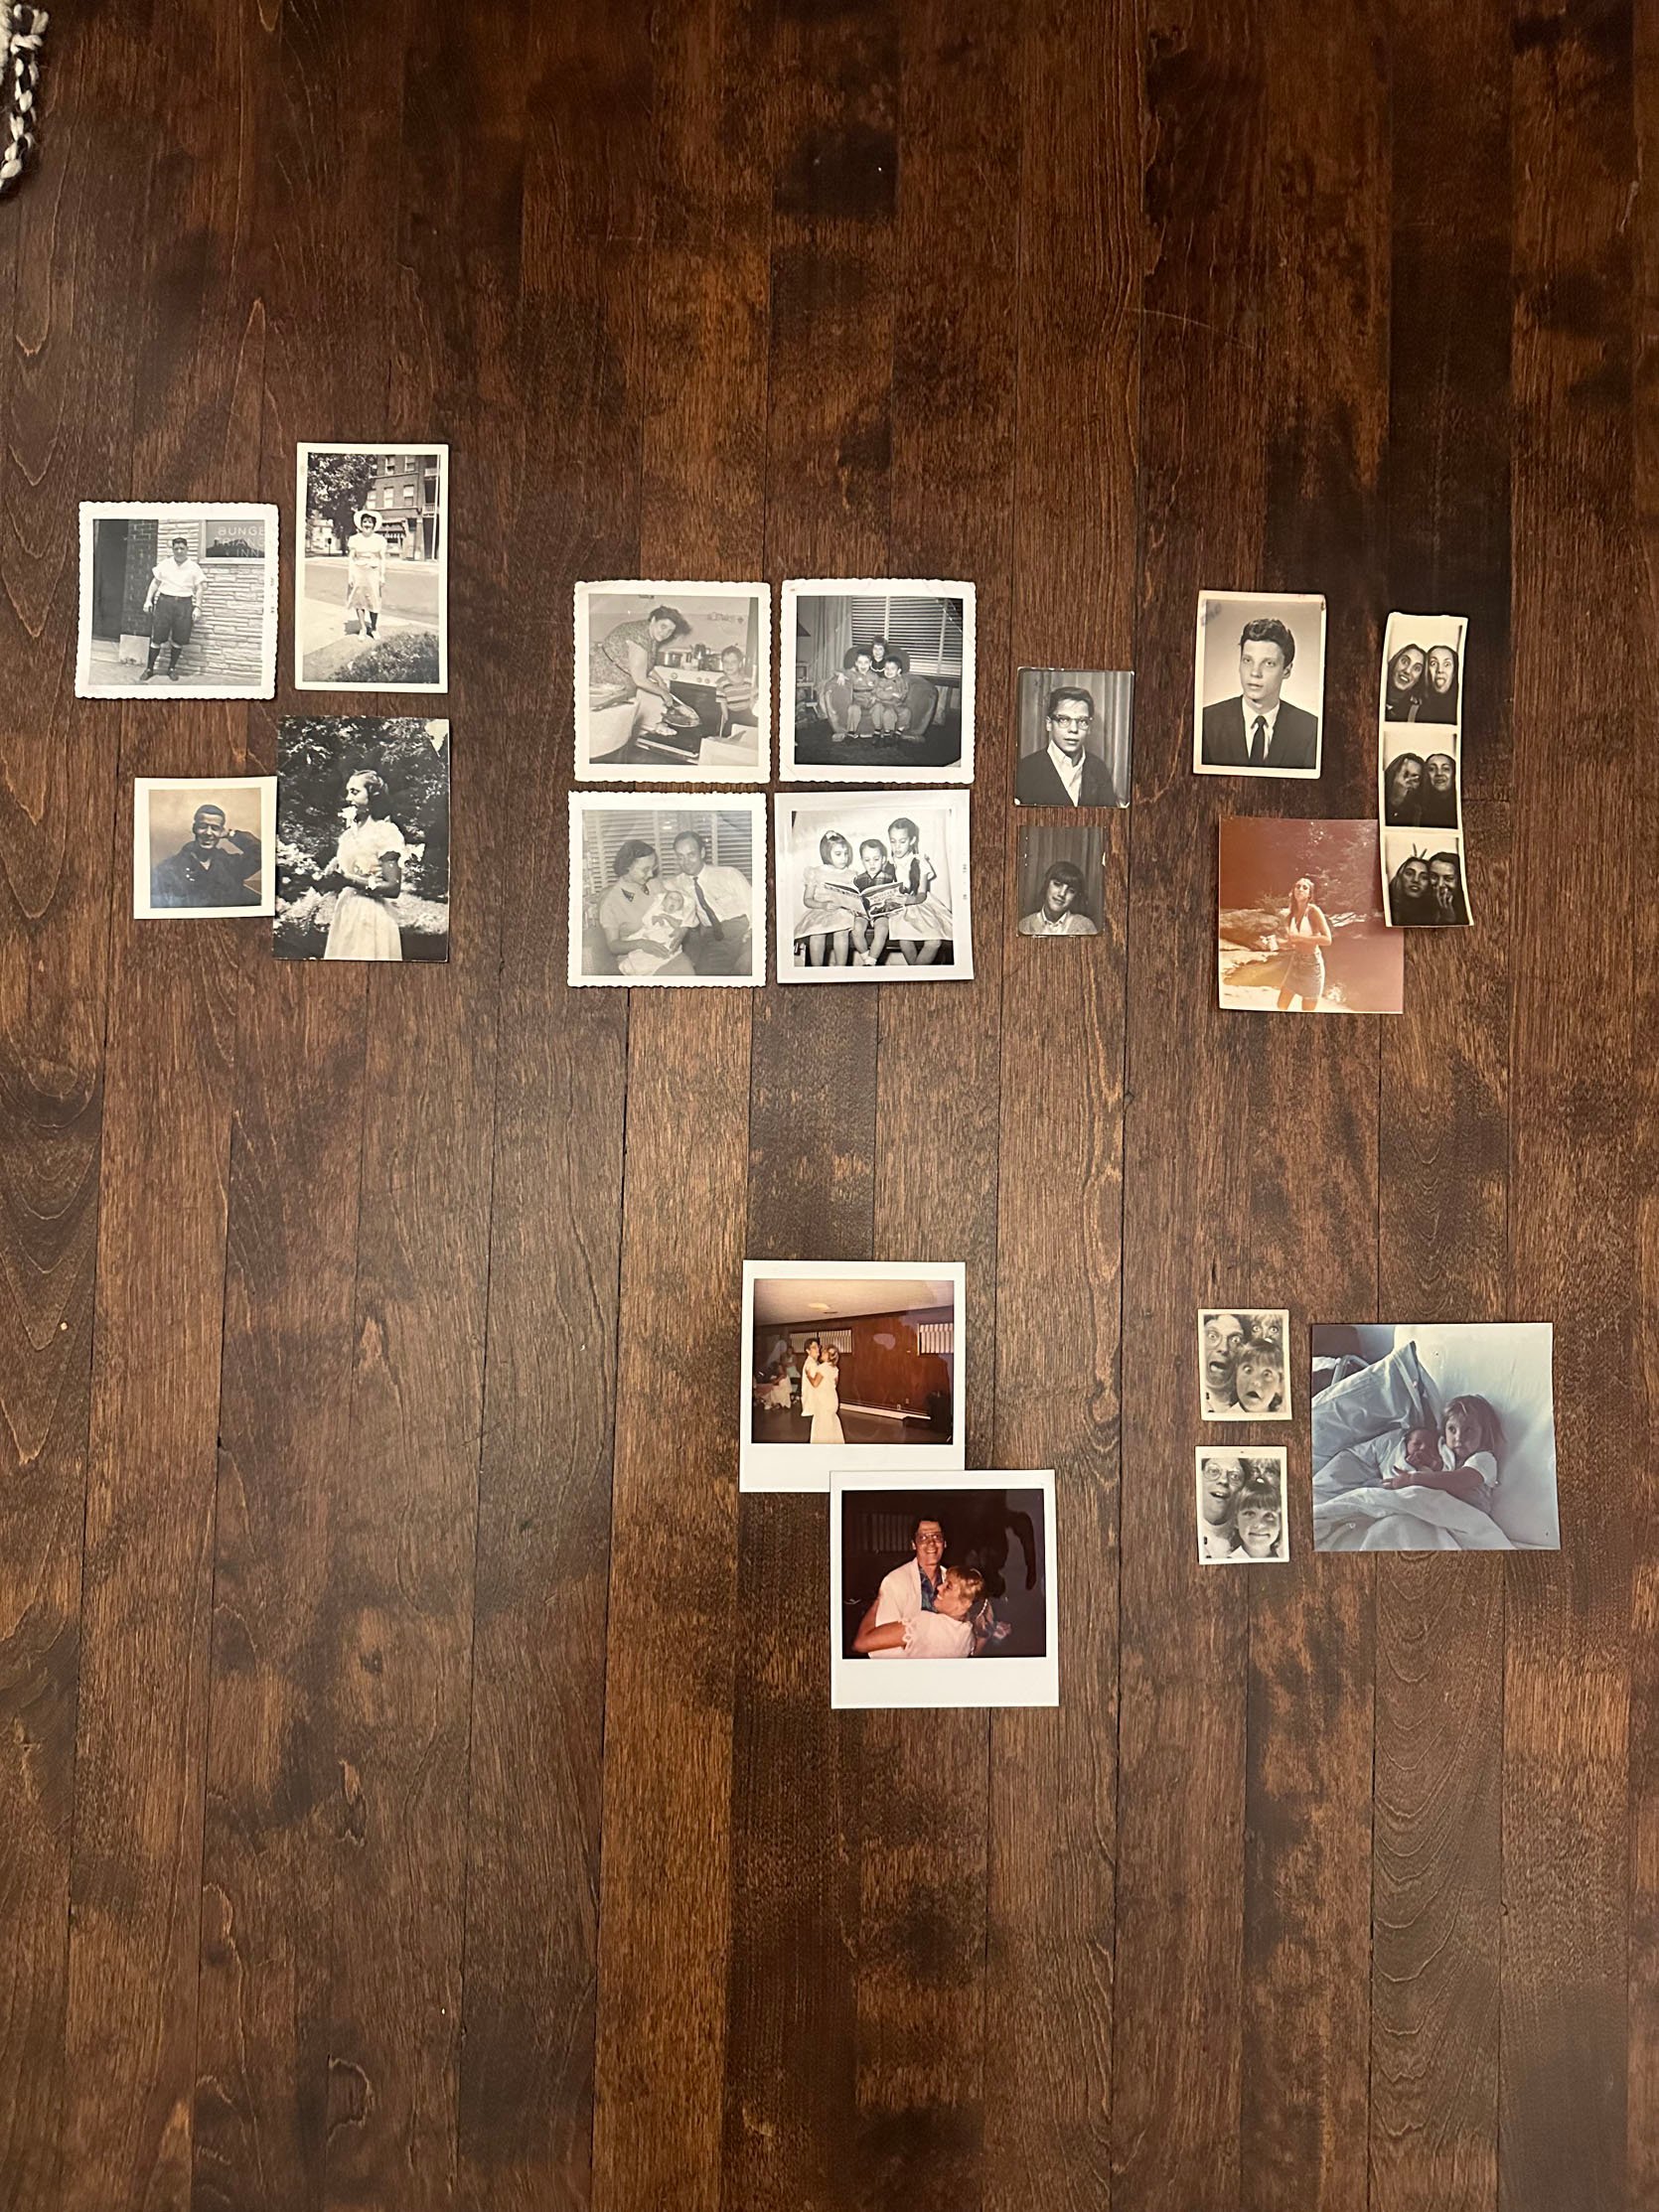
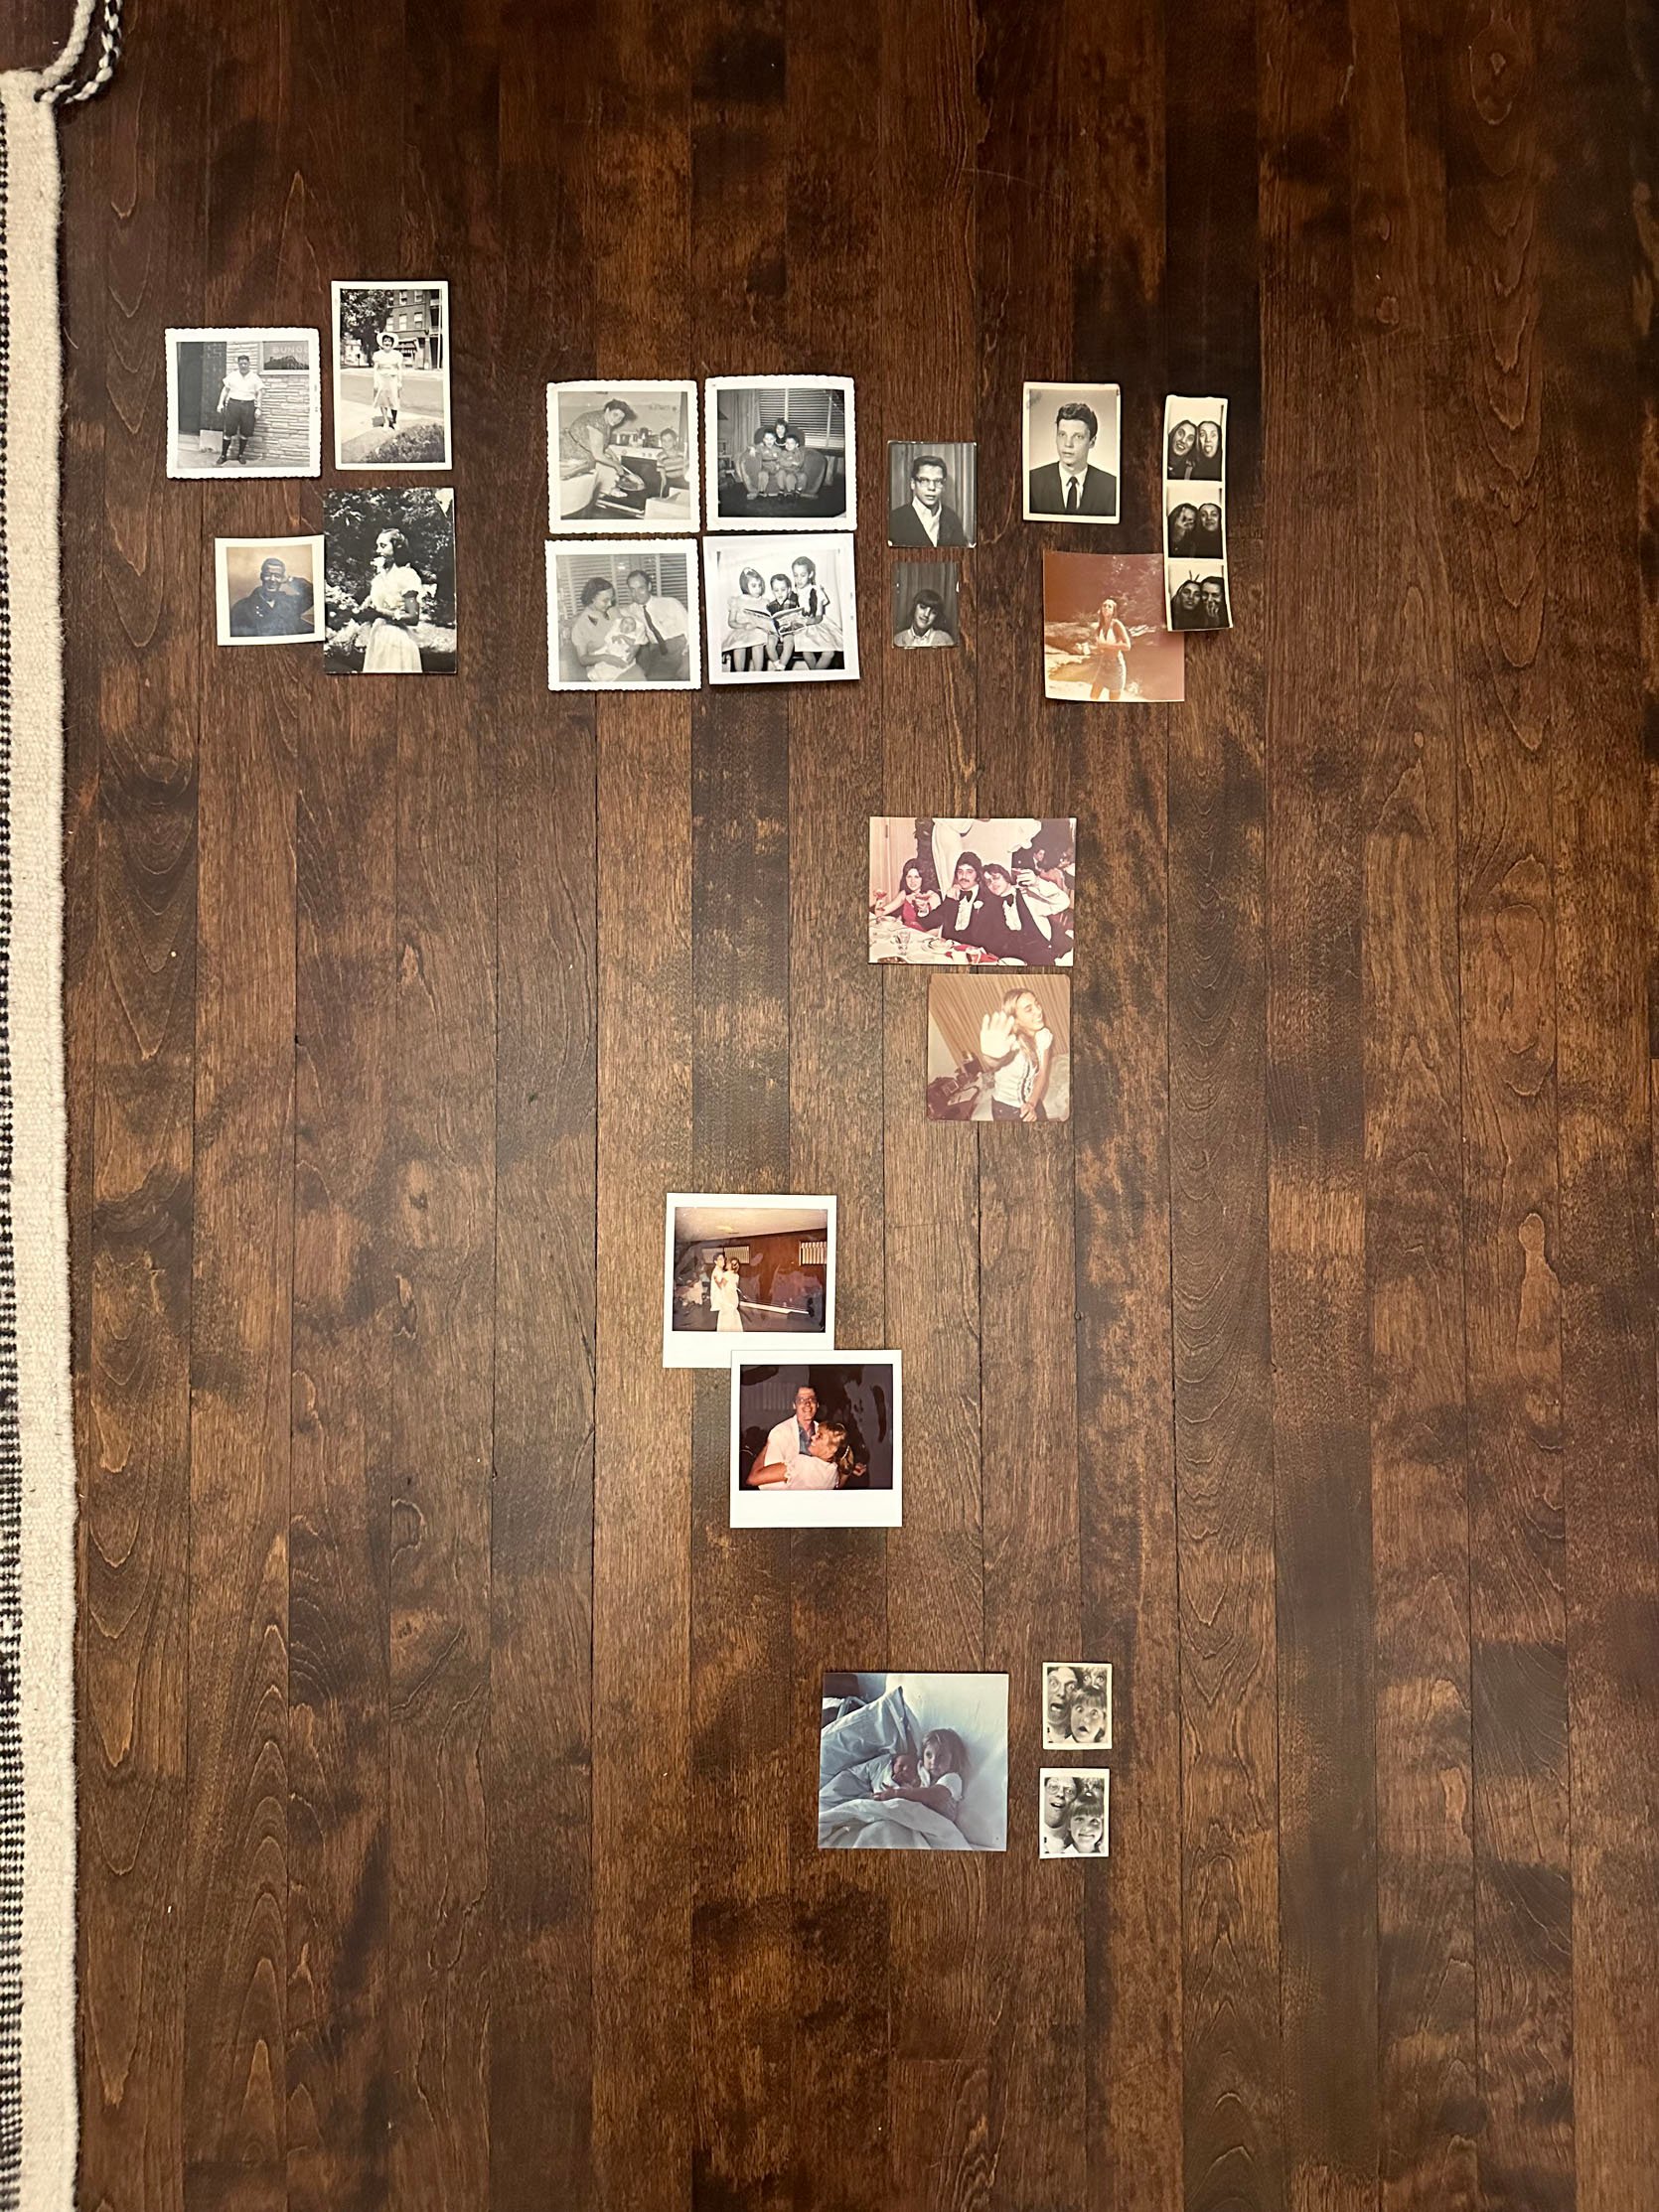
Next, I played with the configuration. For some context, my dad and his family are on the top row, and my mom and her side are under. They act as timelines, first just the grandparents, then photos with their parents, photos with siblings, young school photos, teenage photos, my parents “partying,” their wedding reception party (they eloped to Kauai), then finally my brother and me. I tried to match up the ages as best I could.
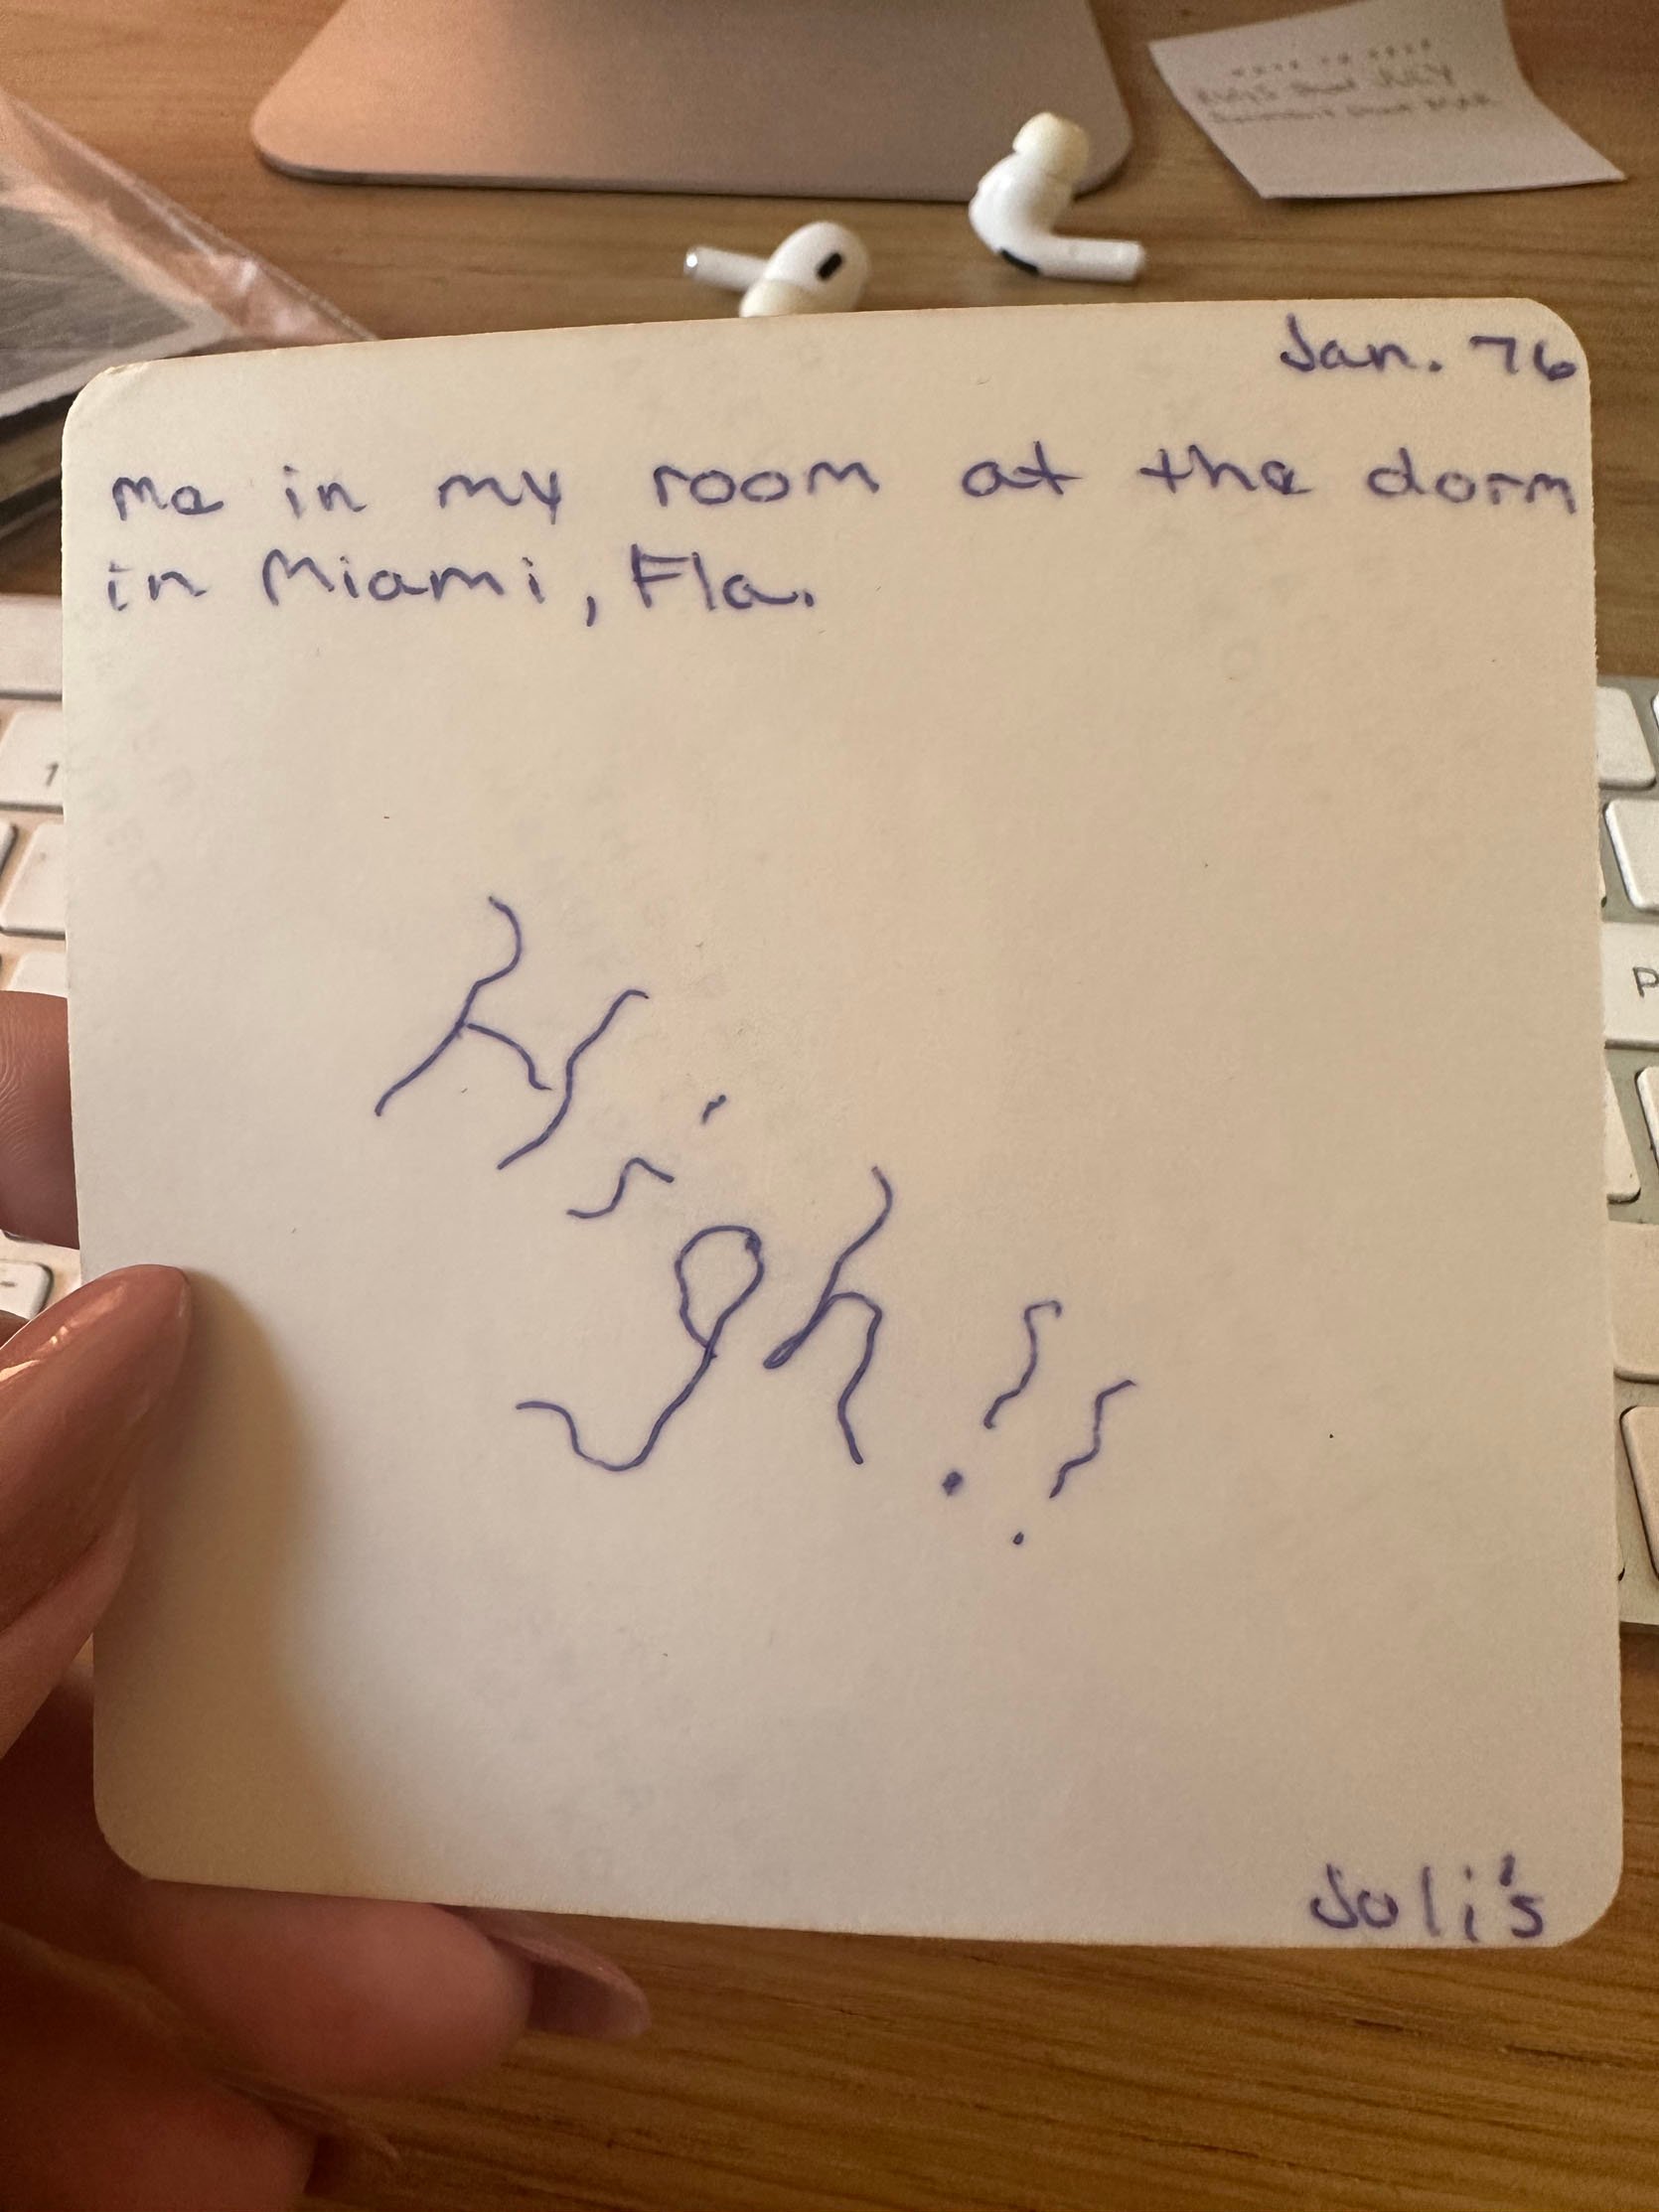
This was on the back of my mom’s “partying” photo, where her hand is up. I love the squiggly lines so much. What a dork:)
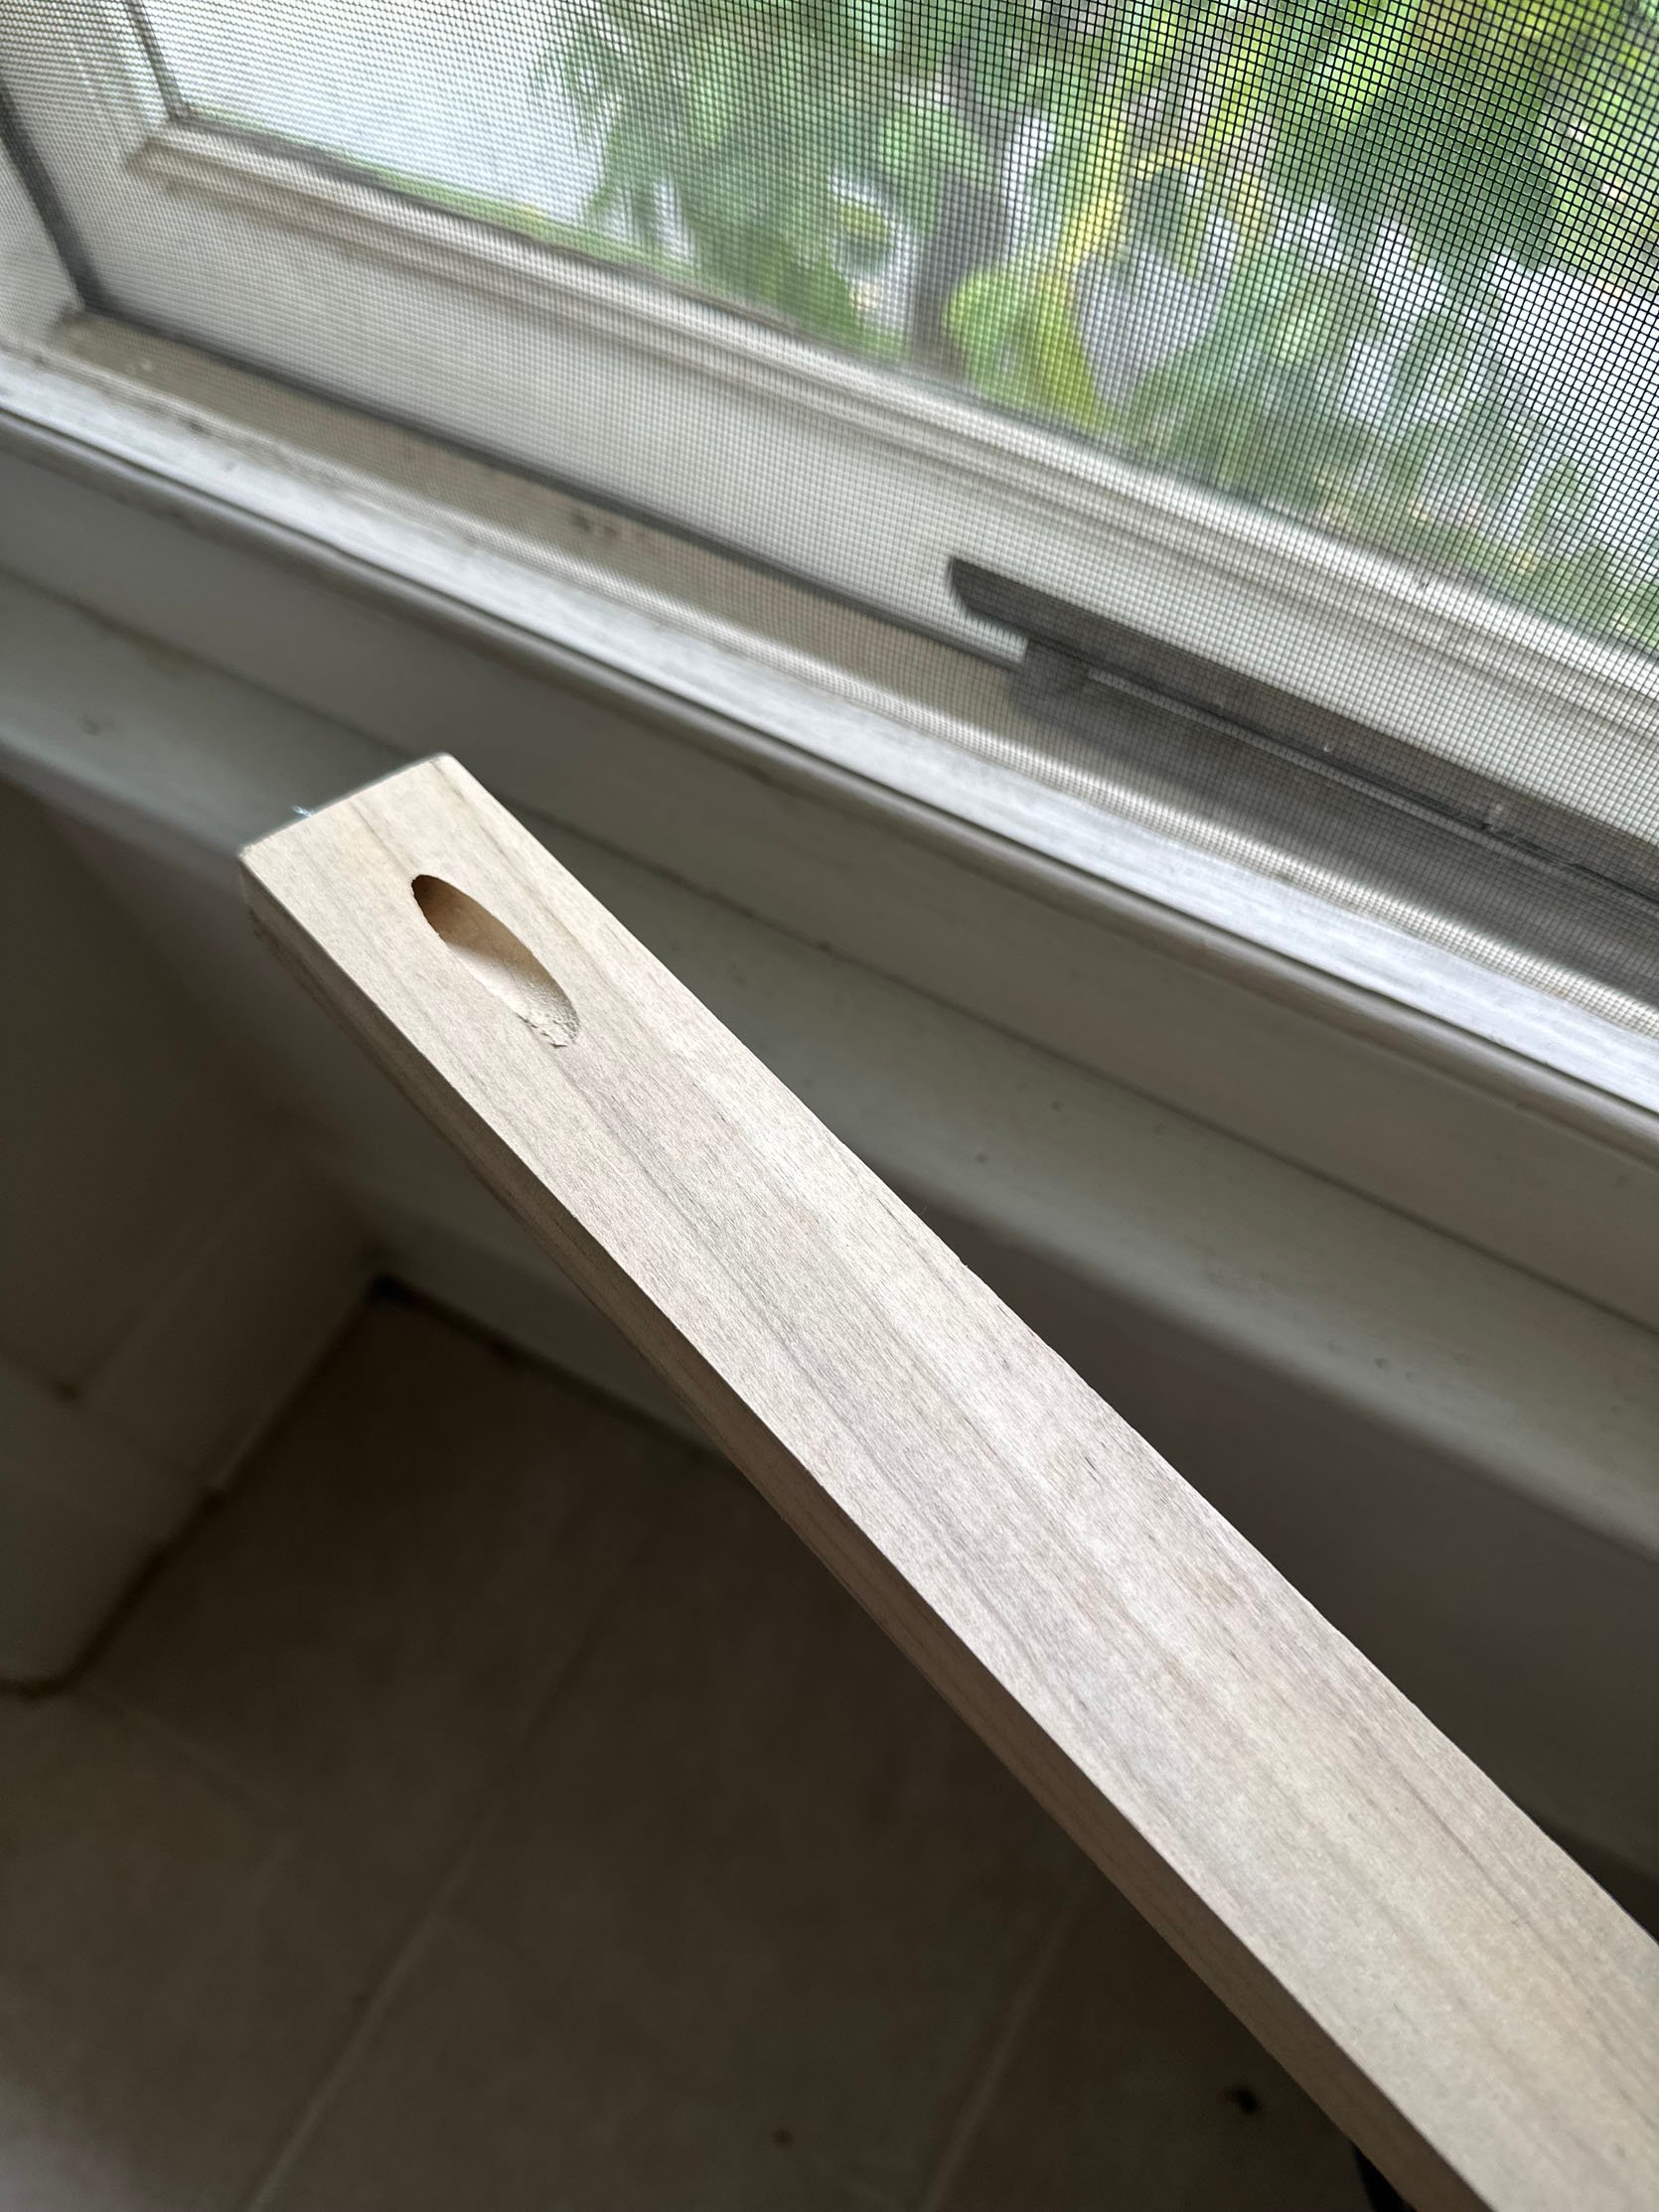
In case you were wondering this is what the back looked like. The Kreg Pocket Hole Jig is what gives you those angled holes. I felt invincible drilling those lol.

Here’s an even tighter shot. Julie actually first thought that the photo strip was of me and my cousin Becca, but it’s my mom and her sister. I smile thinking about that every time I look at it. So if it’s not clear, I highly recommend making one of these. It truly means so much to me.

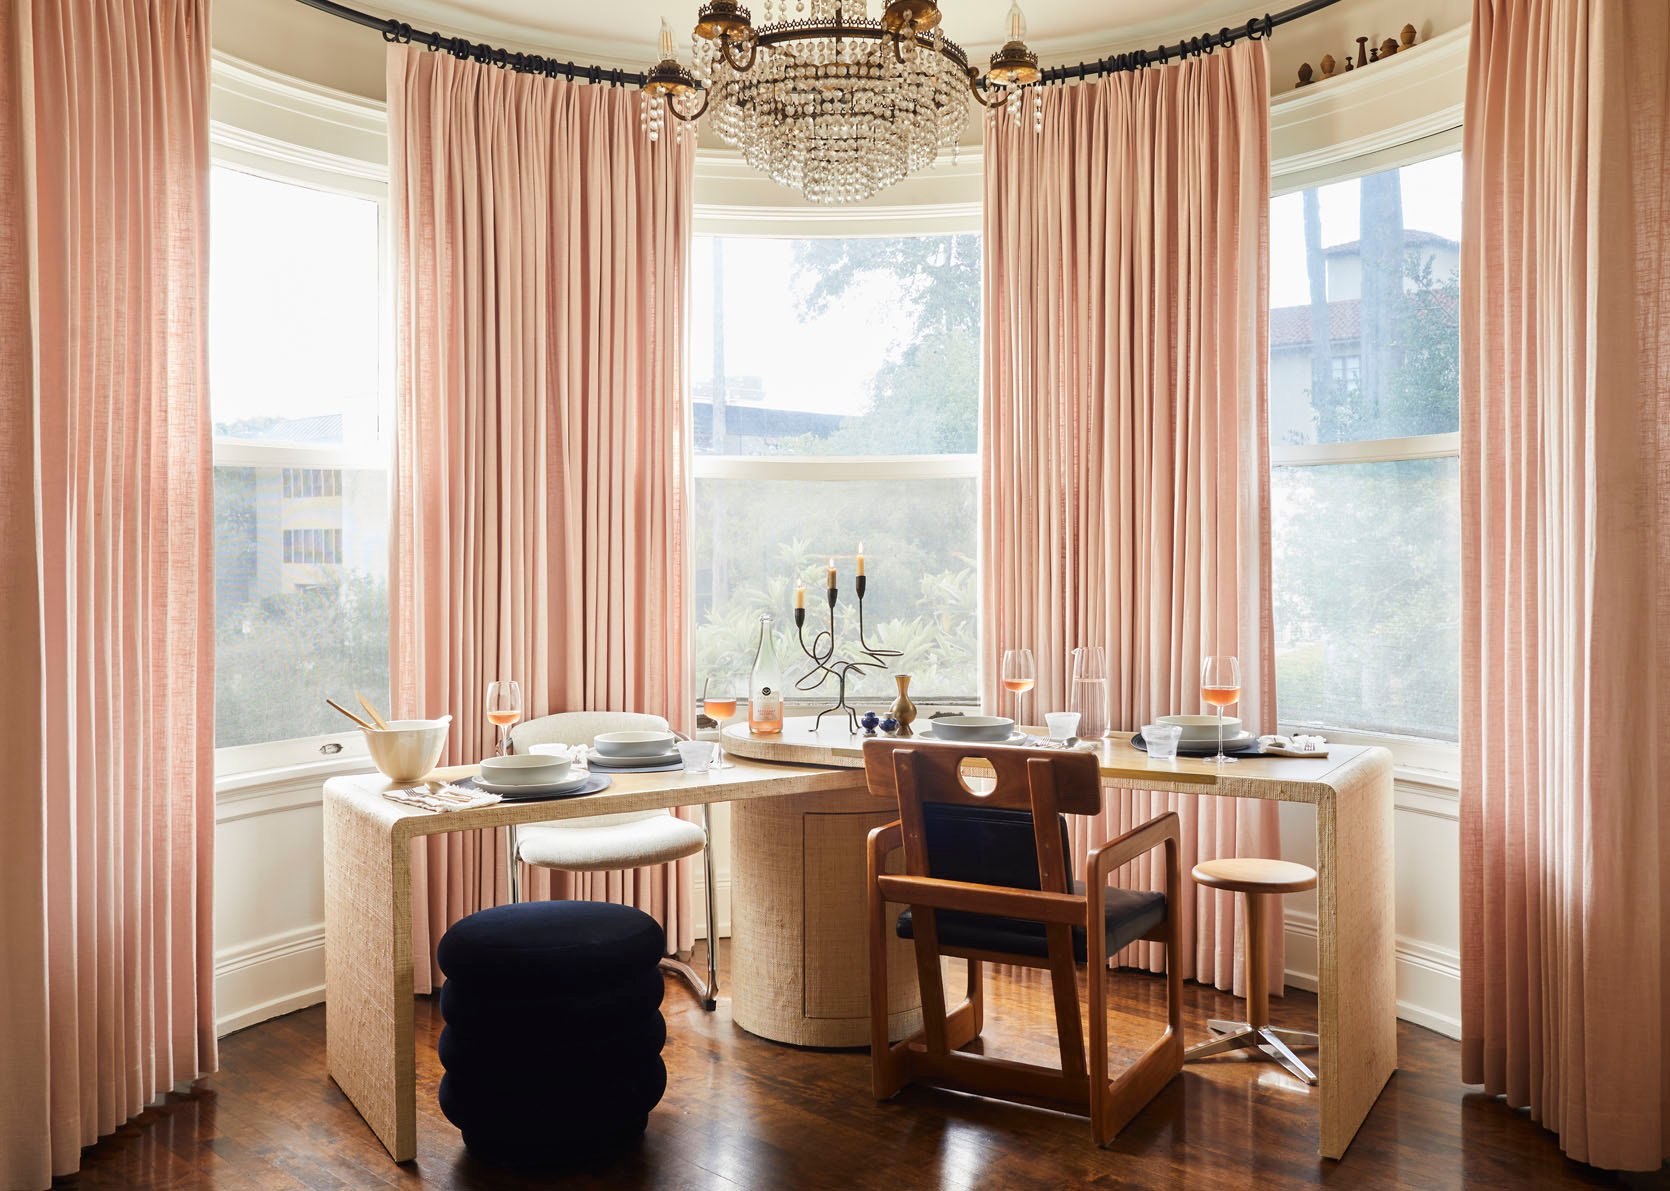
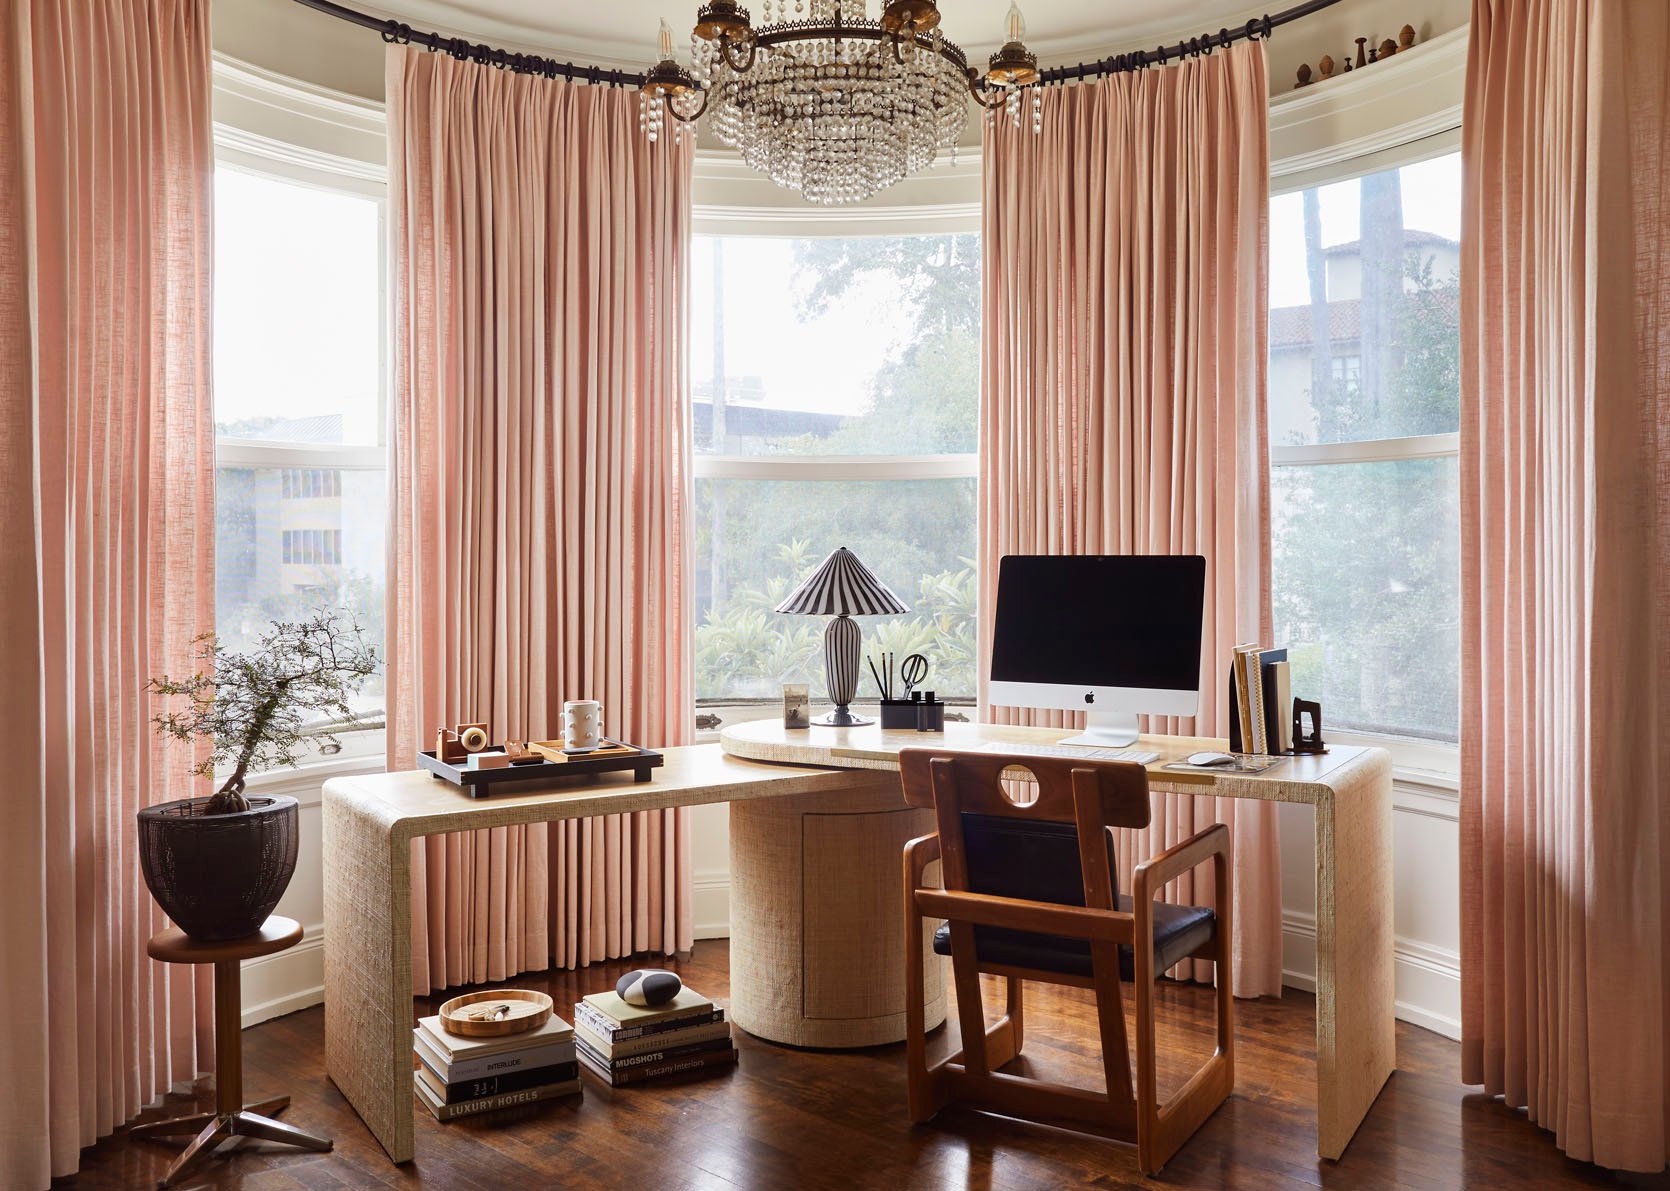
Desk (similar) | Chair | Tray | Tape Dispener | Pencil Holder | Lamp (vintge) | Metal Bookend | Little Sculpture | Drapes | Black and White Ceramic Rock
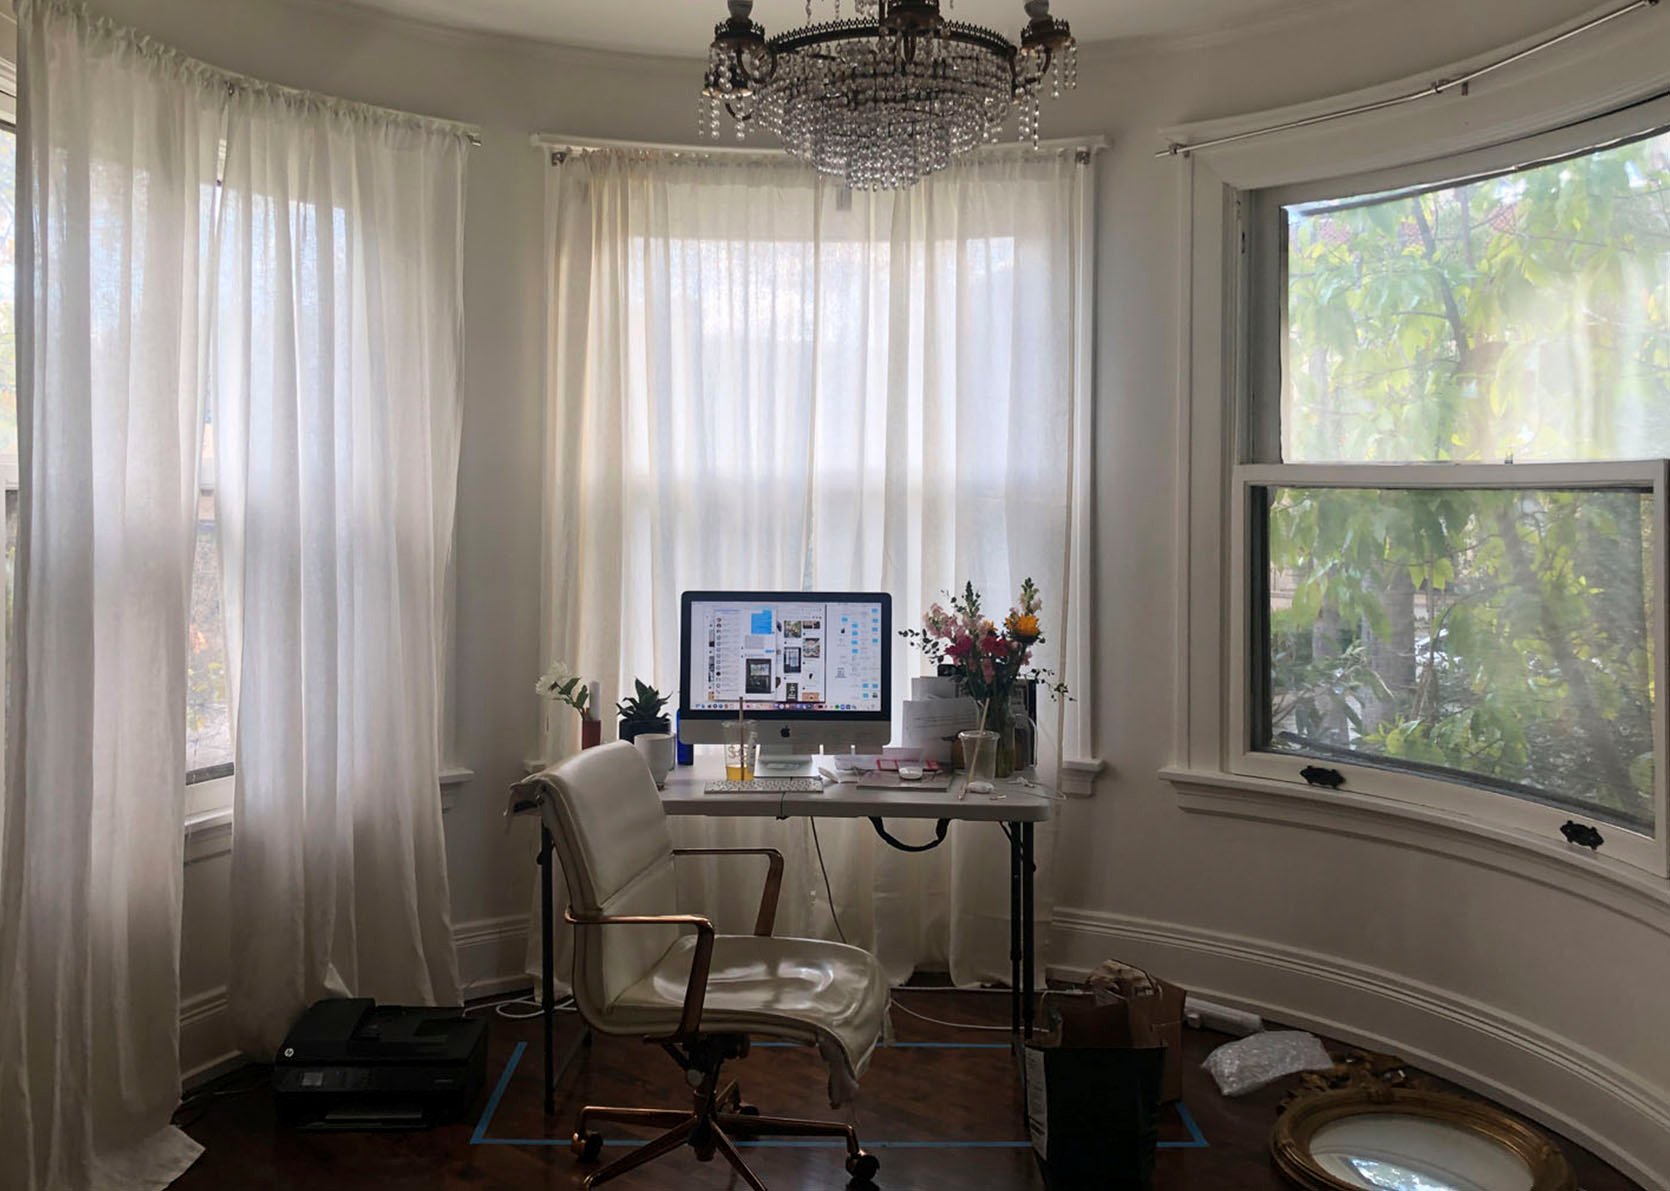
My office! Here’s the original reveal. I did make a few changes, but overall it’s pretty much the same. First, I need to call out these amazing drapes again from Decorview. They make the room feel so happy and elevated. You can read more about my experience in the first post, but I love them just as much now as I did then. Next up, the lamp! That was another Paris find with my dad that is so dear to me. It’s Murano glass, has that wonderful striped pattern, like the one I borrowed for the first shoot, and it’s vintage. It’s never leaving me.
Now, the potential elephant in the room is that I no longer have that beautiful monitor. After needing to use my personal laptop to be able to use the monitor, it didn’t ultimately make the most sense. Emily provided me with that iMac, and since my job requires A LOT of storage space, I really didn’t want to use up all of my laptop’s space. While I miss the beauty of the old one, my best friend recently started her own business and needed a monitor, so it worked out perfectly. Another change is the brass bar on the desk in front of my chair. The rattan didn’t hold up as well as I’d hoped (they don’t even sell this version anymore). But I was able to buy that 3′ long bar for $52, drill some holes through the top, and attach it to the desk with no problems. Now you can’t even see the old damage!
White Chair (similar) | Pouf (similar) | Dinnerware
Aside from the fact that this desk was simply beautiful and the perfect size for the space, I also loved the idea of being able to use it as a dining table. You have to get creative with smaller space living, amirite? So Bowser set up this little dining look with all of my real dinnerware. I don’t use it this way a lot, but when I have, it’s been great. It’s great for a snacking table too:)
Man, these sliders are fun. Work to play and play to work!
Art | Lamp (unavailable) | Jar (similar) | Ceramic Plant Stake (unavailable) | Plate (similar) | Ceramic Object (vintage) | Roman Shade
And for the grand finale, here is the piece of furniture that almost caused my demise. She’s got quirks, but who doesn’t? All of my electronics are in there, and if it weren’t for T-molibe internet (#nonspon) and their plug-in any outlet router, who knows what kind of cord-filled mess my living room would be? The other side has, of course, more decor. Will it ever end? I kinda hope not.
As a self-proclaimed shape lover, this photo nearly makes me emotional. Just kidding. But from the circles of the bench/cabinet, to that utterly perfect checkered lamp of which I don’t think I’ll ever forget receiving as a surprise from Jayson Home. I still can’t believe it’s in my house, and I am so sad that it’s no longer available! Oh, and that piece of art was also from the gallery wall in my last apartment. I love it so much. Lastly, let’s talk about this woven roman shade. It is just so beautiful and adds so much texture and warmth. It is, of course, from Decorview as well. I really have to say that if you are able to afford custom window treatments (and check to see because you may be surprised), they simply provide the absolutely best customer service with the most beautiful products.
Oh, and since I know you were wondering, that little blue jar holds the quarters for my laundry:) Now, let’s see some before-and-after sliders before I officially let you go:


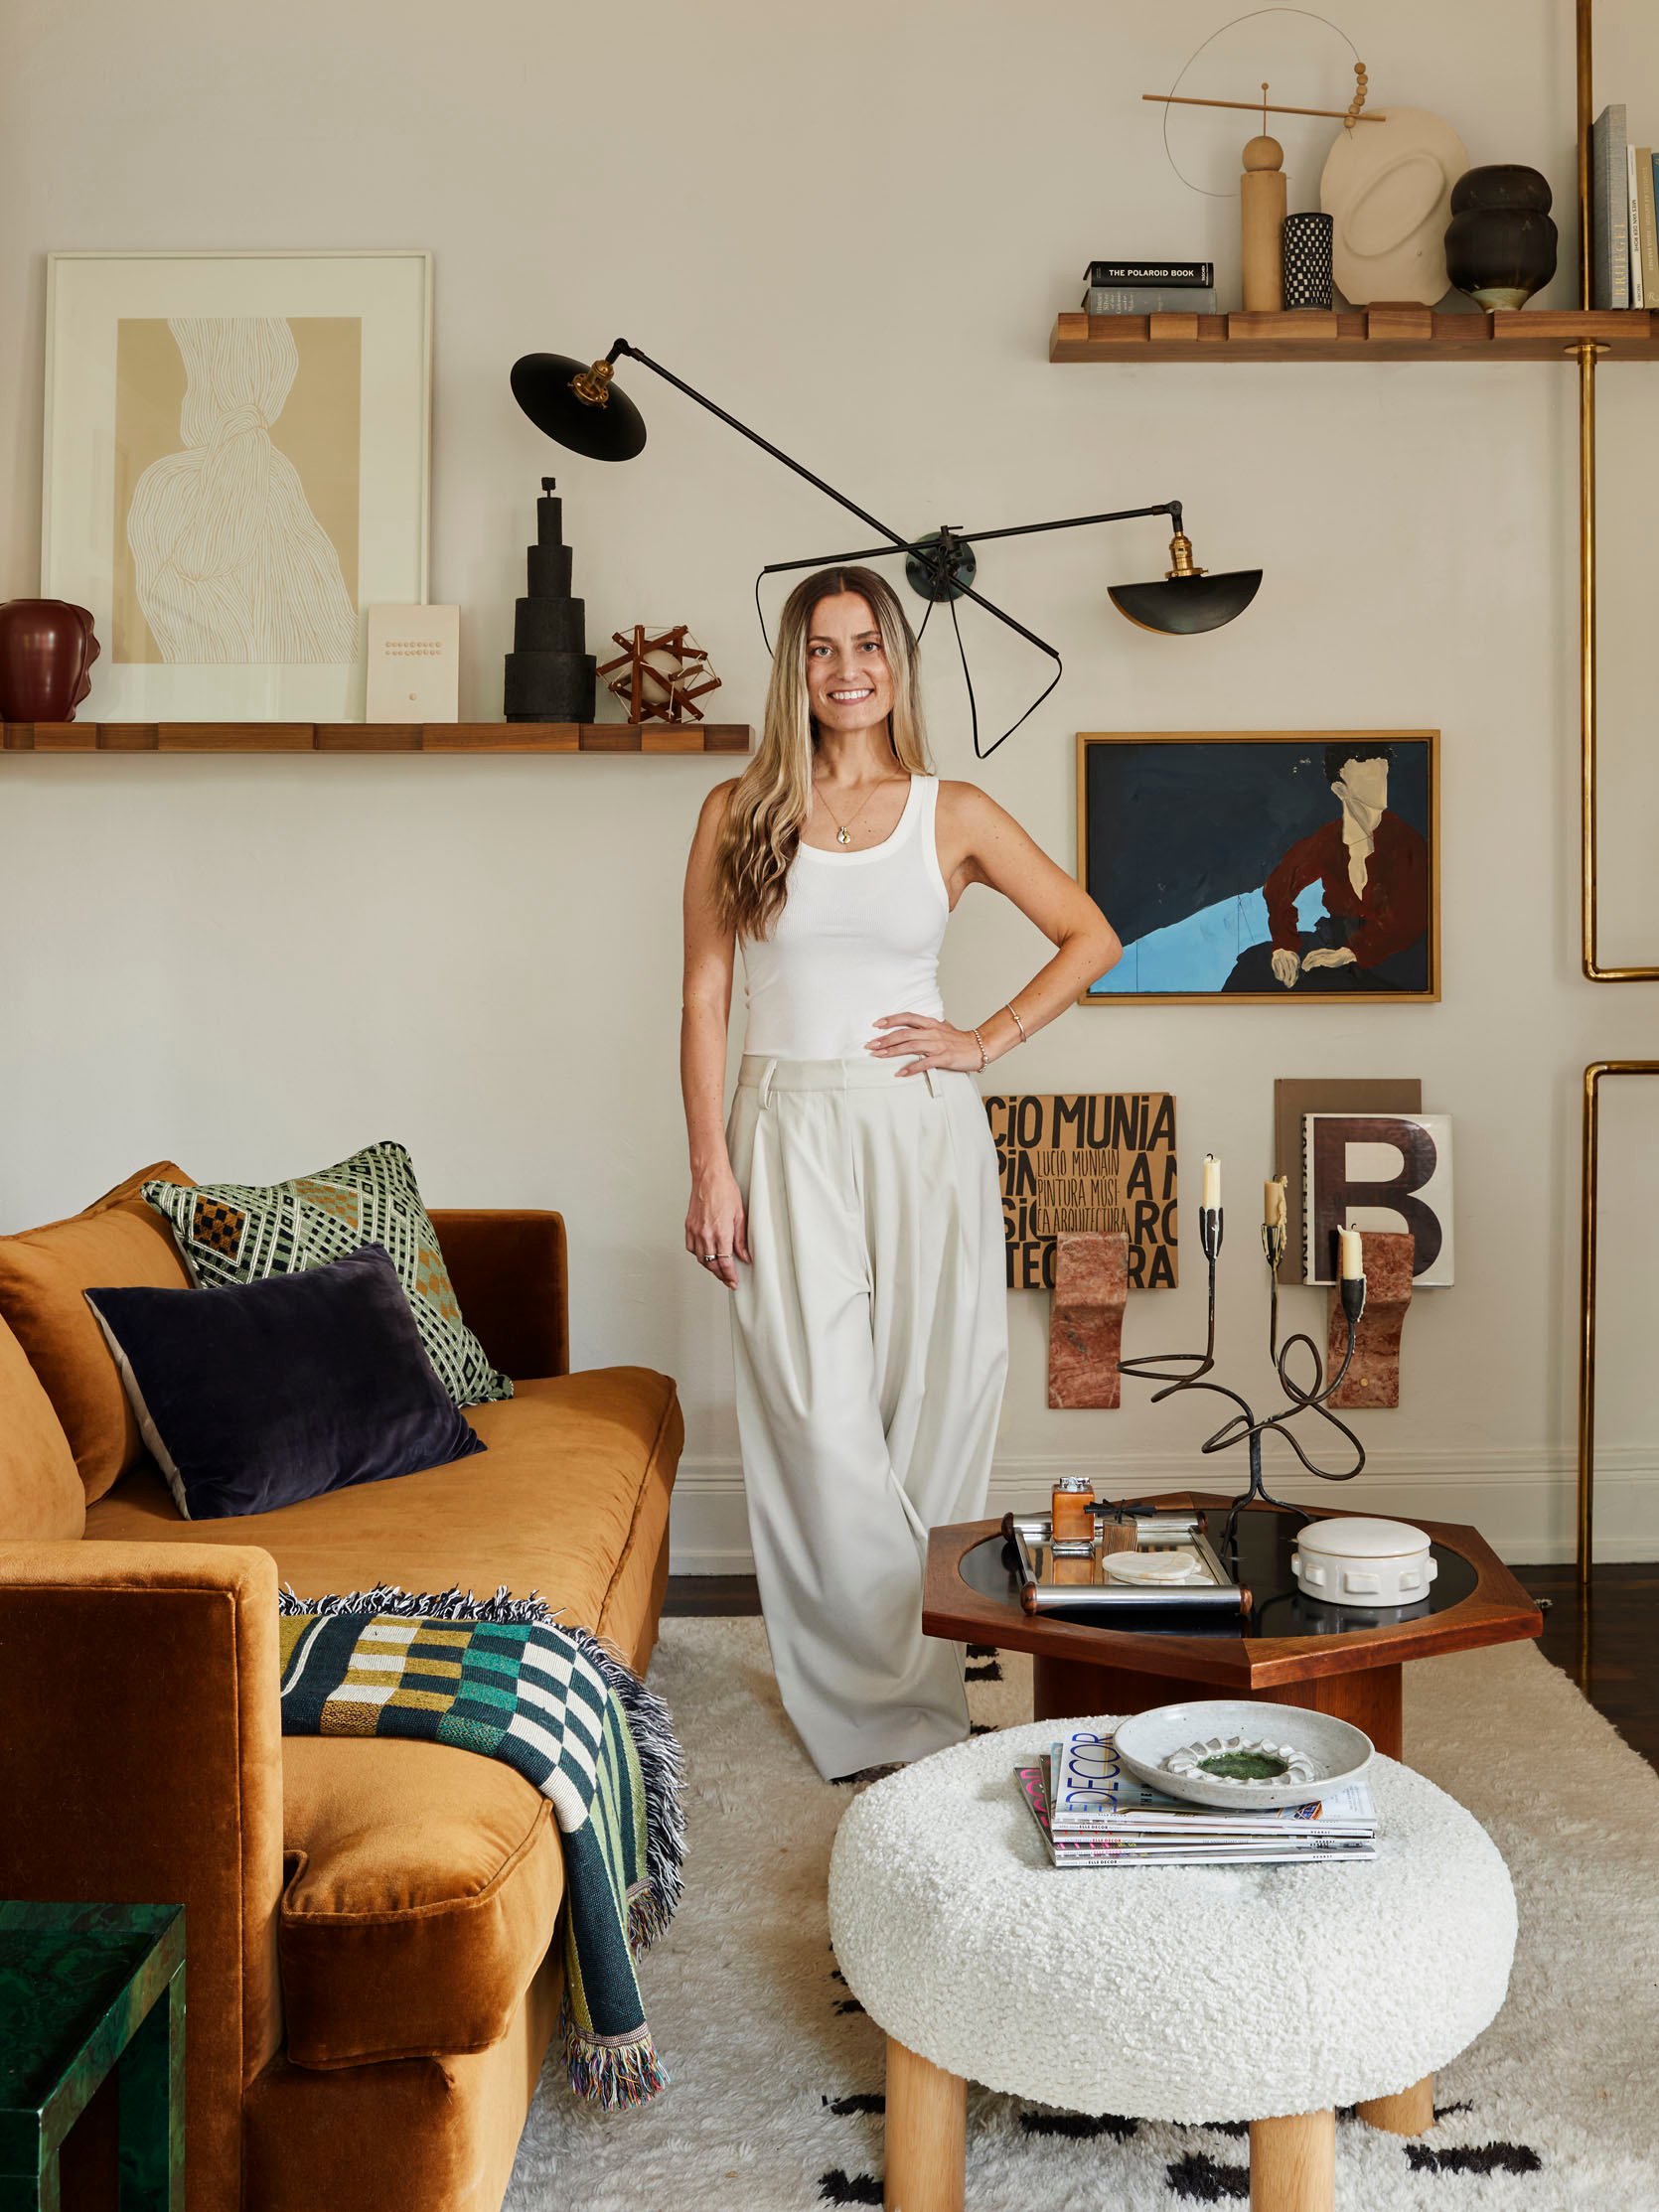
Top | Pants | Necklace | Bracelet with Pearl | Cape Cod Bracelet
It feels unbelievable to say that at the end of the week, I will be celebrating 9 years at EHD, and I still love it as much as I ever have. On top of that, I am so grateful and honored to share a piece of me with all of you again. We’ve been on a long journey together, and I’m not just talking about this over 5,000-word post. I promise my bedroom, coming at you Wednesday, will be for sure less than 4,000;)
I will also happily take any suggestions for what to call this style. Please and thank you.
Love you, mean it.
*Design by Jess Bunge (me!)
**Styled by Emily Bowser
**Photos by Sara Ligorria-Tramp