
OK, lead and asbestos info coming at you – and before you click away, I know this stuff might sound boring, but it’s actually riveting because I can see all the dollars we are saving. I’m GIDDY. In past gut renovations, I would have just relied on our professional contractor to hire the experts to do the work needed, and listen, typical GCs don’t offer up budget or DIY ideas. You aren’t going to skimp on stuff like foundation or ask the homeowner to DIY asbestos (especially on a public project) because you have to guarantee the work long-term. ARCIFORM, for instance, is a high-end company, and for our huge renovation, they hired the best of the best in Portland, which meant the most expensive subs that guaranteed very high-quality work that lasts forever (but it sure did add up). That was great for this home (hard to swallow at times, but I’m grateful that it’s done right and in the past). Now, for the guest cottage, we just don’t want to spend money if we don’t really need to. And by project managing myself (no GC), I’m learning SO MUCH. I’m getting multiple quotes and asking the experts what they would recommend we try to tackle ourselves versus hiring out. I was surprised by what the answers were re lead paint and asbestos, and today I’m sharing.
Now I feel compelled to give the disclaimer that obviously I am not an expert in toxic home substances, and the internet might recommend you not do these things yourself (what we are DIY-ing is legal, btw). And yet, all the subs that toured our guest cottage gave us the exact same advice on where we could easily save by doing it ourselves and would be just as good/safe as if they did it. So this is all anecdotal, and I’m taking no legal responsibility because I’m not giving ANY advice here, just telling you what I learned and what we are thinking about doing.
Asbestos – How Much We Have And How Much It’s Going To Cost
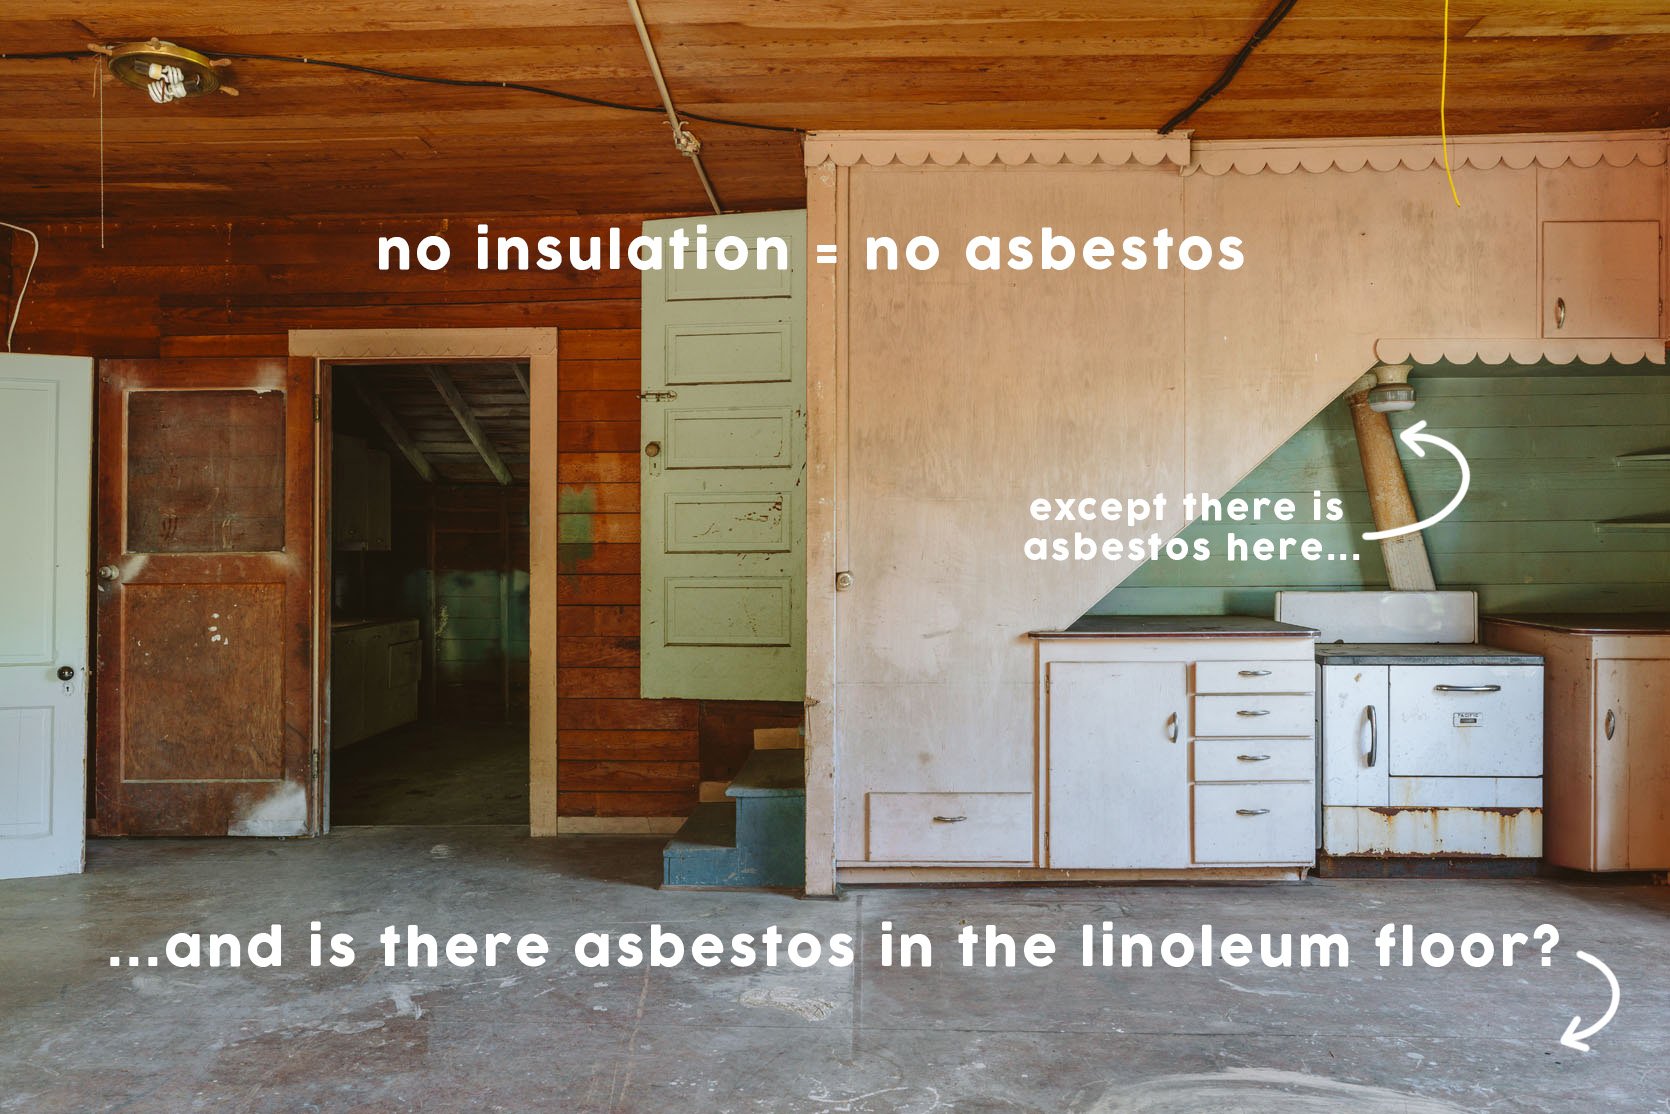
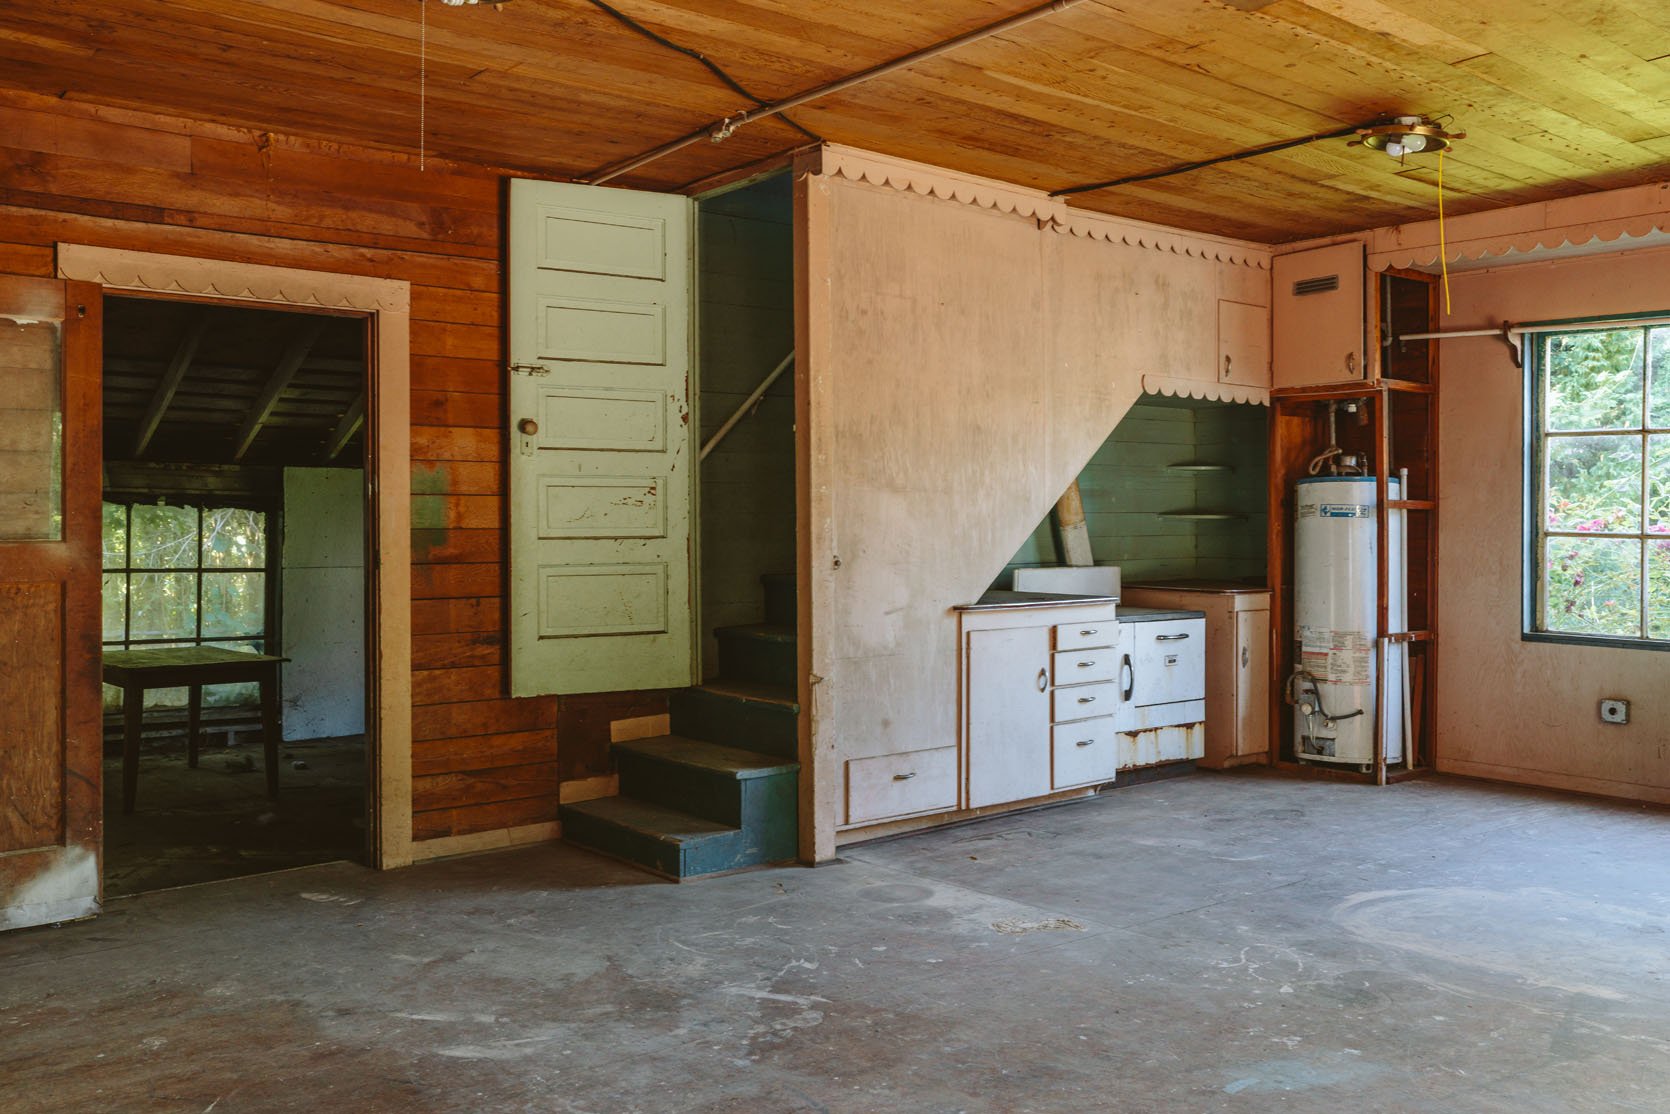
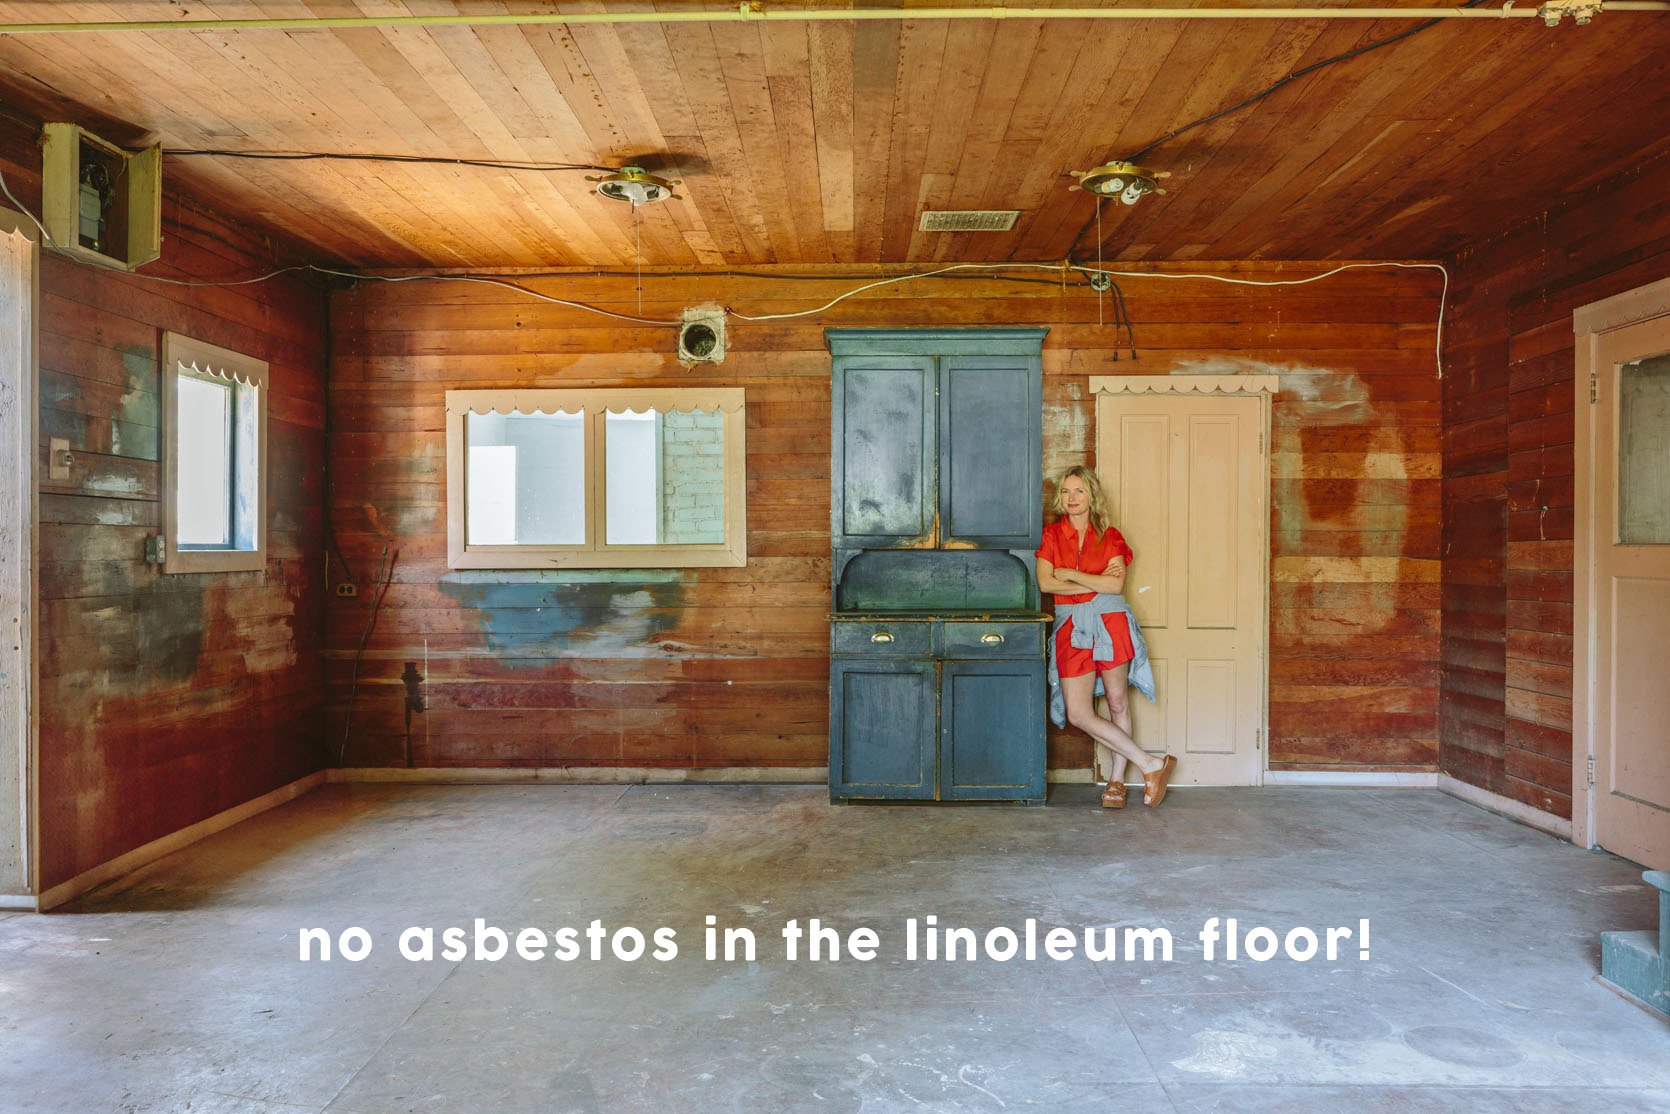
The good news was that our house is so old that there is no insulation, which is usually where there is A TON of asbestos. Our inspection report indicated that there might be asbestos in the linoleum floor (which is over the original wood we want to refinish in the main room) as well as the ducting near the stove (around 12 feet). So it’s pretty minimal. But still, I would never have considered doing asbestos abatement myself (keep reading). I had 3 abatement companies come, inspect, and submit quotes.
Company A – John
The first company came in at $7,130. Around $4k to remove the asbestos in the flooring and $2,250 for the ducting, then with a bunch of prep and legal fees. I didn’t love this quote, obviously, but having never done this before, I didn’t know if it was market rate or not. Thank goodness I continued to get quotes.
Company B – Leon
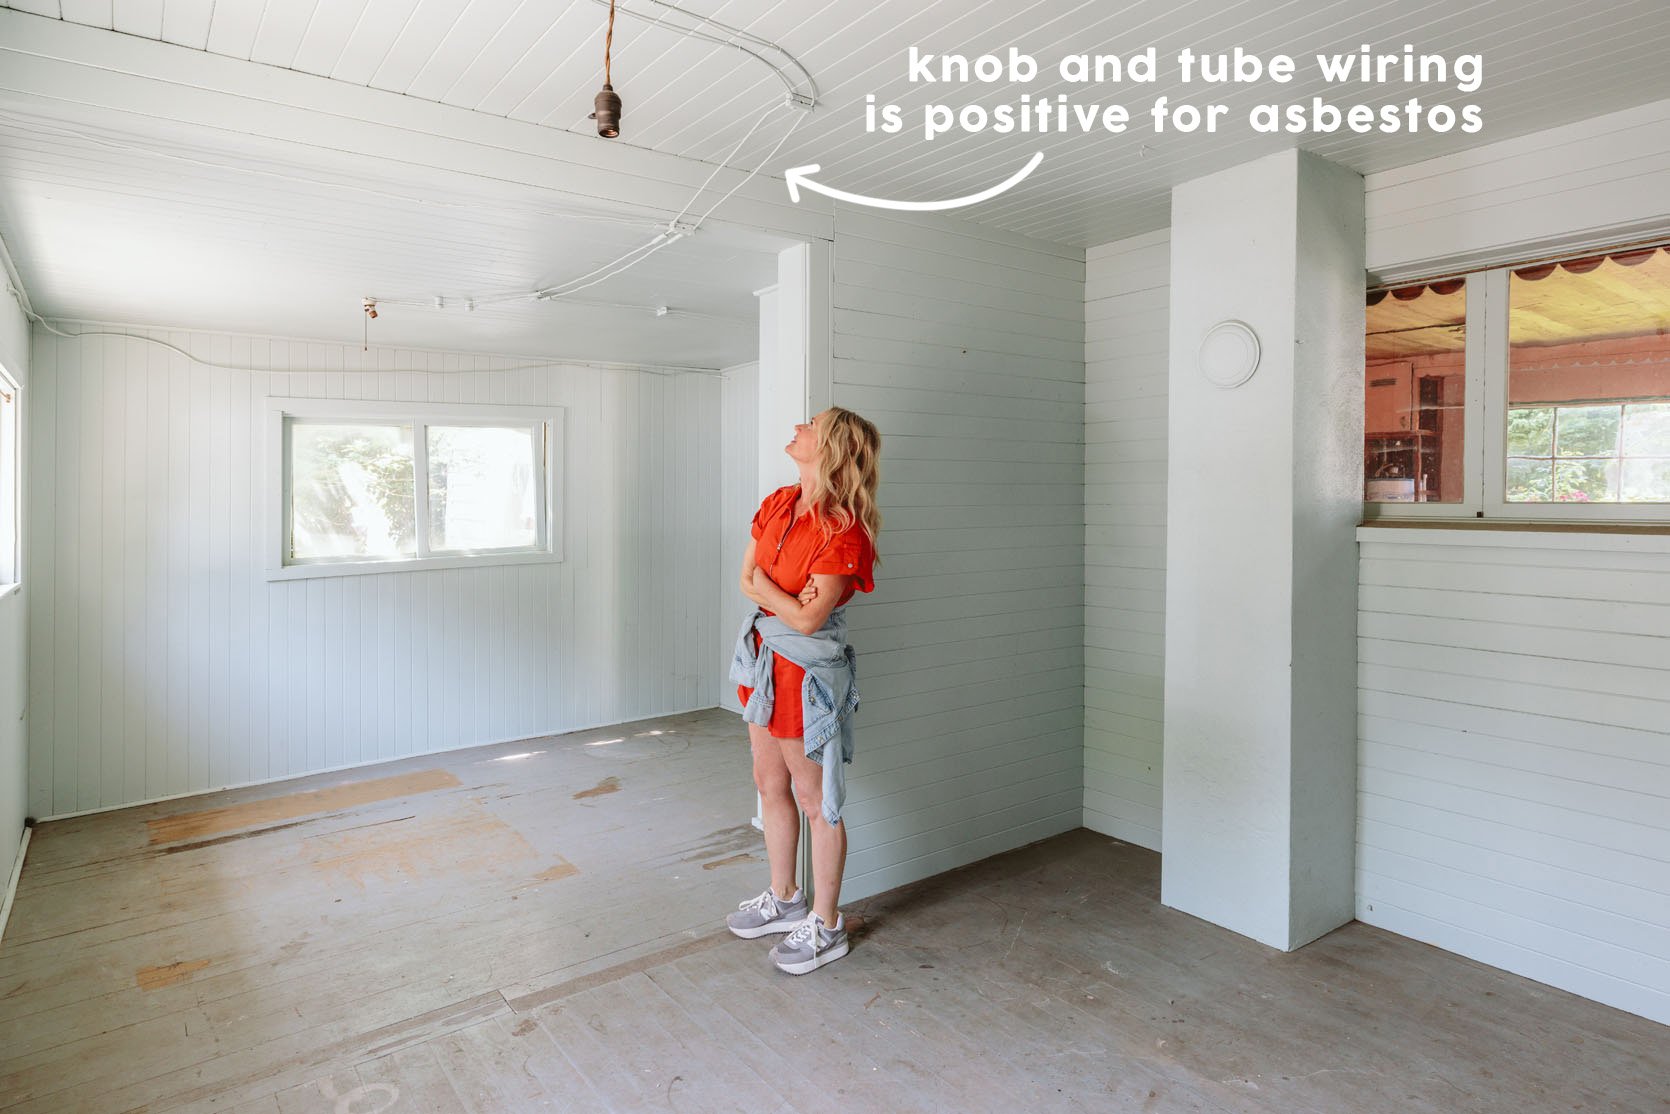
This company asked us if we wanted to test for asbestos and levels of lead, which cost $450 in lab tests (we didn’t know the cost when I agreed, whoops). While that does seem like a lot, he recommended it because he wasn’t convinced it was underneath the linoleum. Turns out the floor came back NEGATIVE FOR ASBESTOS!!! INCREDIBLE. His cost for removing it in the ducting was only $995! He did, however, say that there was asbestos around all the knob and tube wiring, which would cost $1,595 for him to remove. But he was very clear that we could do this ourselves and that most people don’t hire out for this (more on that below). But if we just did the ducting, it would be $995.
Company C – Barry
At this point, knowing that the flooring wasn’t asbestos, I had Barry only quote for the ducting. They came back at $1,782 for the same job as Leon (although Leon charged $450 in lab fees, and I’m assuming they make some money off of that).
Our Decision For Asbestos Abatement And What We Are Going To DIY Ourselves
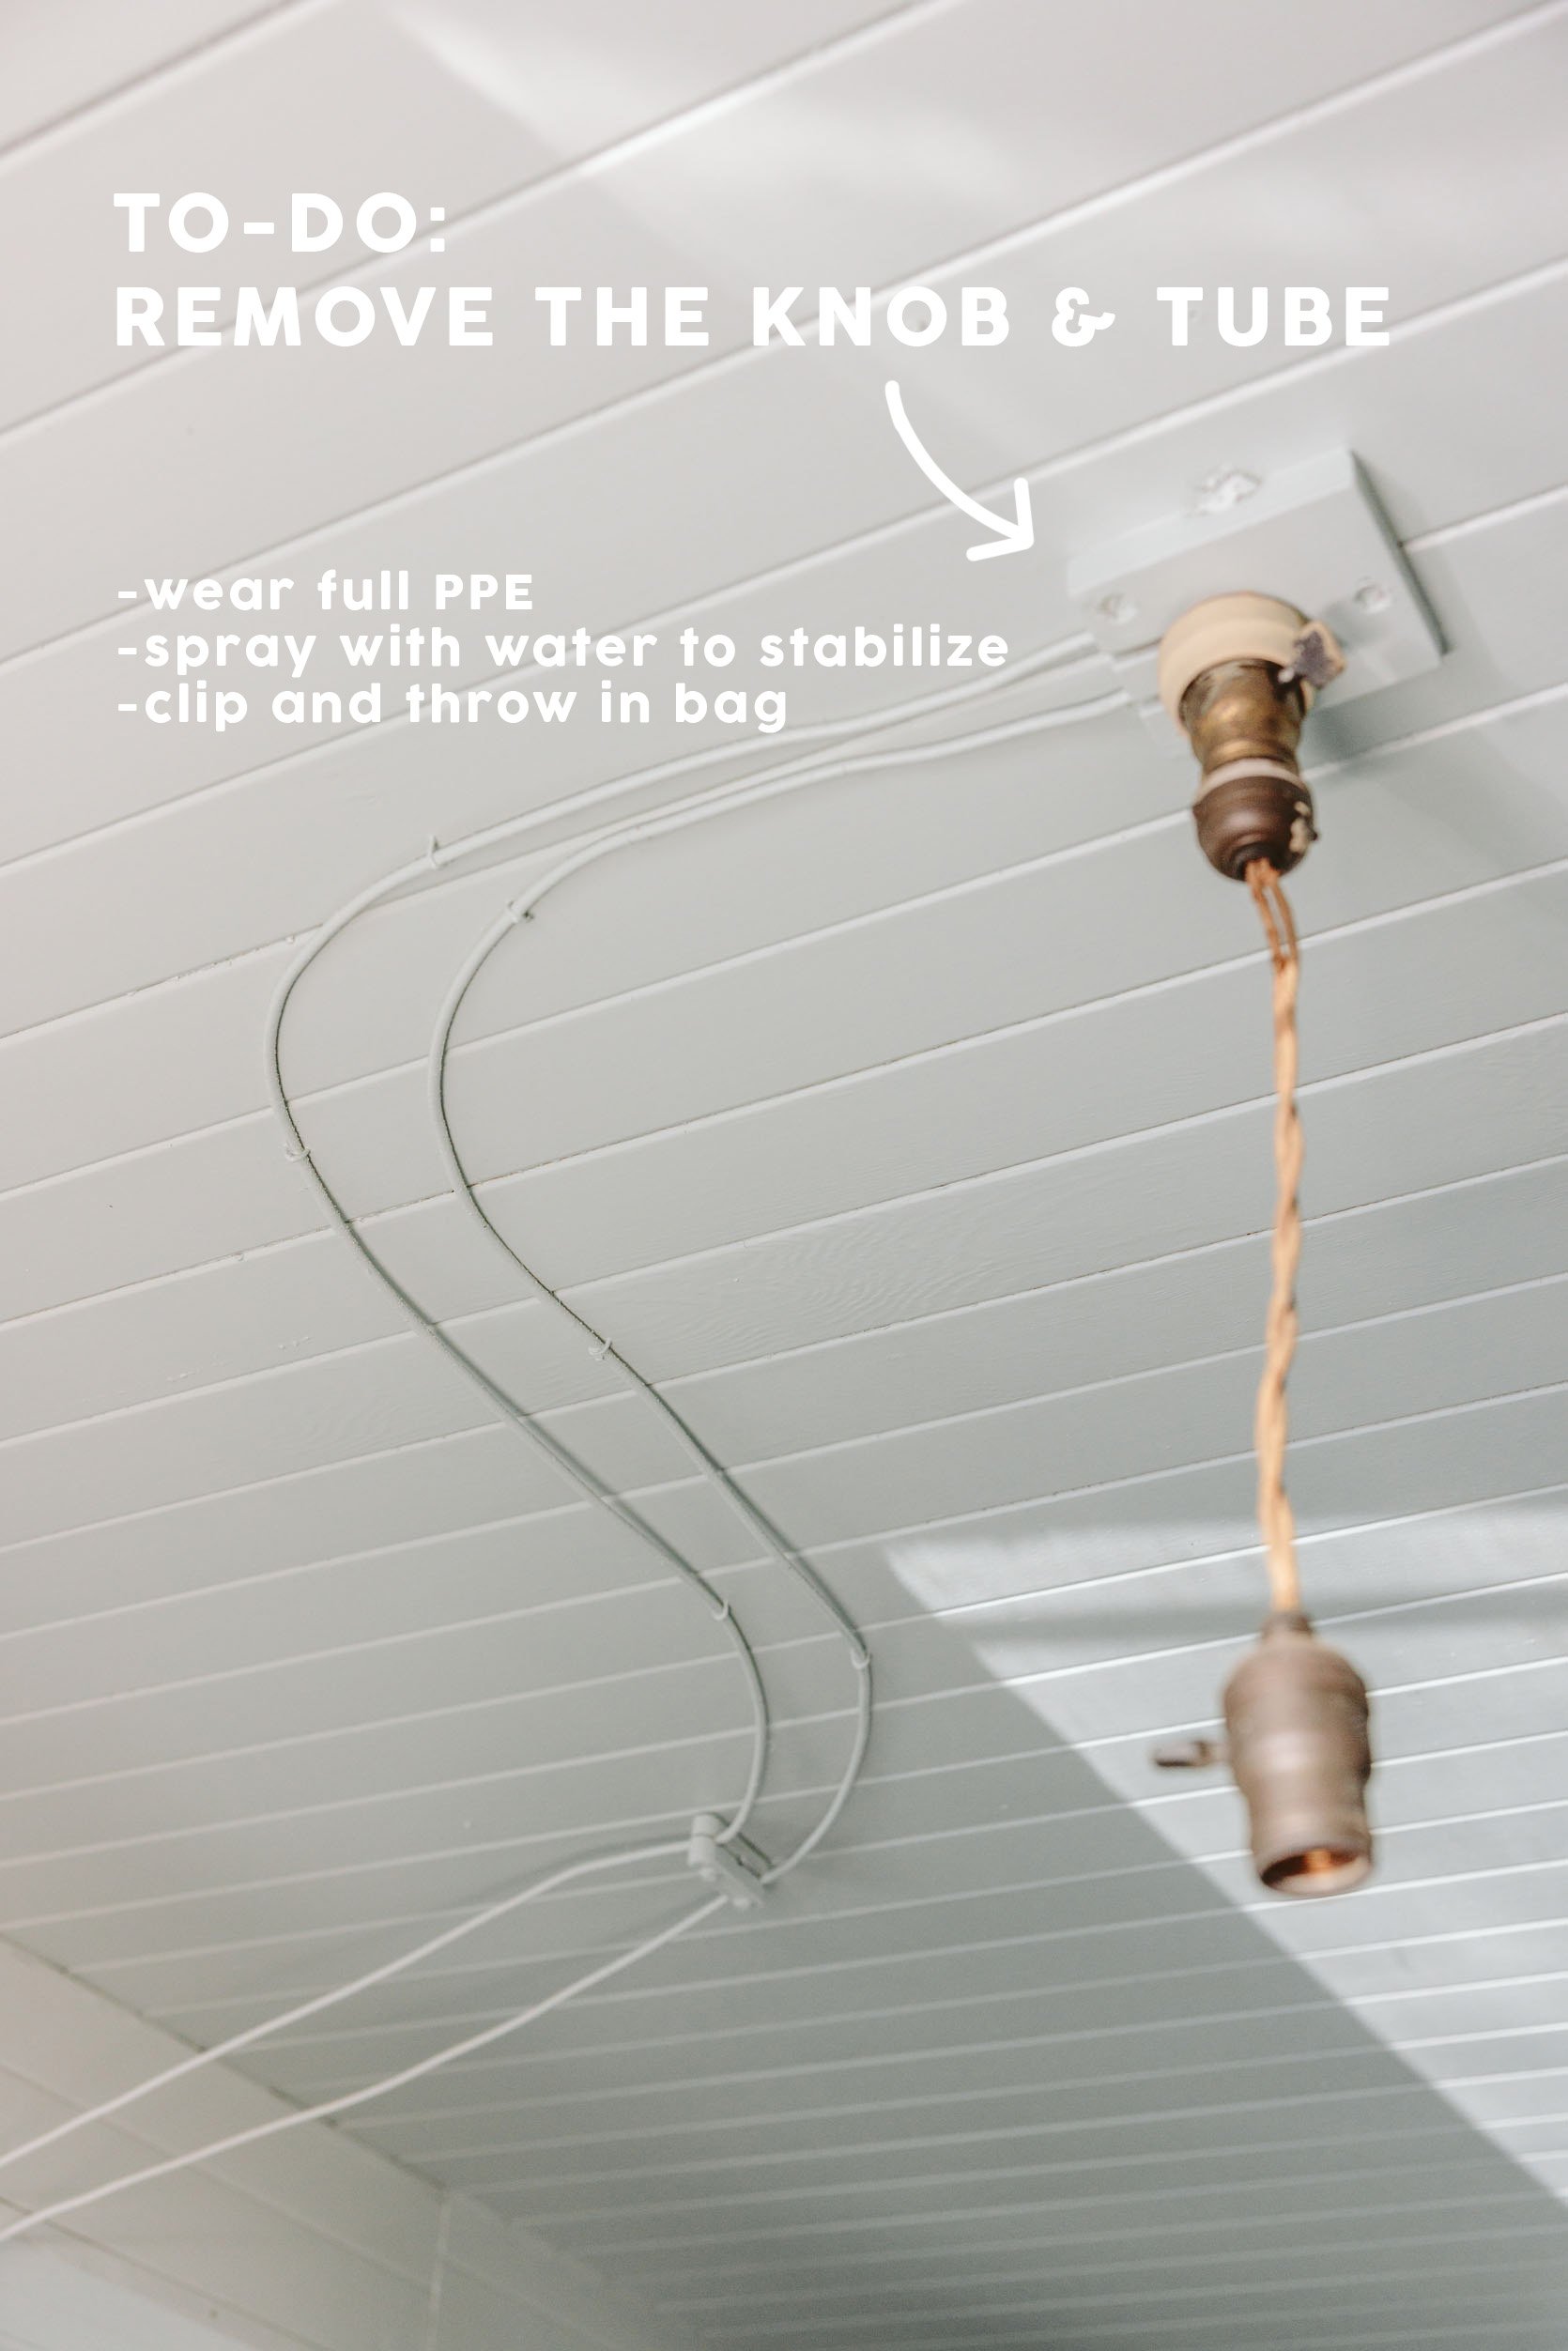
I think it’s pretty clear that we went with Leon, company B, at $995 (having already spent $450 on the testing labs), and then he walked me through how to safely get rid of the knob and tube that has encapsulated asbestos around it, so that we could save that $1,595. He said to gear up in full PPE (hazmat suit, mask, etc), spray water on it with a spray bottle to stabilize it (and reduce the chance of loose fibers/particles), clip it with clippers, and throw it in a bag. Now, I need to look into where I legally dump this, but he said it was very much DIY-able, and most people do this themselves.
Now Onto Lead Paint
A fascinating and frightening historical fact about lead paint, which is no joke. Banned in the late 70s, most paint before then had a decent amount of lead in it (which made it durable), but lead is lead; it’s toxic in every form. But I guess that the reason they even realized that it can be so poisonous specifically for kids’ brain development is because kids were gnawing on window sills and eating the chipped paint from window sills off the floor, because lead paint is oddly sweet. WHAT???? But most houses built before the 1970s have lead paint likely underneath fresher paint, but it’s universally accepted that it’s only dangerous if it’s “disturbed” (i.e. flaking off), consumed directly by breathing in dust, eating flakes of it, or in water/soil (which is why you don’t sand blast it off – it actually makes it much more dangerous). Again, I’m not giving advice here, just passing on my research (which involves both deep internet and asking like 6 contractors/experts I know with a lot of knowledge and experience). We are safely and legally abating it, don’t worry.
Where Is The Lead?
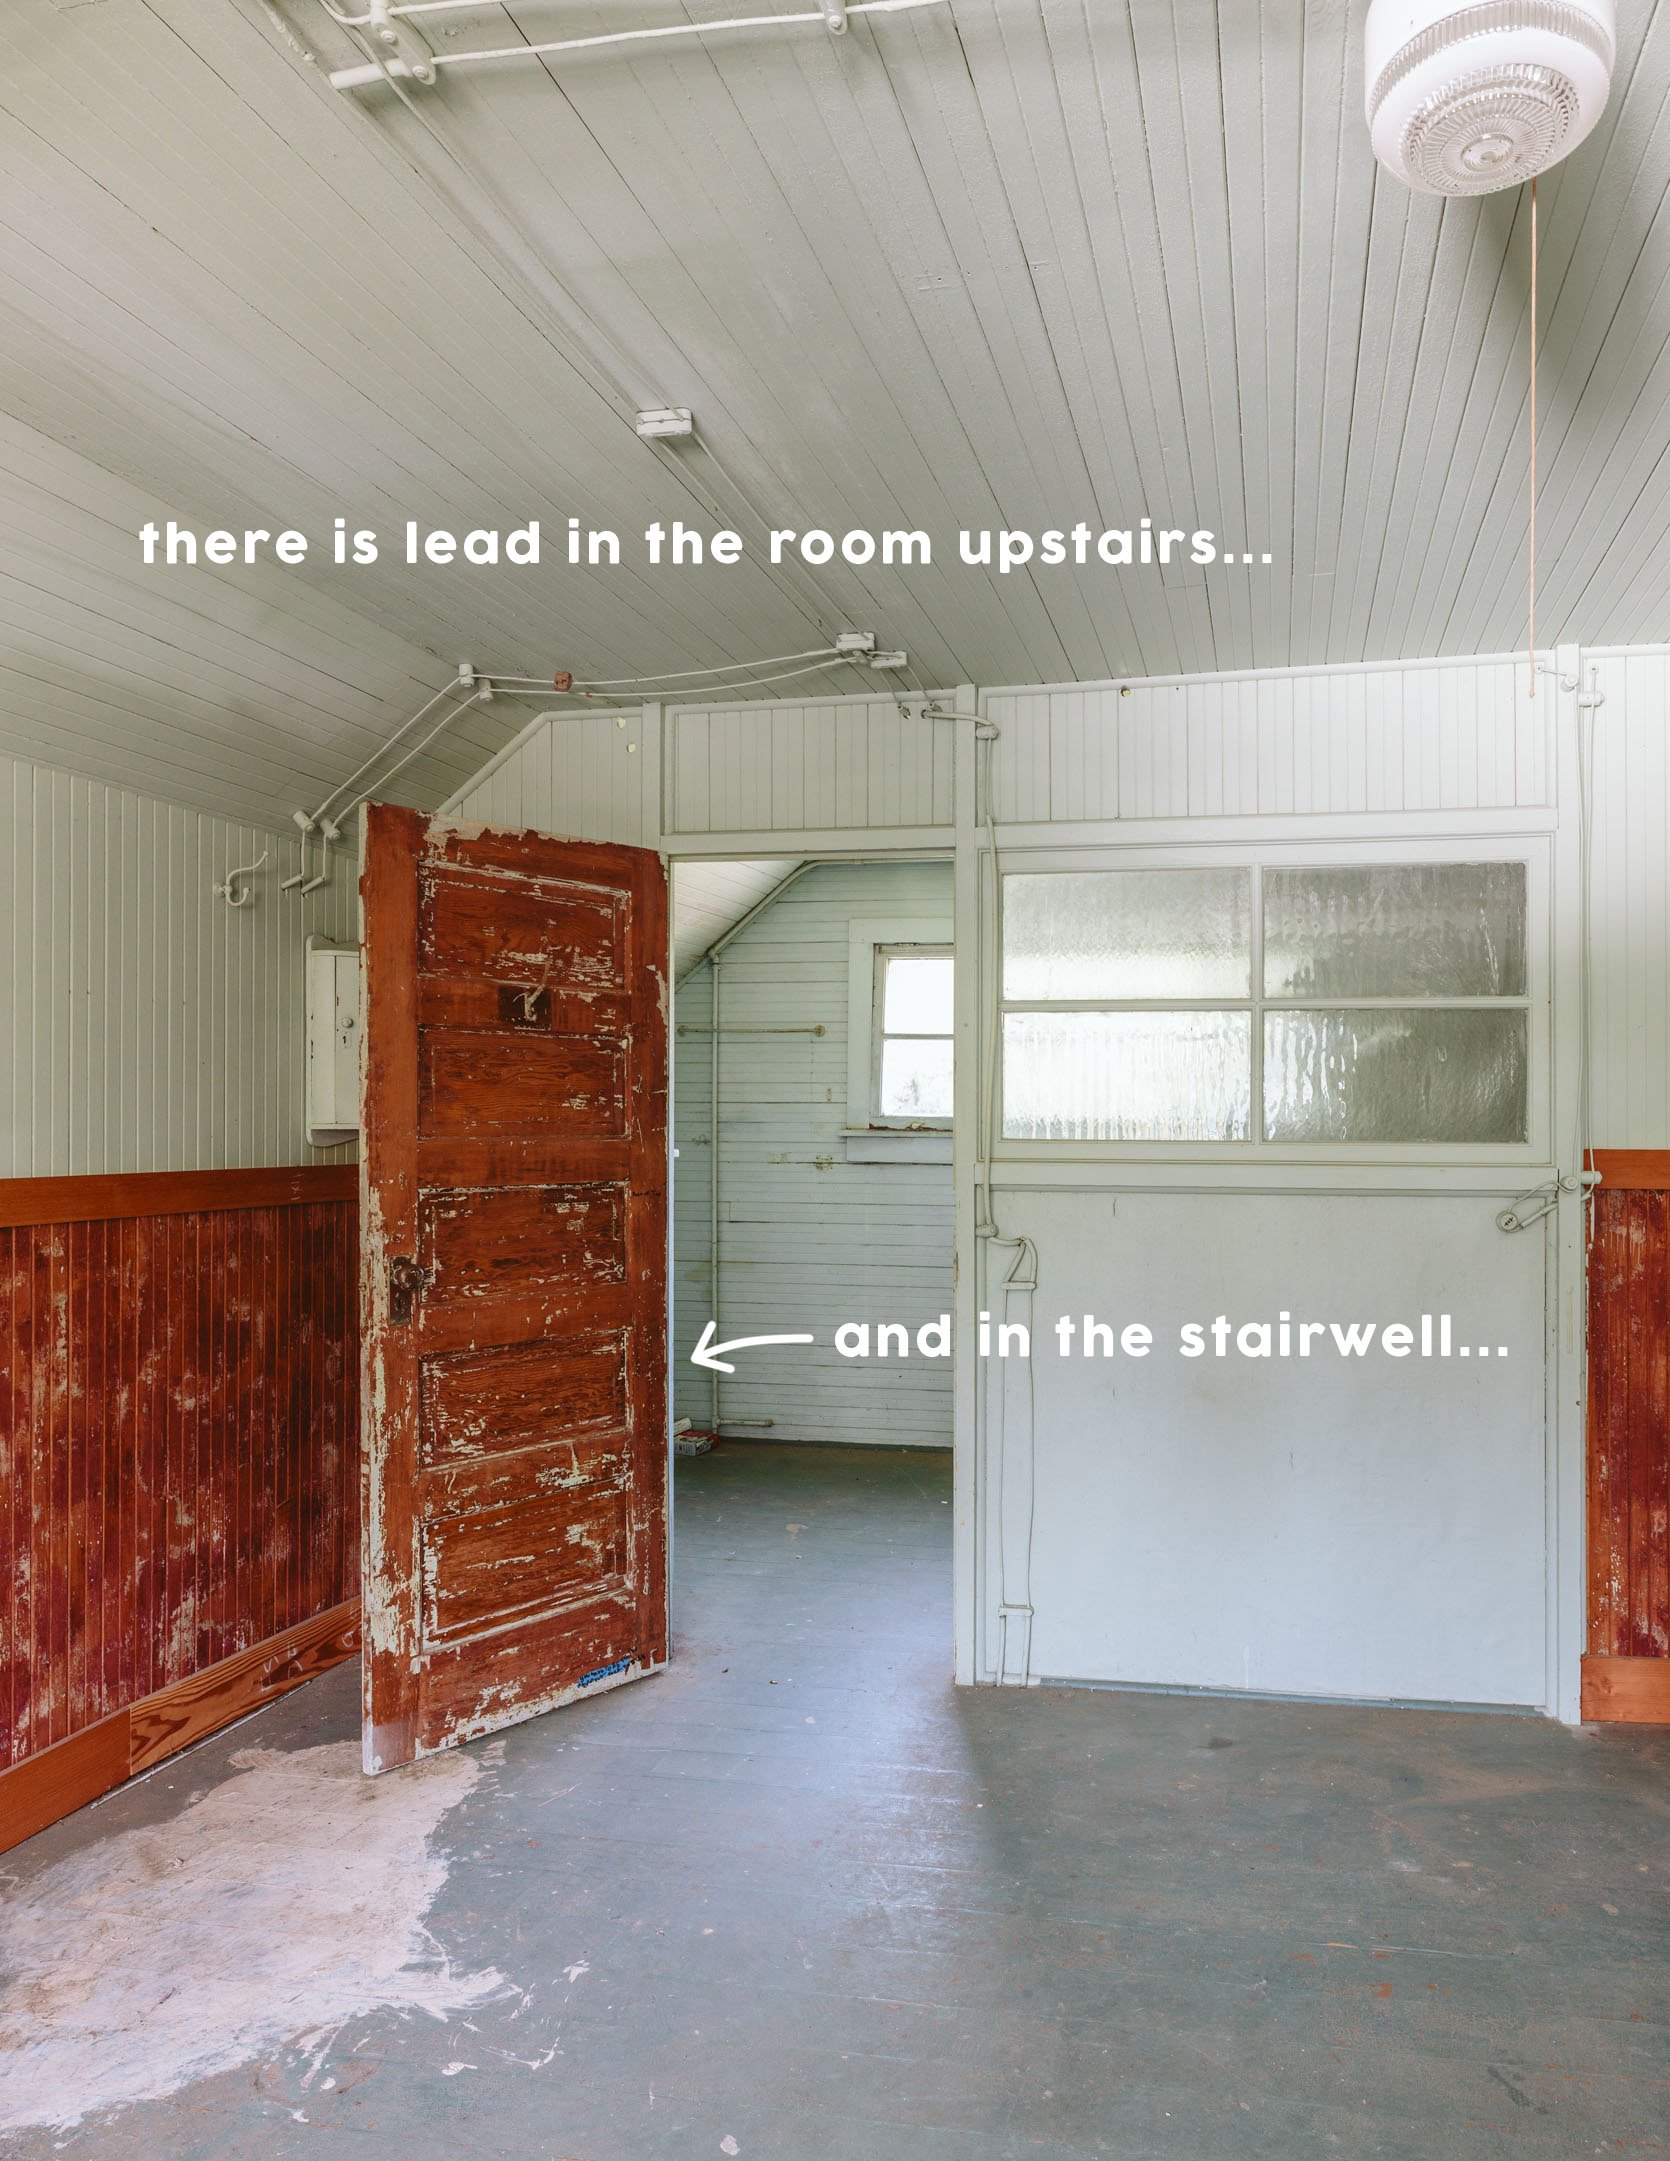

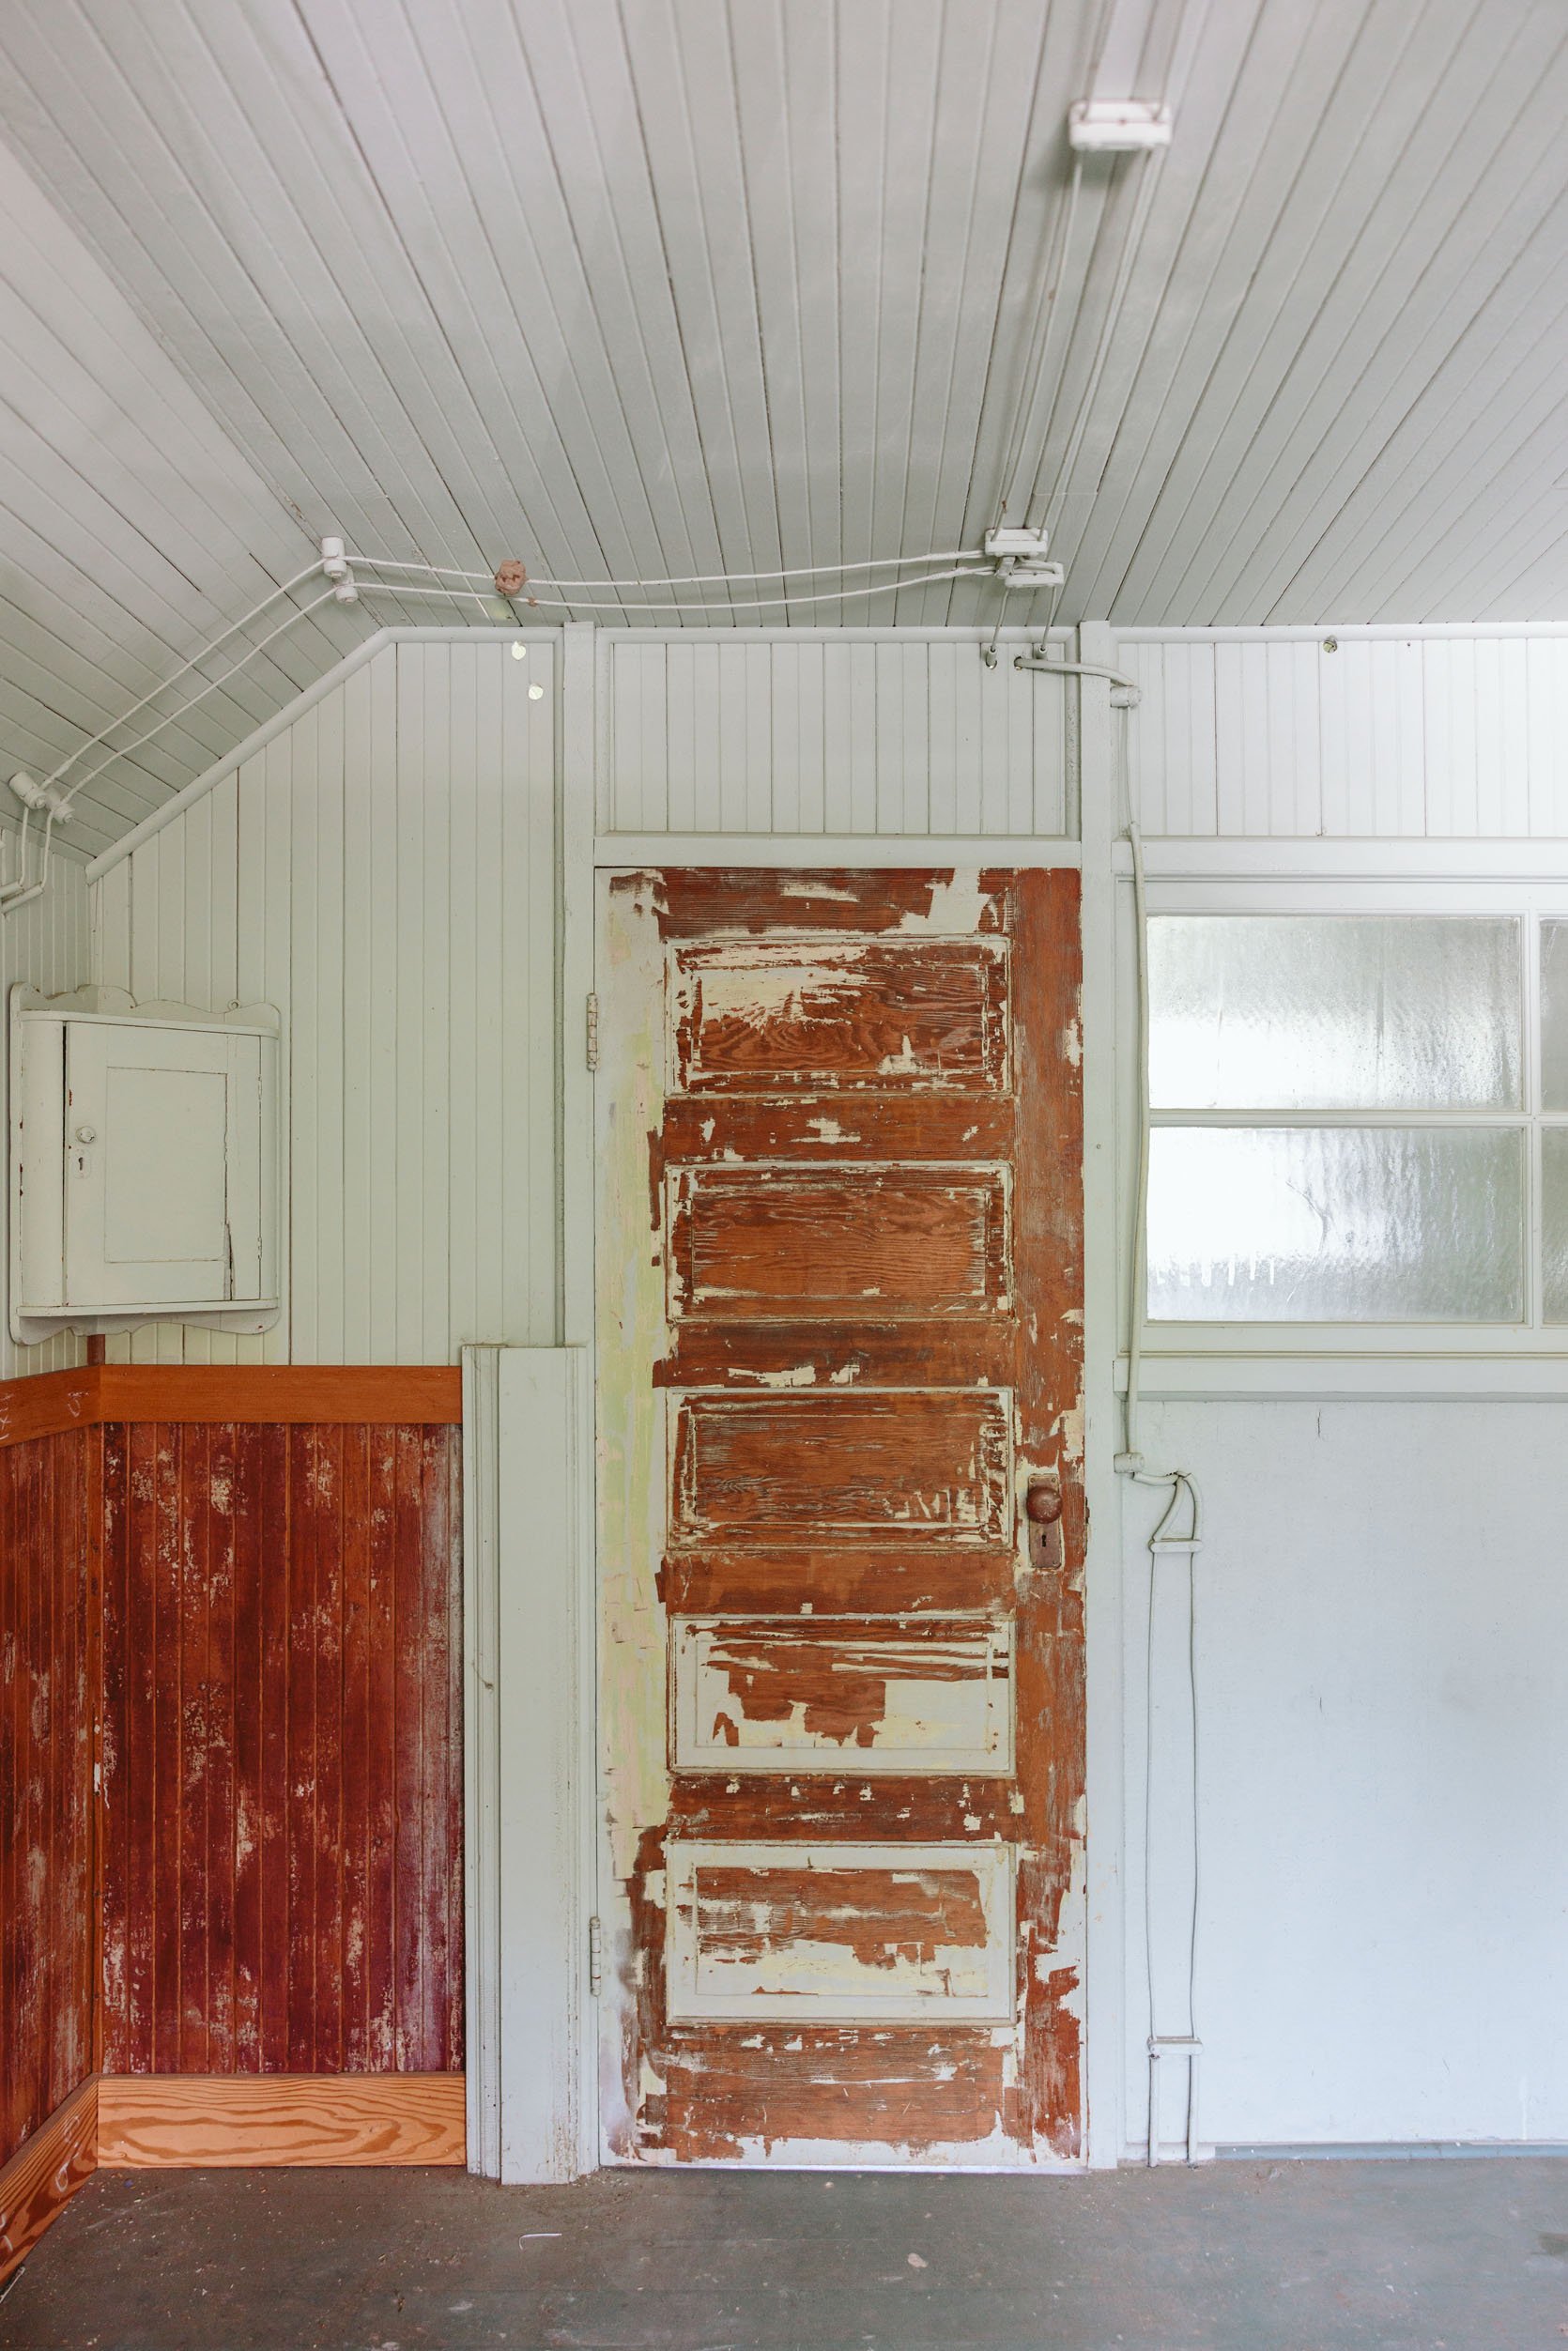
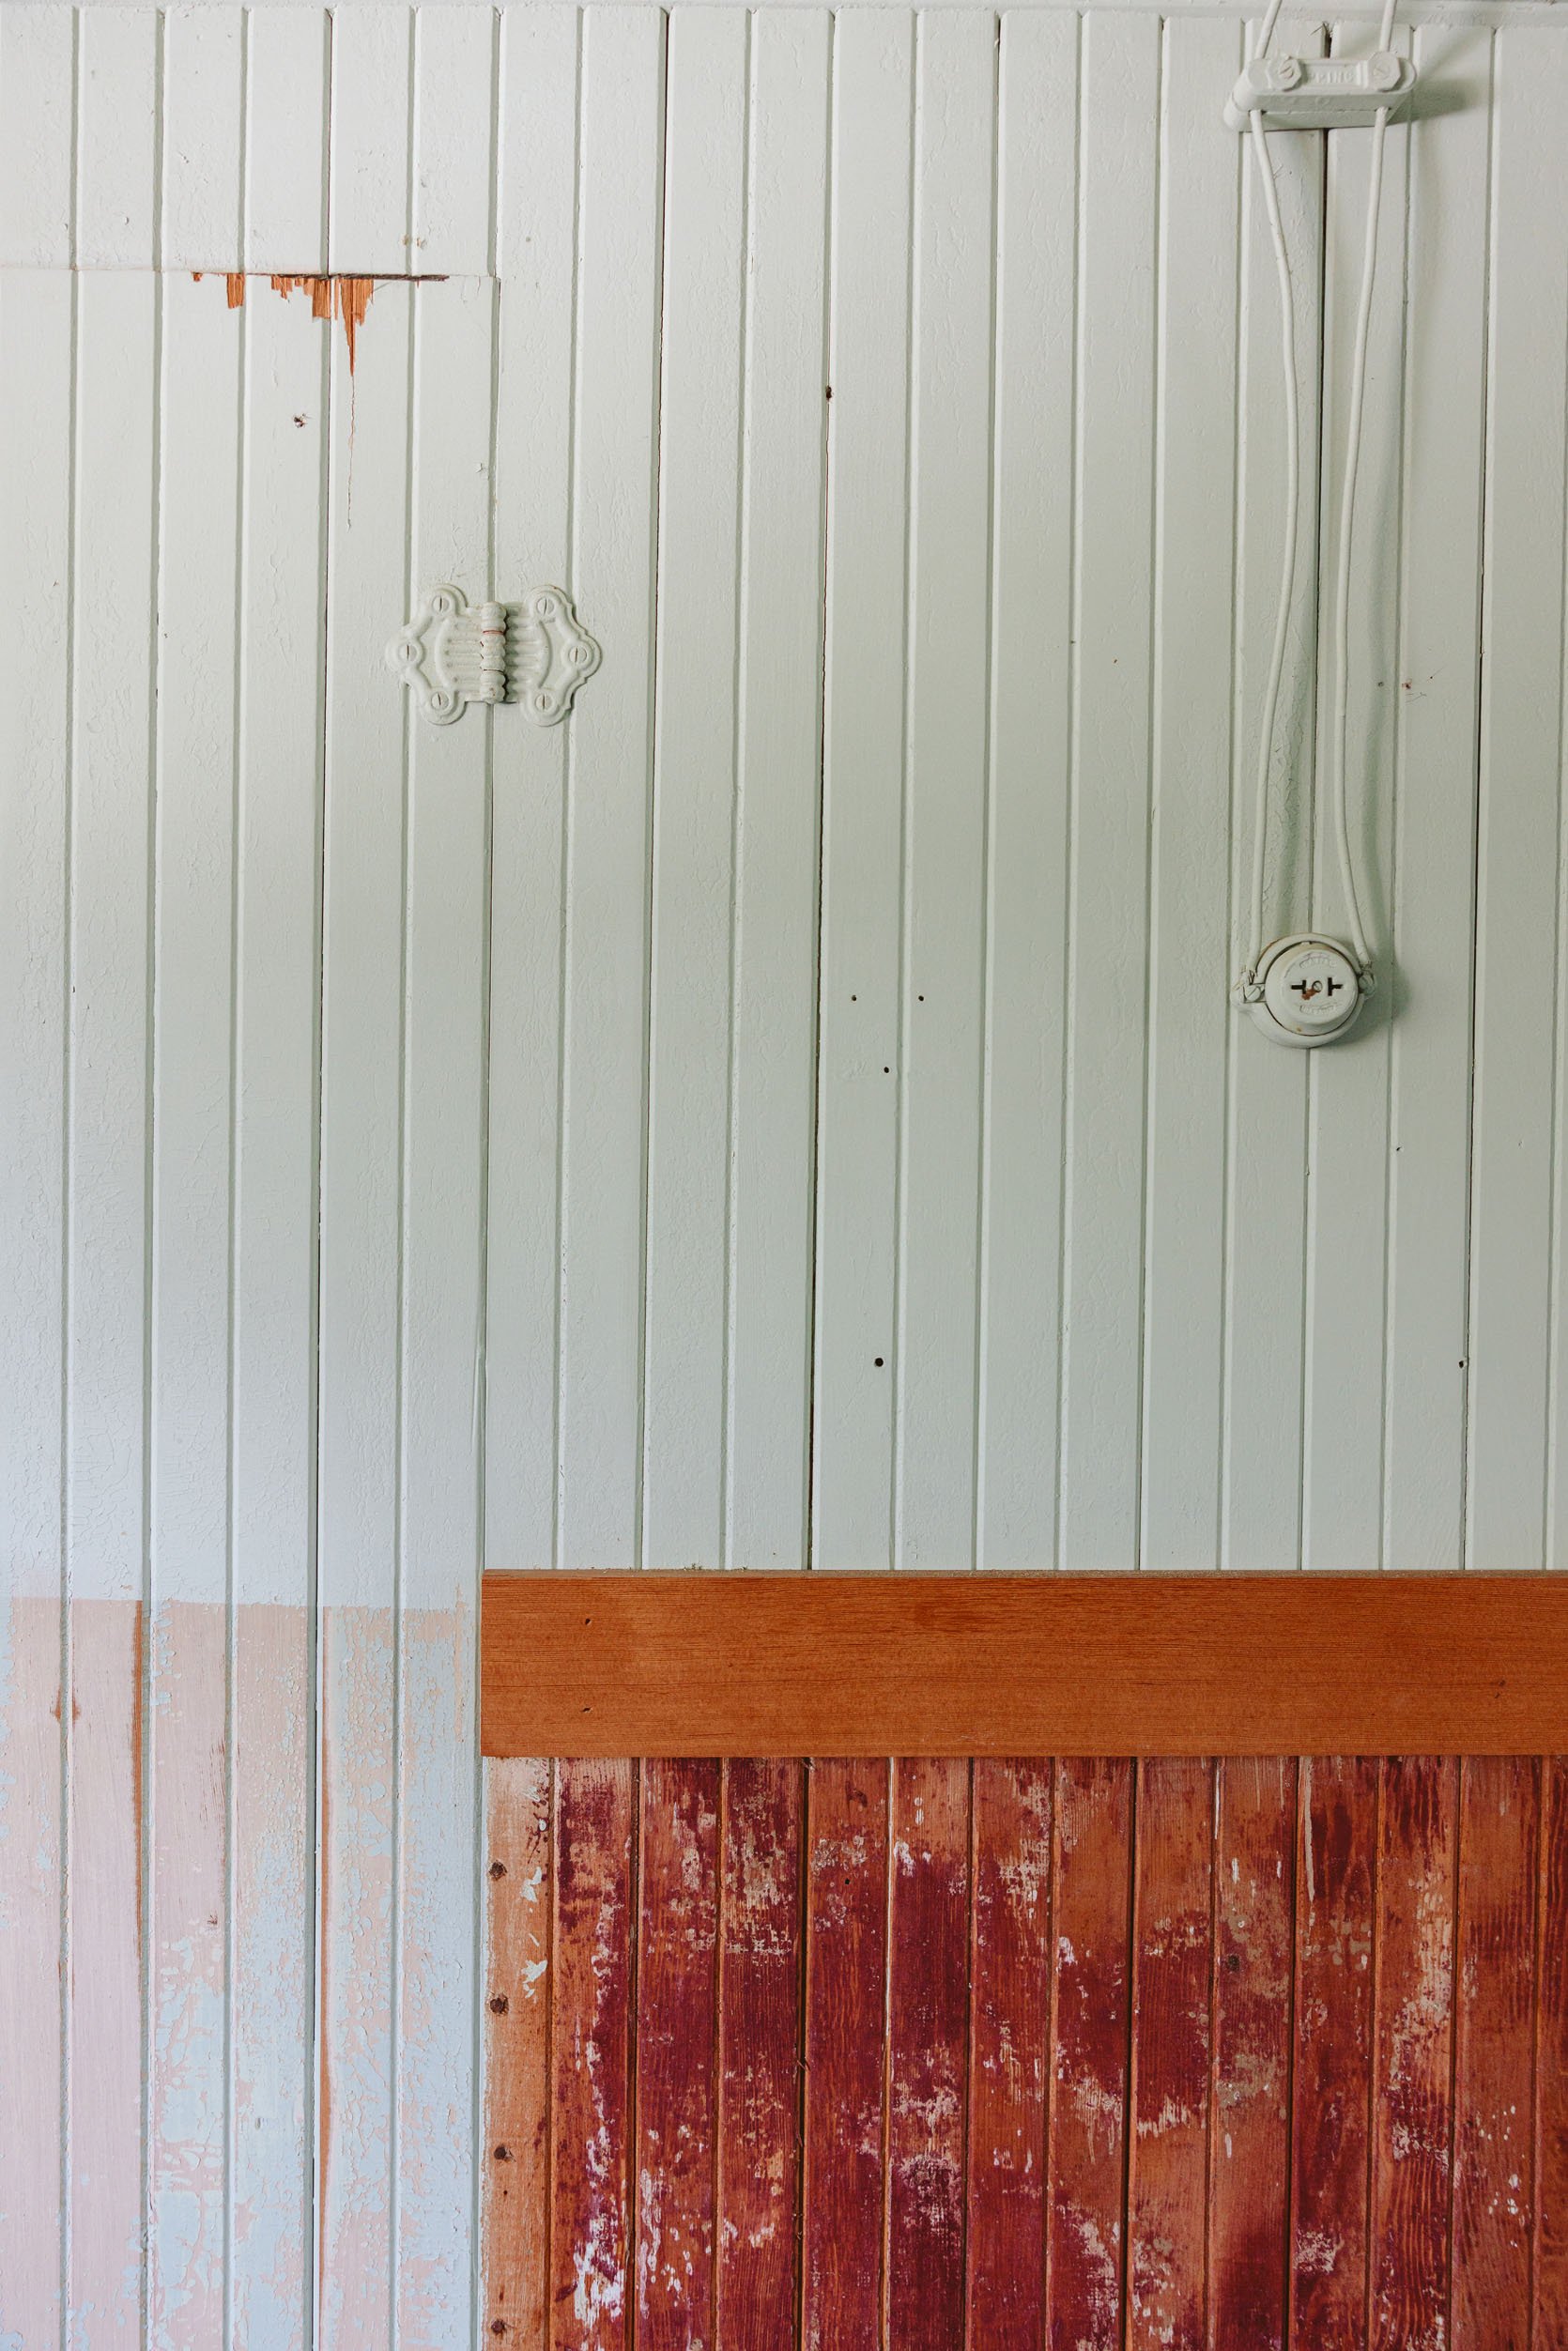
The good news is that we don’t have very much paint in the house. Most of the rooms are paneled with wood or just have open beams. So it’s mostly the stairs and the room upstairs (and the floor of the prop room). If it were on a bunch of old gross drywall, we might remove it all and just replace it, but since it’s all on good wood paneling, we aren’t demo-ing it out.
First And Only Quote For Lead Paint Abatement

Company B (The same as above, Leon) gave me interesting insight. He said that sometimes in these really old homes, they couldn’t afford lead paint (it was the fancier, more durable paint back then), and there was a chance that there wasn’t enough lead in the paint to even worry about. He tested it at a lab (that was included in the same $450 fee, above), and it came back to have twice as much that is legal, which isn’t that much, actually (the legal amount is 5000 ppm, ours had 10k ppm – parts per million). It’s pretty minimal. He also reminded me of what the internet told me – that lead is really only dangerous if consumed directly by breathing in dust, flakes, or eating it. Leon said we could totally do this ourselves, but gave me the quote anyway. He quoted $4,495 to stabilize and prime over all the lead paint.
I asked Leon multiple times how he would do it versus a normal DIY homeowner, and he said the process was the EXACT same. You gear up in PPE, then “stabilize” it by scraping off any loose paint, perhaps sanding with a block sander, then prime over it to encapsulate it. So we’d be doing the exact same process; he’d obviously be faster at it, but it’s not a highly skilled job nor requires fancy tools. He honestly just thought we should do it ourselves and save the $4,495. I agreed with Leon 🙂
Total Cost If We Hired Out For Lead And Asbestos
If we had hired the first asbestos removal guy ($7,130), added on the knob and tube asbestos removal (which he didn’t quote for but Leon did at $1,595), and then hired out to remove the lead paint ($4,495) plus the $450 testing fee, we’d be at a whopping $13,670.
Total Cost We Are Paying

We are only hiring Leon to remove the ducting asbestos for $995 + the already-spent lab fee = $1,445. We will (safely) be doing the lead paint stabilizing and the knob and tube abatement on our own, and we are so glad that we got multiple quotes instead of just hiring the first company who assumed the flooring had asbestos without testing. Now, of course, there will be some purchases of supplies (PPE, spray bottle, scrapers, primer, etc), but pretty minimal, we hope. Also, this isn’t something I’m going to let my team help me with just because I feel a little weird subjecting them to known toxic materials, even if we are safe with PPE. So they’ll help film an intro and set up a time-lapse then take off (I mean, it’s pretty boring stuff to film anyway).
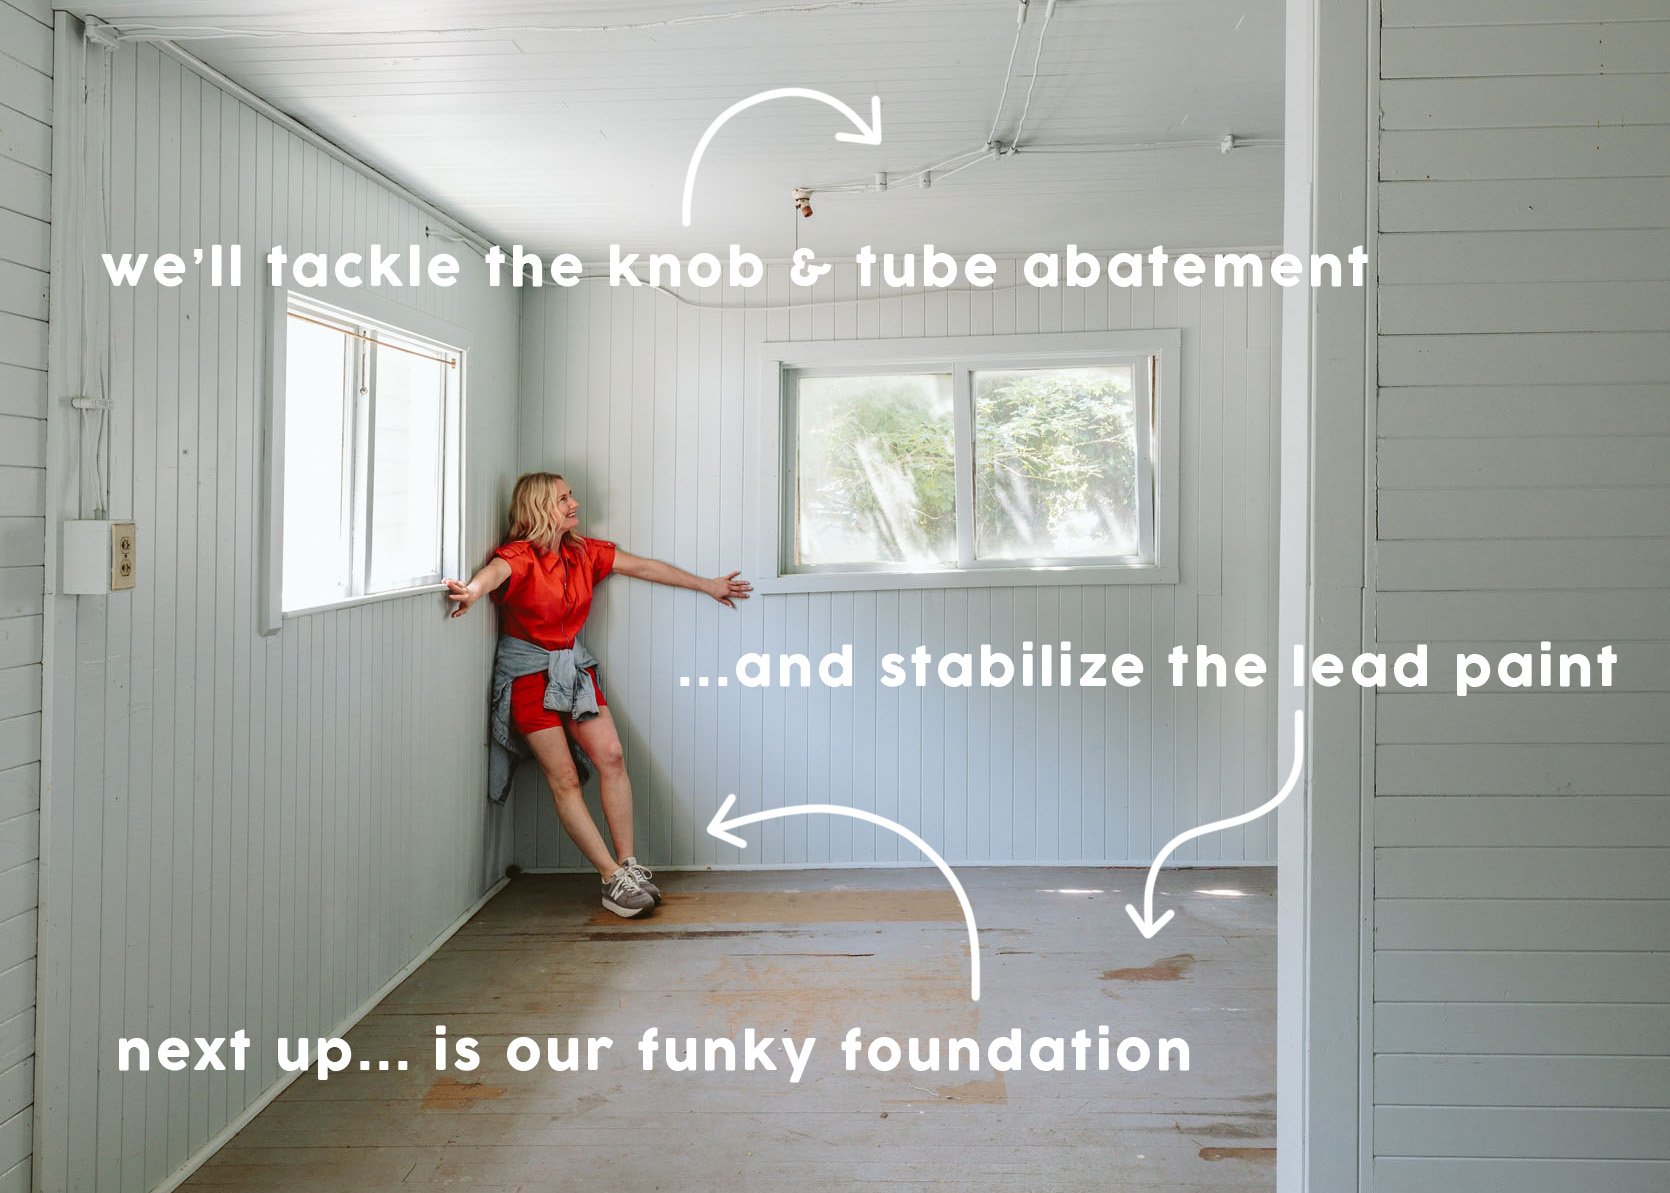
Next up are the foundation quotes, which are coming back with some pretty good news, THANK GOD. I’m waiting on one more before comparing them all and showing you what we are doing.
If anyone has experience doing either of these projects themselves and can give any tips, let me know in the comments!
*Photo by Kaitlin Green