
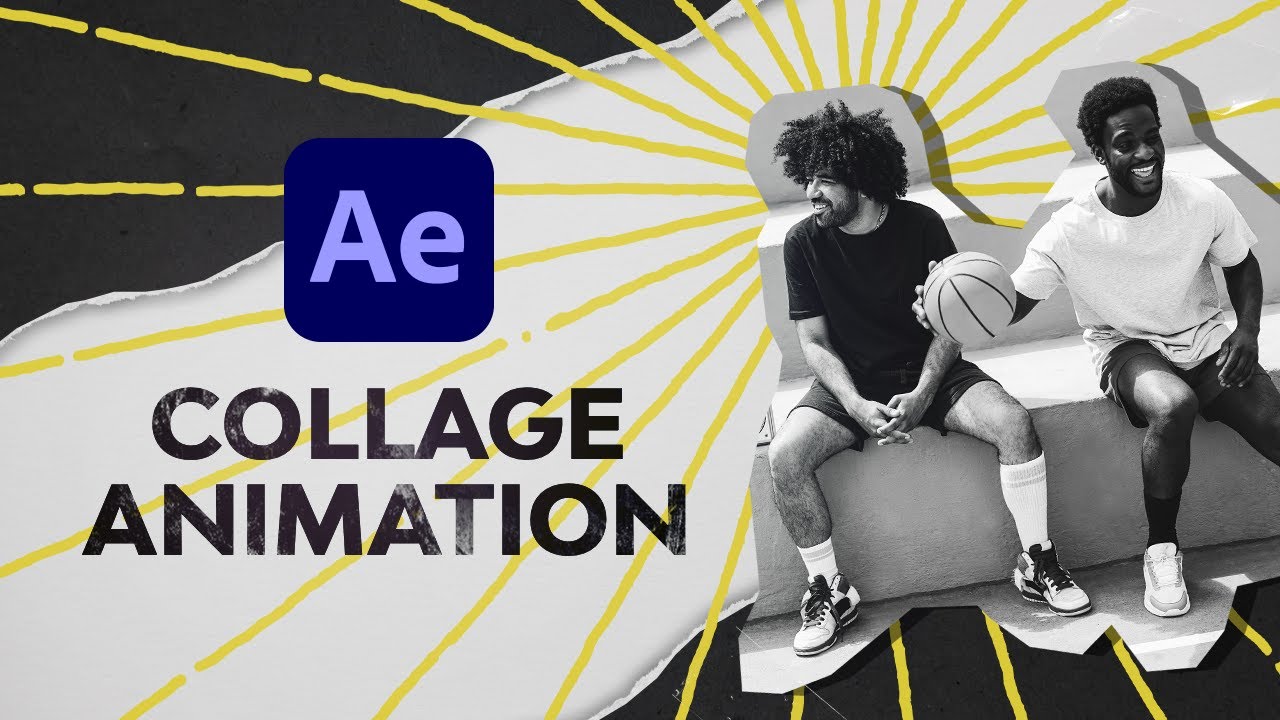
Learn how to make a collage animation in After Effects with this step-by-step guide in just over an hour.
Jump to content in this section:
What you’ll learn: Making an After Effects collage animation
- How to use rotoscoping to create multiple layers
- How to create blending effects on animated collages
- How to motion track an animation in a collage
- How to add and use 3D assets for your collage animation
- How to use Keylight in After Effects
- How to make a stop motion style collage animation in After Effects
Let’s get to it!
1. Introduction
1.1 Recreate this collage effect!
Watch video lesson (1 min) ↗
Check out the introduction of the video to see what we’ll be doing. You’ll learn the creative process to make a collage animation in After Effects.
2. Getting started
2.1 Getting started in After Effects
Watch video lesson (2 mins) ↗
I’ll show you how to set up your composition, including how to create some initial motion by adding a null object.
These are the steps we’ll follow to start our animated collage:
- Start a new composition: 1920×1080, 25 fps, 16 seconds, and 20 frames (or make it match your audio track).
- Import your music track and place it on the timeline.
- Create the null object and rename it Movement.
- Hit P to bring up Position.
- Create keyframes from left to right to simulate horizontal scrolling.
This null will drive the entire After Effects collage animation. You won’t need to animate every layer individually.


3. Creating a background
3.1 Creating the base layer with null objects
Watch video lesson (5 mins) ↗
Let’s explore how to add, resize, name, and order the elements we’ll include in our collage animation.
We’ll use the movement Null Object we made in the last lesson to get these items moving from right to left. We need to take the Pick Whip and drag it over to the movement layer to create layers that are ‘parented.’
Don’t worry, this sounds more complicated than it is:
- Import your video and image assets from Envato.
- Resize to fit the frame vertically. Don’t worry about horizontal width yet.
- Rename your layers for clarity.
- Arrange them in the timeline based on desired sequence.
- Use the Pick Whip or Parent dropdown to link each asset to the Movement null.
- Extend or stretch each footage as needed to cover the full scroll length.


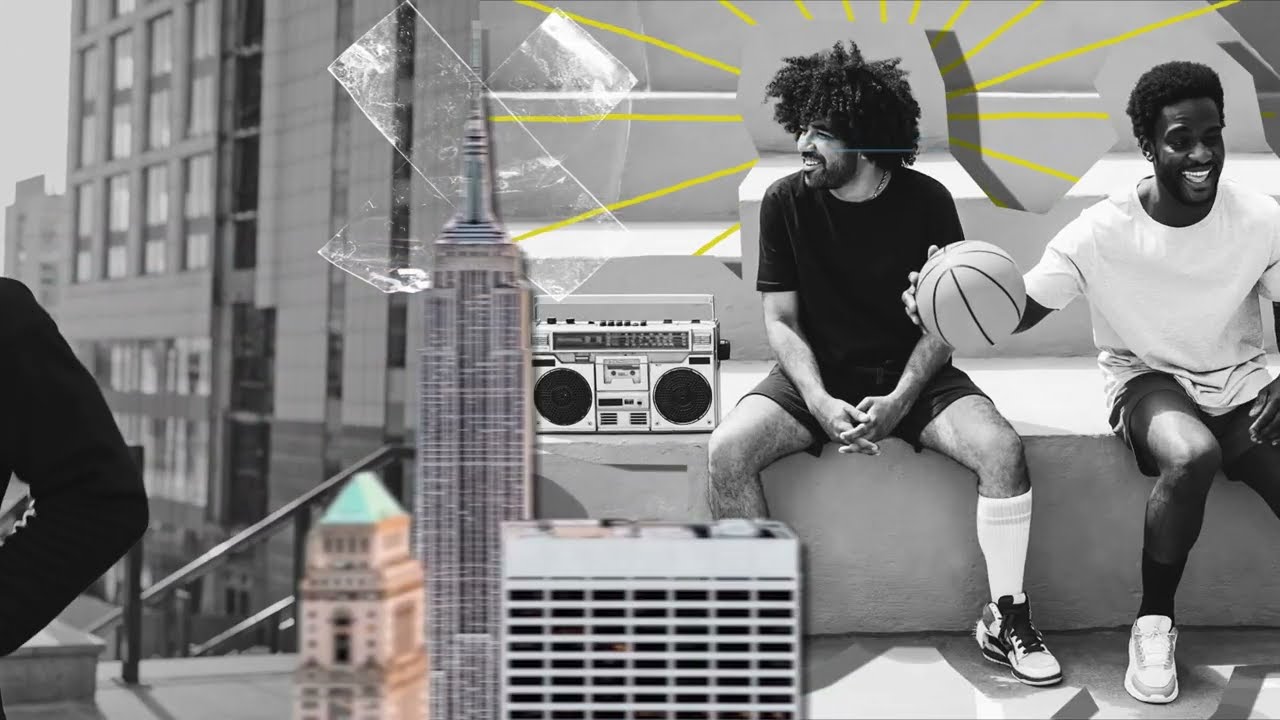
4. Making your photo collage animation in After Effects
4.1 Beginning the collage effect
Watch video lesson (3 mins) ↗
Now, we’ll get into creating the collage in After Effects. I’ll show you how to choose points in footage that work better to transition through to the next.
We’ll also explore how to adjust these points so that they flow seamlessly rather than looking like individual assets.
Start by isolating a piece of footage for the animated collage. We’ll start with the one of the man running.
- Choose a moment in the clip that feels like a natural transition point.
- Pre-compose the layer to start adding effects to it.
We want to make everything grayscale and separate the man from the background, so we’ll do the following:
Inside the pre-comp:
- Desaturate using “Hue/Saturation.”
- Use the Roto Brush Tool to separate the subject from the background.
- Freeze the selection.
Back in the collage comp:
- Duplicate the pre-comp.
- Remove the roto from the background layer.
- Insert a colorful element (in this case, we’re using a rocket) in between layers.
- Animate its position and add motion blur for a faster movement effect.


4.2 Rotoscoping to create multiple layers in your animation
Watch video lesson (8 mins) ↗
I’ll show you how to rotoscope efficiently, working only on the parts of footage you’ll be using rather than the whole clip.
Rotoscoping or Roto is a means of hand-drawing a mask to isolate a subject in your footage, frame by frame. This can then be animated independently from the rest of the unselected footage.


Let’s learn how to separate a subject and add the animation between that isolated subject and the background:
Rotoscoping in After Effects
Select your footage
Double-click in Timeline to open the layer in its own panel.
3
Select the Roto Brush tool
Use option/Alt+W for the Roto tool
4
Brush over the subject
Holding Control or Command while clicking and dragging your mouse, paint over the thing you want to isolate.
4.3 Cutting things out to get the paper collage look
Watch video lesson (8 mins) ↗
This time, we’re not going to rotoscope. I’ll show you how to make a rough selection with the pen tool and scale it up for your animated collages.
Splitting a clip shortcut in After Effects: CMD/CTRL + Shift + D
With a few tweaks, you’ll create something that pops off the screen.
Pre-compose a new layer of your After Effects collage animation. Then, follow these steps:
- For still images, mask the subjects using the Pen Tool.
- Keep it rough to embrace the handcrafted collage style.
- Add Drop Shadow for depth.
- Animate the Scale and Drop Shadow Distance in sync for a paper lift effect.
- Use colorful animated elements like sunbursts behind masked figures.
- Change color with “Change to Color” and adjust Hue/Lightness/Saturation.


4.4 Blending modes for overlay effects: True Detective effect!
Watch video lesson (6 mins) ↗
Now, you’ll learn how to use blending modes to create some great effects. These include a double exposure and using green screen footage with Keylight.
We’ll do the following to our collage in After Effects:
- Pre-compose the layered footage (in this case, the face over a court).
- Choose “Move all attributes into new composition.”
- Use the Screen blend mode on top layers.
- Adjust layer timing to match visual rhythm.
- Add blurred green screen overlays (we’re using birds here) using Keylight and Gaussian Blur.
- Stylize the animation with Posterize Time at 12 fps.


More on Keylight later.
4.5 Freeze frame in After Effects
Watch video lesson (5 mins) ↗
We’ll use the same effect here as we did in lesson 4.3. This time, we’re also going to use freeze frame to stop the motion of a bike jump at the peak of its height. This adds some extra drama.
Start with a new pre-composition of this footage. Then:
- For dramatic pauses, use Time > Freeze Frame.
- Mask with the Pen Tool and add Drop Shadows.
- Animate the Scale and Shadow Distance to mimic cut paper lifting.
- Add supporting elements. Here, we’re using animated sunbursts.


4.6 Motion tracking in After Effects
Watch video lesson (6 mins) ↗
In this lesson you’ll use rotoscoping again. I’ll show you how to add elements to cover up unwanted things with something that looks a little nicer.
We’ll then motion track that so it stays with the movement in the footage.
Here’s what we’ll do to our animation collage:
- Use rotoscoping selectively to isolate elements like the subject’s arm or lower body.
- Freeze only the needed section to keep your project light.
- Add eye-catching elements between foreground and background.
- Use Edit Target to attach tracking data to the new elements (in this case, the cactus).
- Use Motion Tracking to pin these elements to specific points in the footage.
- Adjust anchor points so the new object moves naturally.
- Clean up edges using Shift Edge and Feather in the Effects panel.
- Layer Drop Shadows and Roto Brush cutouts for a mixed media look.
“The whole aesthetic is to make things look a little bit thrown together, textual.”
5. End screen CTA
5.1 Creating a call-to-action end screen animation
Watch video lesson (12 mins) ↗
In this lesson, we’ll combine some of the assets we’ve used with some new ones to make a rough, funky looking scene. We’ll place some call-to-action text on top of it.
We’ll follow a few simple steps:
- Reuse earlier cutouts (like the boombox guys) in the final scene.
- Mask the background using the Pen Tool.
- Replace the sky with a timelapse or animated burst.
- Add a Drop Shadow with a white color to simulate a paper edge.
- Use CC Page Turn to make characters appear like stickers.
- Add animated text (we’re using “Get into the mix”) with layered Drop Shadows in red, green, and blue.


6. Adding elements and effects
6.1 Adding foreground elements to the collage animation in After Effects
Watch video lesson (5 mins) ↗
If you’ve made it to this point in our collage animation tutorial in After Effects, you’ll have a great base. Now, we need to cover joins and gaps, as well as bring in some depth and texture.
Here’s how we’ll polish our After Effects collage animation:
- Use sticker-style elements, like transparent tape PNGs.
- Add layered cityscape elements and mask individual buildings.
- Apply Drop Shadows and Gaussian Blur to create depth.
- Animate with CC Page Turn for a layered paper aesthetic.


6.2 Using 3D assets in After Effects
Watch video lesson (5 mins) ↗
Adding 3D assets means you can spin something around to any angle that you want and create a hi-res PNG of that angle.
In this lesson, we’ll look at where you can grab those assets and how to set them up in After Effects to make adjustments.
- Import PNG sequences from Envato’s 3D render generator.
- Interpret footage at 12 fps to mimic stop motion.
- Use After Effects looping to repeat the animation.
- Add wiggle expressions for subtle motion.
- Style with gold or white Drop Shadows to add more dimensionality.


6.3 After Effects green screen with the Keylight effect
Watch video lesson (5 mins) ↗
You’ll now learn how to can use large blocks of color in footage as a sort of green screen, and key that out with Keylight.
- Use Keylight to remove blue or green backgrounds from stock footage (in this case, the “slam dunk” clip).
- Combine with explosion effects and Parent to the Movement null.
- Pre-compose layers and apply Posterize Time to match animation style.
You’ll get a sense of how you can add some cool little effects to make the whole piece more interesting and fun!
7. Finishing up
7.1 Adding some final touches
Watch video lesson (5 mins) ↗
By now you should have a really cool looking animated collage with lots of different elements going on. In this final lesson, we’ll look at adding some last little flourishes to finish your project off in style.
Here’s how we finish up our collage animation in After Effects:
- Add one last green screen element (we’re using the “football header” clip) using Keylight.
- Animate the Drop Shadow trails with layered keyframes.
- Add time effects to musical cues for greater impact.
- Use sticker cutouts, tape textures, and creative transitions to fill any visual gaps.
There you go! The final result should look something like this:
Take After Effects further
Learn about After Effects animation and so much more with our free courses.
Learn about After Effects animation and so much more with our free courses.
If you prefer to learn in a different way, you could try our free After Effects tutorials. We’ve got a huge library to get you started!